Fun fold cards are not difficult once you have the correct measurements. I first saw a card made by Tami White, a US demonstrator called an accordion Z fold. I’ve adapted it for UK-sized cards, changed it a bit and I’ve called it a diamond accordion fold card because that describes it exactly!
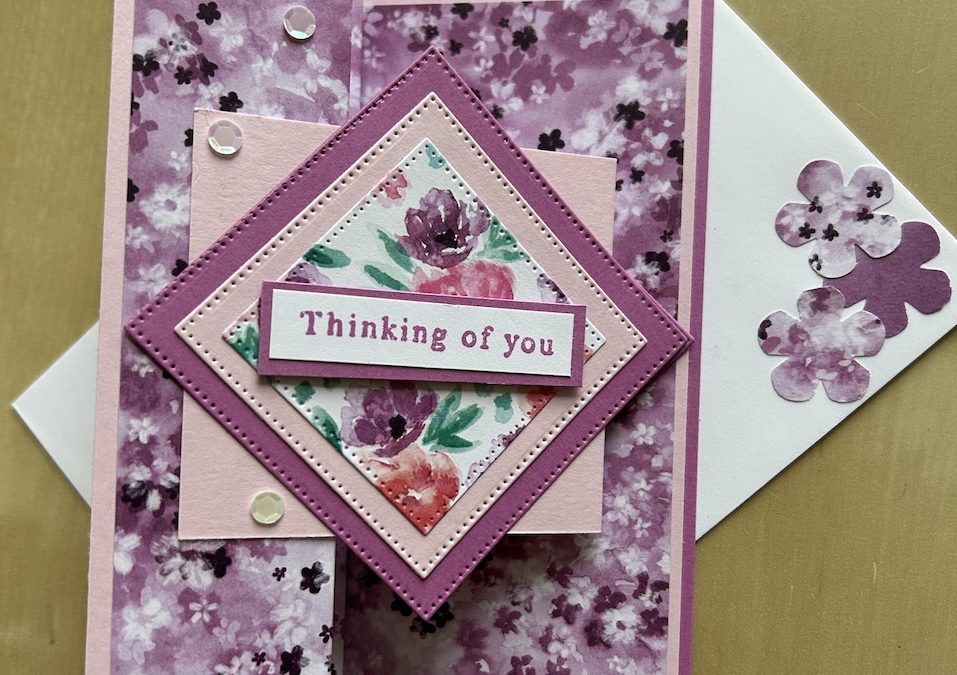
I’ve made it as a sympathy or thinking of you card, but you can also change the sentiments and DSP to make this card for any occasion. It looks complicated as there are quite a lot of pieces for this diamond accordion fold card, but the resulting card is worth it.
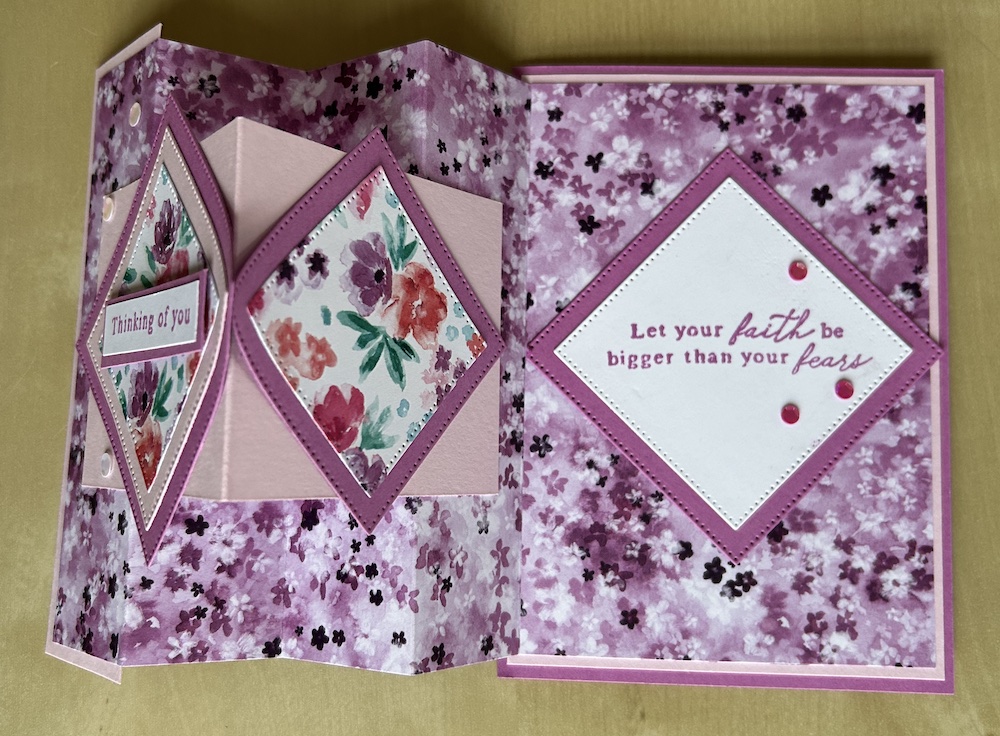
Here’s what it looks like opened – note that it does not open out fully, that is correct and deliberate so that it will display nicely on a shelf or mantelpiece.
To make this card you will need:
- Petunia Pop card base 21cm x 14.8cm scored at 10.5cm (8½” x 5½” scored at 4¼”)
- Bubble Bath layer: 10cm x 14.3cm (4” x 5¼”)
- Basic White layer for card inside 9.5cm x 13.8cm (3¾” x 5”)
- Bubble Bath edge panel 3.8cm x 14.8cm (1½” x 5½”)
- Bubble Bath mini-card 7cm x 15cm scored at 7.5cm (2¾” x 5″ scored at 2½”)
- Blooms Impressions DSP (or DSP of your choice) 13.8cm x 23.5cm plus scrap
- Petunia Pop card 24cm x 8cm (9″ x 2″) for 3 die-cuts plus sentiment layer
- Bubble Bath card 7cm x 7cm (2¾” x 2¾”) for die cut
- Basic White card 7cm x 7cm (2¾” x 2¾”) for die cut
- Blooms Impressions DSP 5.5cm x 11cm (2¼” x 4¼”) for die-cutting
- Scrap of Basic White for sentiment
- Petunia Pop ink pad
- Stylish Shapes dies
- Stamp set of your choice for sentiments
Fold and burnish your card base.
Adhere the Bubble Bath panel to the front of the card.
Score the DSP piece at 3.5cm, 7cm, 10.5cm and 14cm. Fold first fold as mountain, then valley, mountain and valley to form the accordion piece. Adhere the larger back panel centrally to the card front. If using, stick the Bubble Bath panel behind the front DSP panel – this allows the card to stand properly for display.
Die-cut two of the largest squares and one second size square from Petunia Pop.
Die-cut the second size square from Bubble Bath and one from Basic White.
Die-cut two third size squares from DSP, so that any directional pattern will follow a diamond shape.
Fold and burnish the mini-card. THis is stuck to the card with the opening to the left. Add glue to 1cm of the inside outer edge of the back fold. Stick this to the final DSP panel (the one in front of the back piece), making sure it lies centrally both vertically and horizontally on the card. Open the mini-card and add glue to the outer 1cm edge of the front. Close your diamond accordion card and stick the front mini-card to the front DSP panel. See the pictures and video if you are unsure about this.
Stamp the sentiment for the back panel of the diamond accordion card in Petunia Pop remembering this panel sits as a diamond. Adhere to a large Petunia Pop square.
Stick the completed diamond to the centre of the large DSP panel – measure if you want – so that the left corner touches the DSP fold, the right one sits just adjacent to the card edge, and the top and bottom corners are lined up vertically.
Create the diamond for the front by sticking the Bubble Bath die-cut square to one large Petunia Pop square, then stick one DSP square on top. Close the diamond accordion fold card and stick the completed front diamond so that it sits exactly over the diamond already adhered to the back panel.
Stick the final DSP square on top of the smaller Petunia Pop square. Stick this on the reverse of the mini-card, lining up within the front diamond. Again see the video if you are unsure.
Stamp the sentiment for the front of the card on a scrap of Basic White, trim the layer onto the remaining scrap of Petunia Pop. Add to the front of your diamond accordion card using dimensionals.
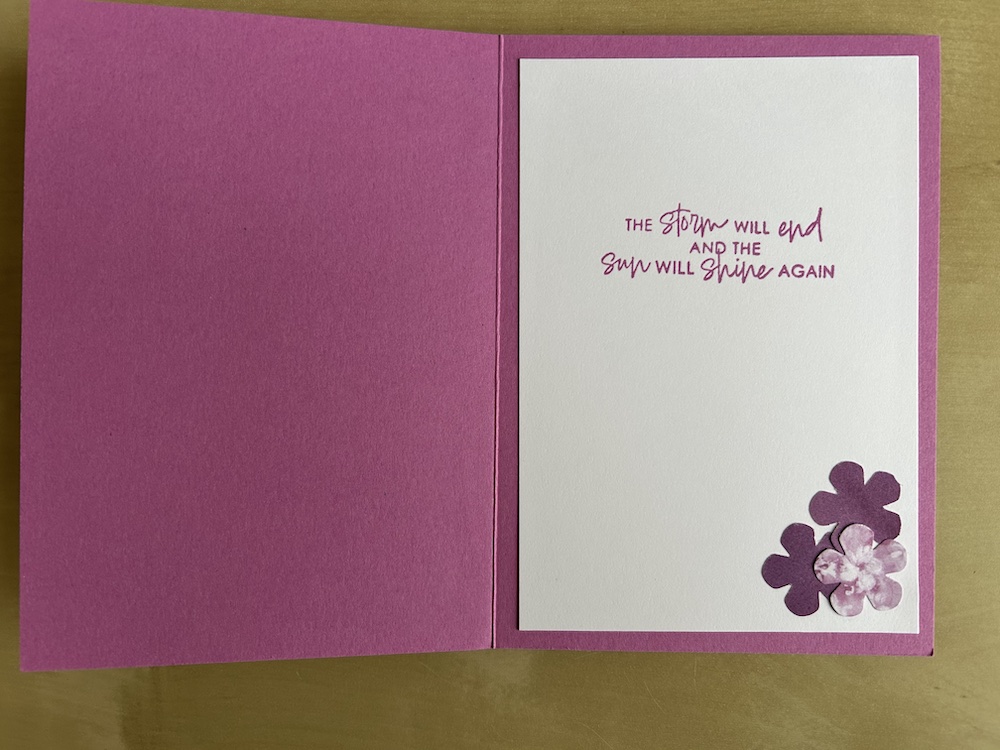
Stamp your chosen sentiment for the inside of the card on the Basic White panel. Add whatever decoration you want and adhere inside your card. I used some flowers punched out from DSP
Complete your diamond accordion card by adding a few gems to the front and to the outer part of the inner diamond as shown.
Don’t forget to decorate your envelope!
Here is the video of how to make this card:
I hope you like this card and will have a go at making one – please show me what you come up with.
Thank you for taking the time to read my post.

Don’t forget – you get a FREE pdf when you place any order with me as your demonstrator. And, if your order is over £40, you will also get to choose stuff from my online shop to the value of your order!
Product List  |  |  |  | |
 |  |
")

 Designer Series Paper")

