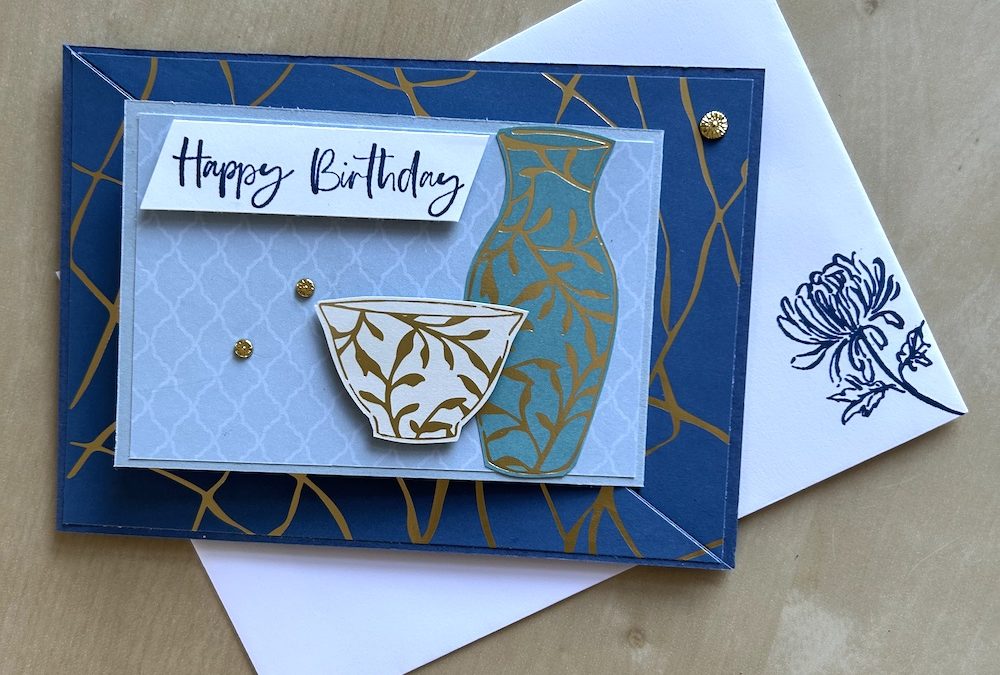
At today’s Craftalong we made a diagonal joy fold card. This fun fold card is far easier to make than it looks and can be used for any occasion. I made it on the Craftalong using the gorgeous Kintsagi suite products, but I also made a video of how to make this card using some retired Christmas DSP and stamp sets. You can watch the video below, or I have also provided full instructions.
You will need:
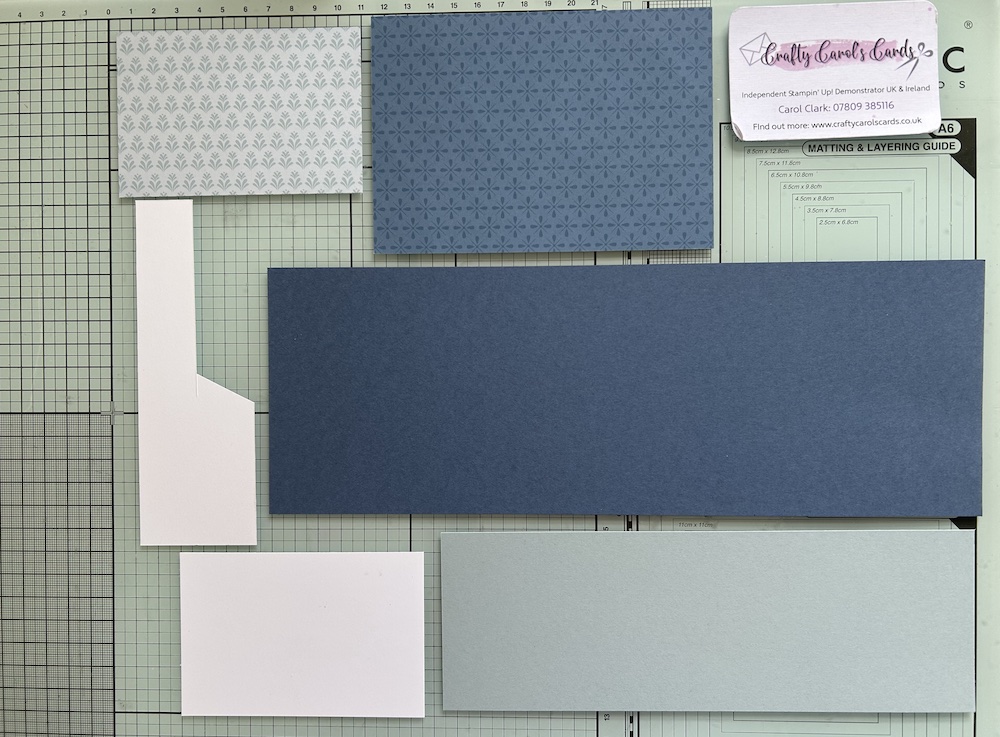
- Colour base card 10.5cm x 29.6cm scored at 14.8cm (11” x 4¼”) I used Misty Moonlight
- Inner card 7.5cm x 22cm (3″ x 8½”) I used Cloud Cover
- DSP 1: 10cm x 14.3cm (4” x 5¼”)
- DSP 2: 7cm x 10.5cm (2¾” x 4”) – you can cut two of these if you wish
- Scrap of Basic White for stamping and sentiment
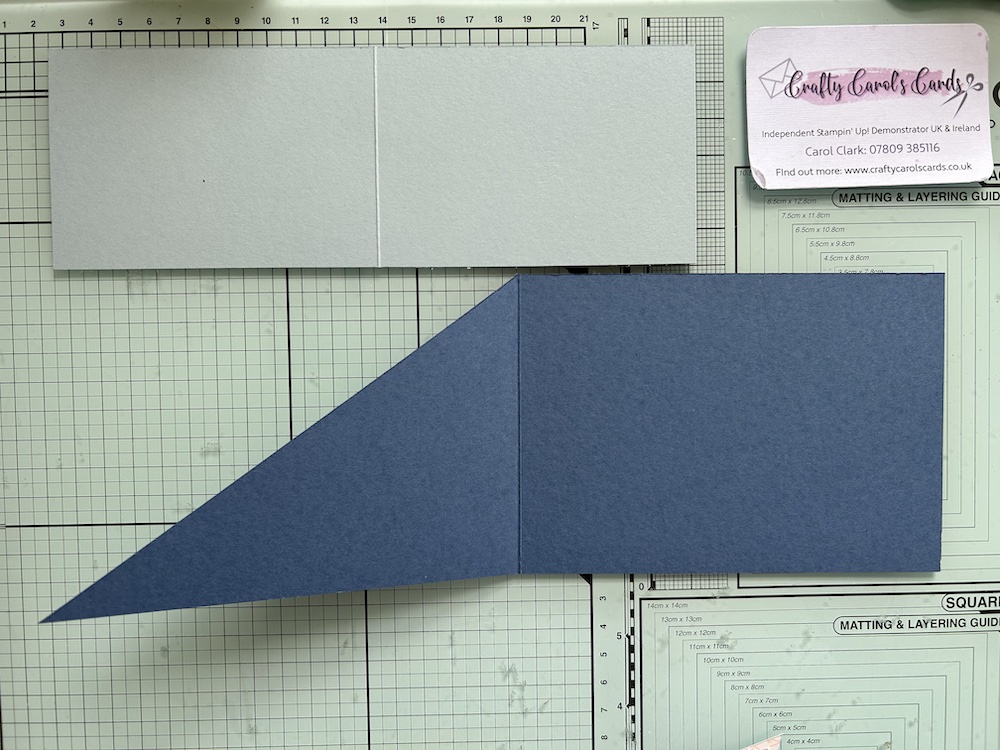
Score the base card in half at 14.8cm (5½”). Fold and burnish.
Now place it in the trimmer with the centre top score line and the bottom right corner lined up with the cutting channel and cut to form the diagonal fold.
Score the inner card in half at 11cm (4¼”). Fold and burnish well.
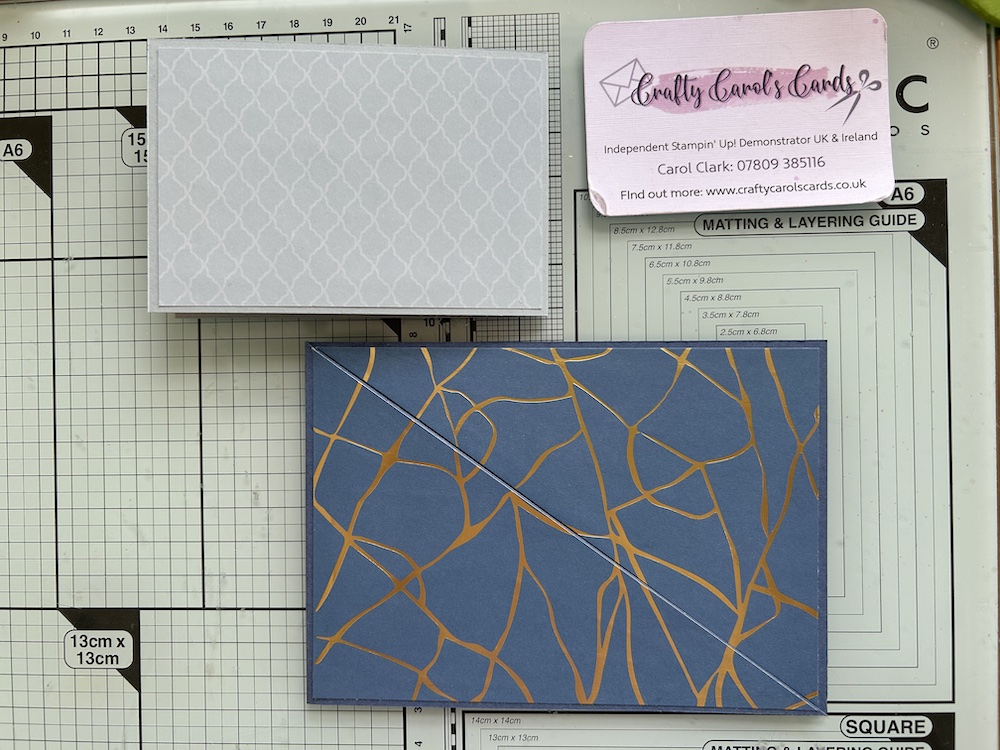
Take the DSP 1 piece and line up with two opposite corners in the cutting channel and cut in half diagonally. (NB if your DSP is directional, cut from top left corner to bottom right.)
Stick the bottom piece of cut DSP to the diagonal cut bottom of the card, lining it up with the cut edge – see the video if you are unsure. Be careful to add glue right into the corners.
Glue the second piece on the back of the card by holding the card closed and place the DSP to line up with its partner piece.
Stick the DSP 2 piece to the RIGHT hand side of the inner card – what will be the front of this card, backwards from the normal. Again see the video if you are unsure. If you wish, you can cut a second piece of DSP and stick it on the inside front of this inner card – this is optional.
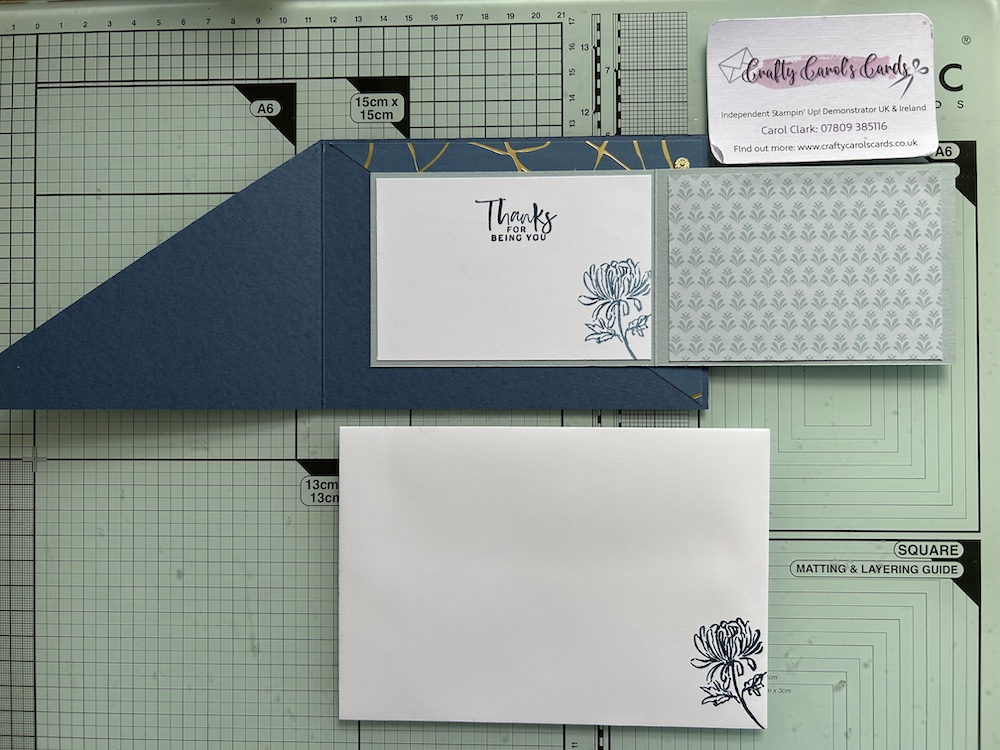
Your completed pieces should look like this:
Add a sentiment and any decoration you want to the inside of the inner joy fold card (the inside LEFT hand side).
Add glue to the back of the inner card. Holding the diagonal flap up, slide the inner card either side of this flap and line it up so that it is central and straight, then push it down to stick (see the video if you are unsure). It should look like this when opened:
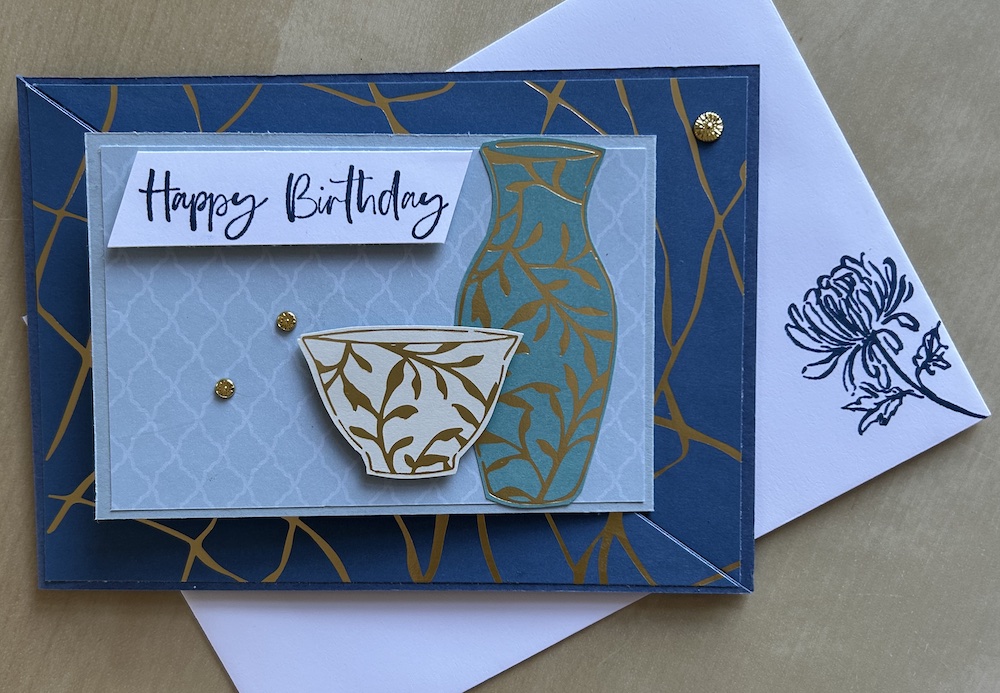
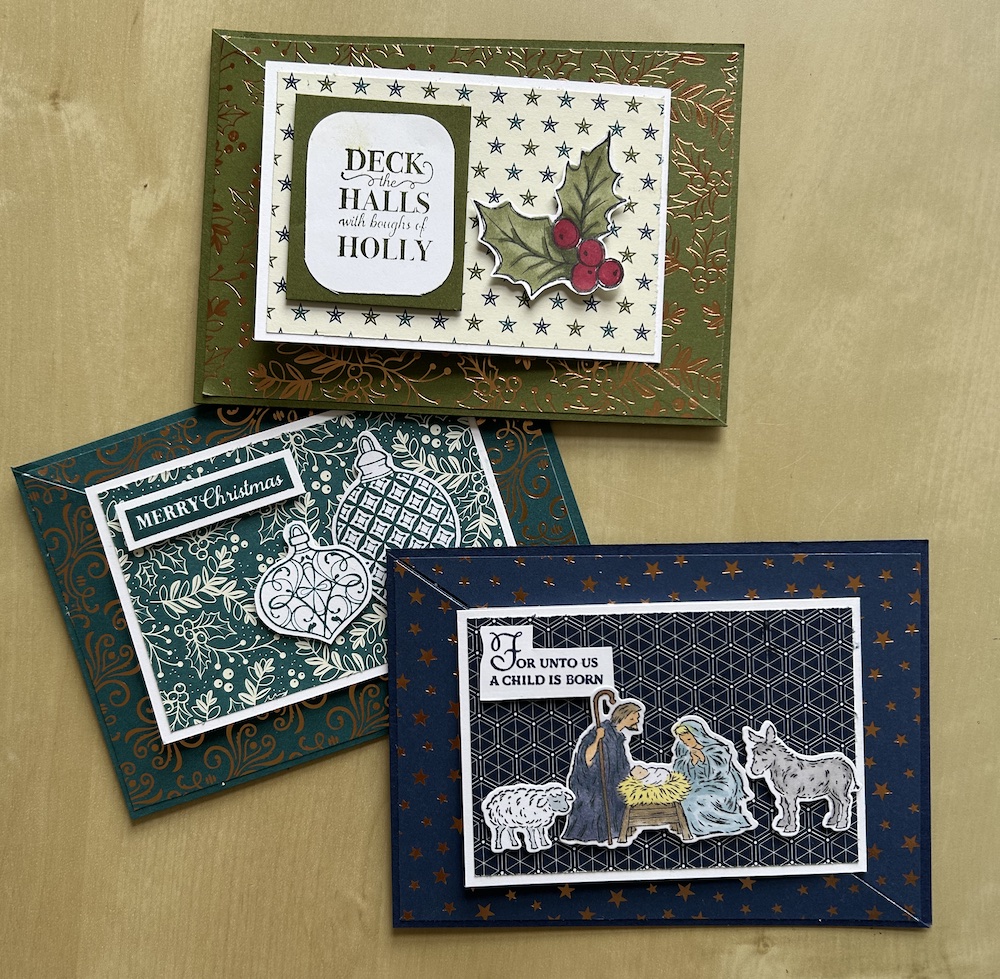
Stamp and/or die-cut pieces for decoration. In the Craftalong, I cut out the vases from the DSP. For the video, I stamped and coloured images from some retired Christmas stamp sets.
Stamp a sentiment in ink to match the base card colour and cut out /shape as you wish.
Add these decorative pieces to the front of the inner card.
Finish your diagonal joy fold card by adding some gems and don’t forget to decorate your envelope!
Here is the video of me making a Christmas version of this diagonal joy fold card:
Here are the three Christmas diagonal joy fold cards I made:
I hope you like this card and will have a go at making one – please show me what you come up with.
Thank you for taking the time to read my post.

Don’t forget – you get a FREE pdf when you place any order with me as your demonstrator. And, if your order is over £40, you will also get to choose stuff from my online shop to the value of your order!
Product List ![Misty Moonlight A4 Cardstock [ 153086 ]](https://assets1.tamsnetwork.com/images/EC042017NF/153086s.jpg "Misty Moonlight A4 Cardstock [ 153086 ]") | ![Cloud Cover A4 Cardstock [ 165293 ]](https://assets1.tamsnetwork.com/images/EC042017NF/165293s.jpg "Cloud Cover A4 Cardstock [ 165293 ]") | ![Flower Accents [ 165171 ]](https://assets1.tamsnetwork.com/images/EC042017NF/165171s.jpg "Flower Accents [ 165171 ]") |
![Kintsugi Inspirations 12" X 12" (30.5 X 30.5 Cm) Specialty Designer Series Paper [ 165159 ]](https://assets1.tamsnetwork.com/images/EC042017NF/165159s.jpg "Kintsugi Inspirations 12\" X 12\" (30.5 X 30.5 Cm) Specialty Designer Series Paper [ 165159 ]")
![Misty Moonlight Classic Stampin' Pad [ 153118 ]](https://assets1.tamsnetwork.com/images/EC042017NF/153118s.jpg "Misty Moonlight Classic Stampin' Pad [ 153118 ]")

