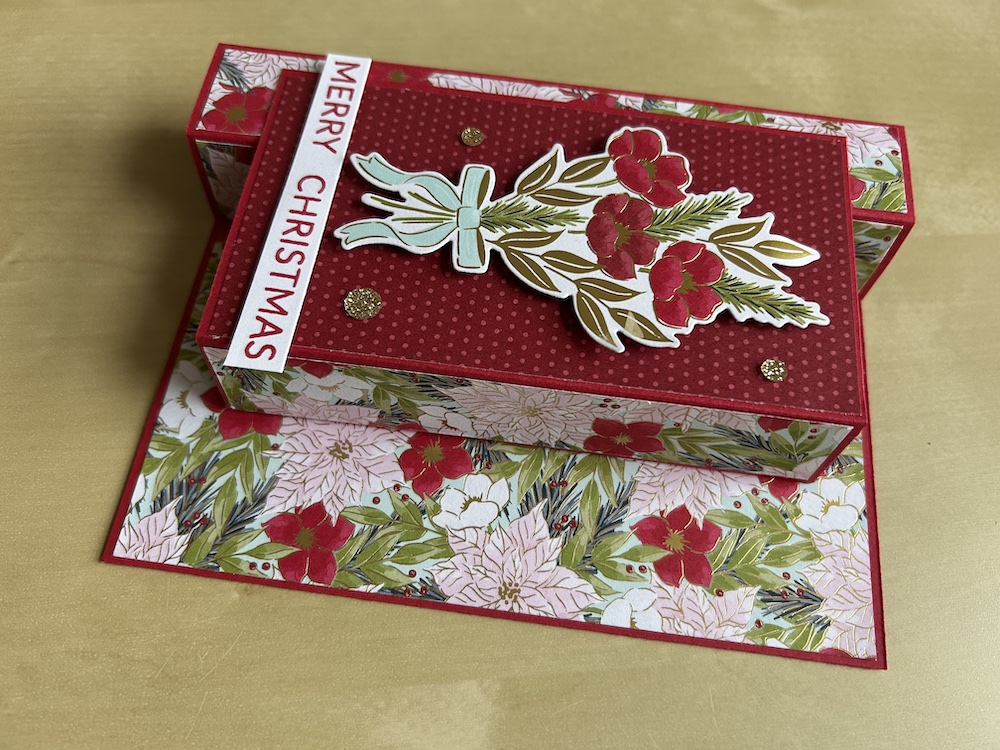
Here is another easy fun fold to make for Christmas. It has very little stamping, with the decoration provided by the gorgeous Traditions of Christmas Designer Series Paper. The card is named for the column that pops up to the left of the card and allows it to stand for display, with a centre pop-up panel containing the decoration and sentiment. There is space for writing a greeting on the reverse of the card.
Choose your base and panel colour cardstock to match your DSP. This column fun fold card is not just for Christmas – it can be made for any occasion – thank you, birthdays, sympathy, there are many possibilities. Here it is from the side view:
You will need:
- Base colour card: 21cm x 14.8cm (Real Red or Cherry Cobbler)
- Panel colour card: 10.5cm x 12cm (same colour)
- Basic White panel: 9.5cm x 13.8cm
- DSP 1: 2.2cm x 14.5cm (x3)
- DSP 1: 7.7cm x 14.5cm
- DSP 2: 2.2cm x 11.7cm
- DSP 2: 6.2cm x 11.7cm
- Scrap of Basic White for sentiment
I’m sorry I have not worked out the inch measurements for this card. When I do I will add them!
Instructions
Trim the base card by cutting off 0.5cm from the long side.
Score at 2.5cm, 5cm, 7.5cm and 10cm. Fold all score lines as mountain folds and burnish well.
Adhere the three strips of DSP 1 to the outside of the second, third and fourth panels you have just created. (The edge panel will be adhered to the card front later.) See the video below if you are unsure.
Adhere the larger DSP 1 piece to the right-hand side of the card, aligning with the right-hand edge to create the same border top, bottom and on the right.
Add glue or tear & tape to the column edge panel. Fold under at the second score line and stick to the card base to form the column fun fold.
Score the panel card piece on the short side at 6.5cm and 9cm. Mountain fold and burnish.
Stick the larger piece of DSP 2 to the large end panel and the other DSP 2 piece to the middle panel.
Add tear & tape to the remaining end strip. Fold this panel inwards at the second score line and line up approximately 0.5cm in from the right-hand edge of the card front. Make sure it is central and stick down.
Open this panel at the left and add a strip of tear & tape on this edge.
Fold the previously created column flat against the card and stick down this floating panel – it will fit against the centre panel of the column. See the video if you are unsure.
Check that the card opens correctly and stands up well.
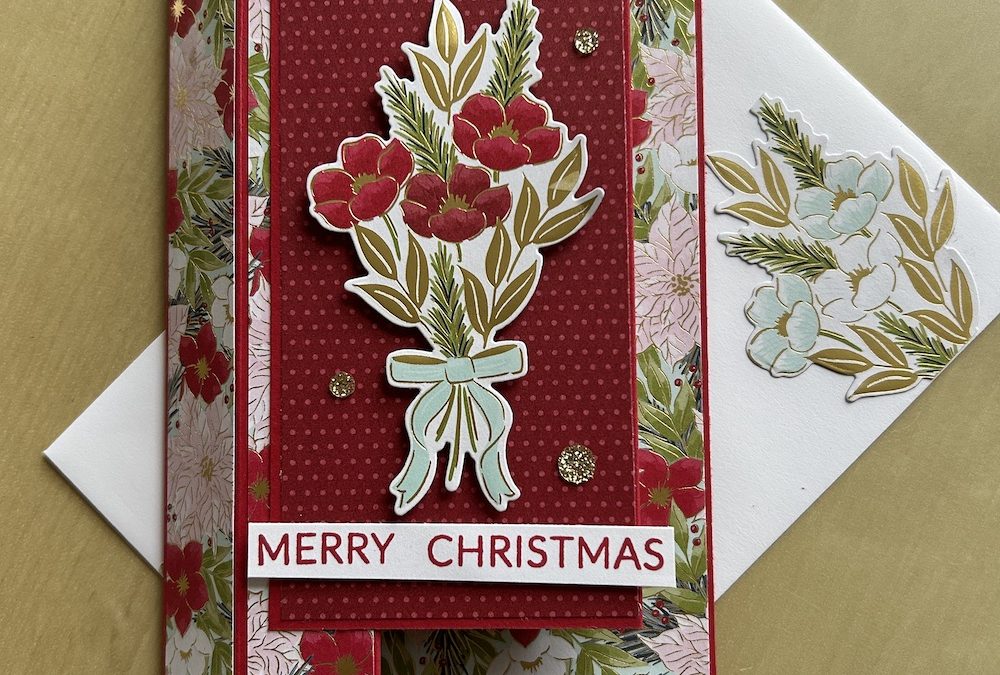
I die-cut a flower bouquet from the Traditions of Christmas DSP using the die-cut from the Christmas Greenery bundle. I also die-cut two more partial bouquets to decorate the back of my column fun fold card and the envelope.
Stamp a sentiment of your choice in Memento on the Basic White piece. Stick to the back of your card and add a die-cut partial piece as decoration.

Add dimenionsals to the flower bouquet and stick to the front of the panel as shown.
Stamp a greeting in colour ink and trim. Add to the front using dimensionals.
Finish your column fun fold card with some Traditional Sparkling Sequins and/or ribbon.
Here is the video of me making this card on my Live today:
I hope you like this card and will have a go at making one – please show me what you come up with.
Thank you for taking the time to read my post.

Don’t forget – you get a FREE pdf when you place any order with me as your demonstrator. And, if your order is over £40, you will also get to choose stuff from my online shop to the value of your order!
Product List ![Christmas Greenery Dies [ 165872 ]](https://assets1.tamsnetwork.com/images/EC042017NF/165872s.jpg "Christmas Greenery Dies [ 165872 ]") | ![Traditional Sparkling Sequins [ 165875 ]](https://assets1.tamsnetwork.com/images/EC042017NF/165875s.jpg "Traditional Sparkling Sequins [ 165875 ]") | ![Cherry Cobbler A4 Card Stock [ 121681 ]](https://assets1.tamsnetwork.com/images/EC042017NF/121681s.jpg "Cherry Cobbler A4 Card Stock [ 121681 ]") | ![Basic White A4 Cardstock [ 166781 ]](https://assets1.tamsnetwork.com/images/EC042017NF/166781s.jpg "Basic White A4 Cardstock [ 166781 ]") | |
![Stampin' Dimensionals [ 104430 ]](https://assets1.tamsnetwork.com/images/EC042017NF/104430s.jpg "Stampin' Dimensionals [ 104430 ]") | ![Paper Trimmer [ 152392 ]](https://assets1.tamsnetwork.com/images/EC042017NF/152392s.jpg "Paper Trimmer [ 152392 ]") |
![Traditions Of Christmas 12" X 12" (30.5 X 30.5 Cm) Specialty Designer Series Paper [ 165853 ]](https://assets1.tamsnetwork.com/images/EC042017NF/165853s.jpg "Traditions Of Christmas 12\" X 12\" (30.5 X 30.5 Cm) Specialty Designer Series Paper [ 165853 ]")
![Cherry Cobbler Classic Stampin' Pad [ 147083 ]](https://assets1.tamsnetwork.com/images/EC042017NF/147083s.jpg "Cherry Cobbler Classic Stampin' Pad [ 147083 ]")

