I saw this card made by Verna Mullen of Stampin’ Notes – she has a free project sheet available on her website at https://stampinnotes.com/column-center-pop-fun-fold-card/ with US measurements, so here I will just give the UK measurements I have worked out.
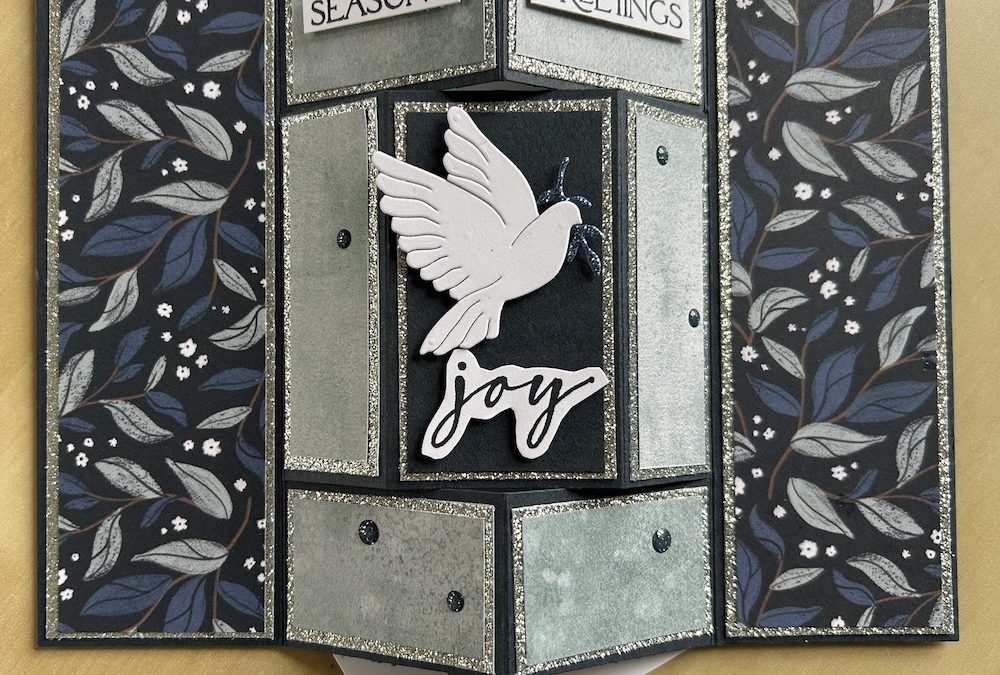
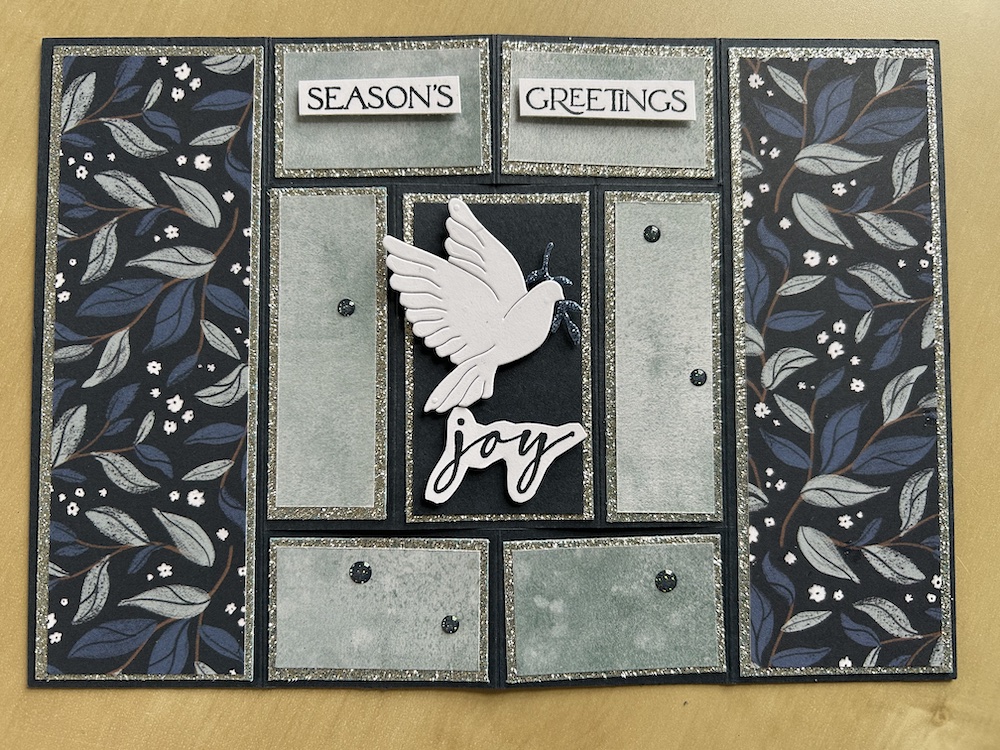
I used the gorgeous Peaceful Garden DSP, with sparkle from the Peaceful Garden glimmer paper on a Secret Sea card base. I also used a die-cut dove and the tiny branch from the Peace of Earth dies plus some low profile sparkle dots for decoration. I used retired stamps for the sentiments (Brightest Glow).
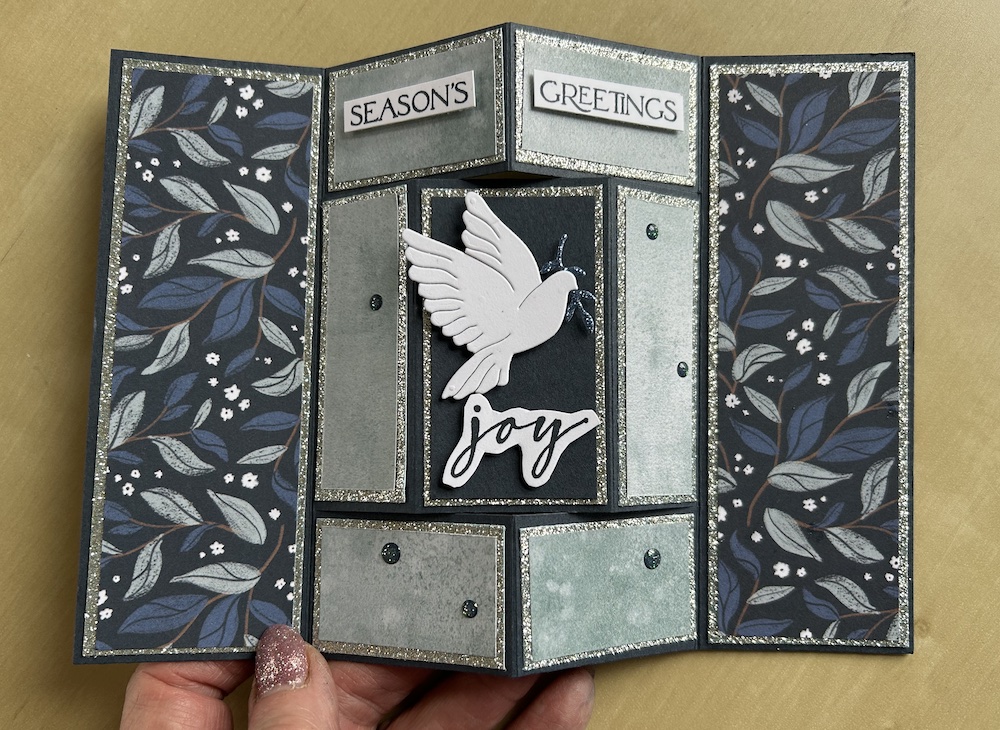
The centre panel fun fold card can stand up two ways – either with side panels forwards and centre top/bottom fold forwards:
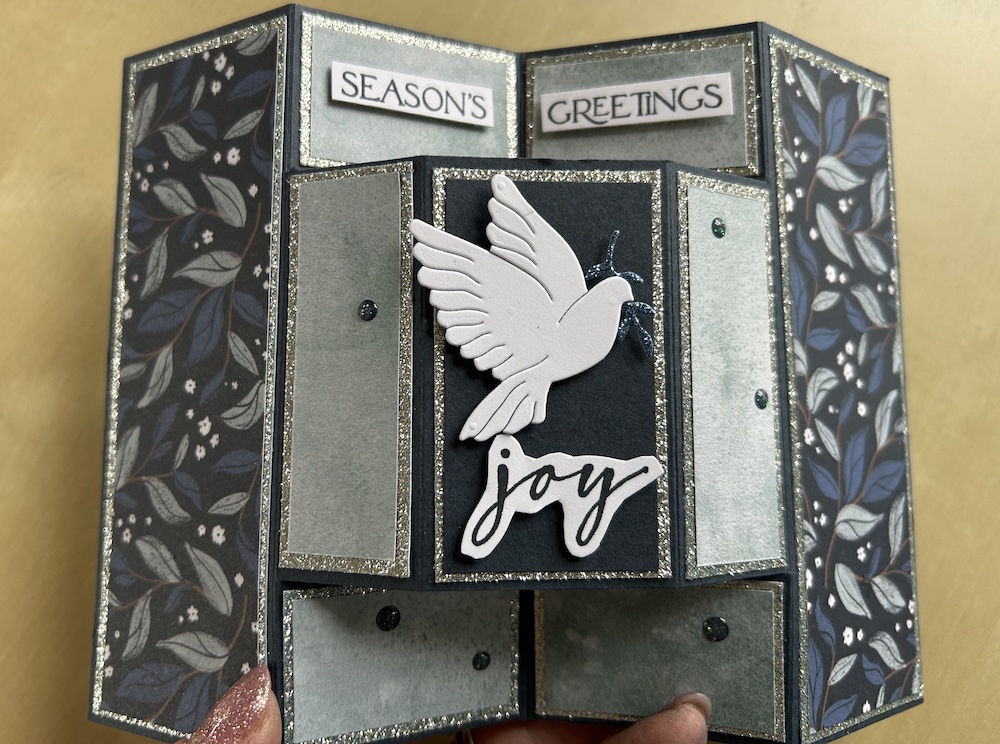
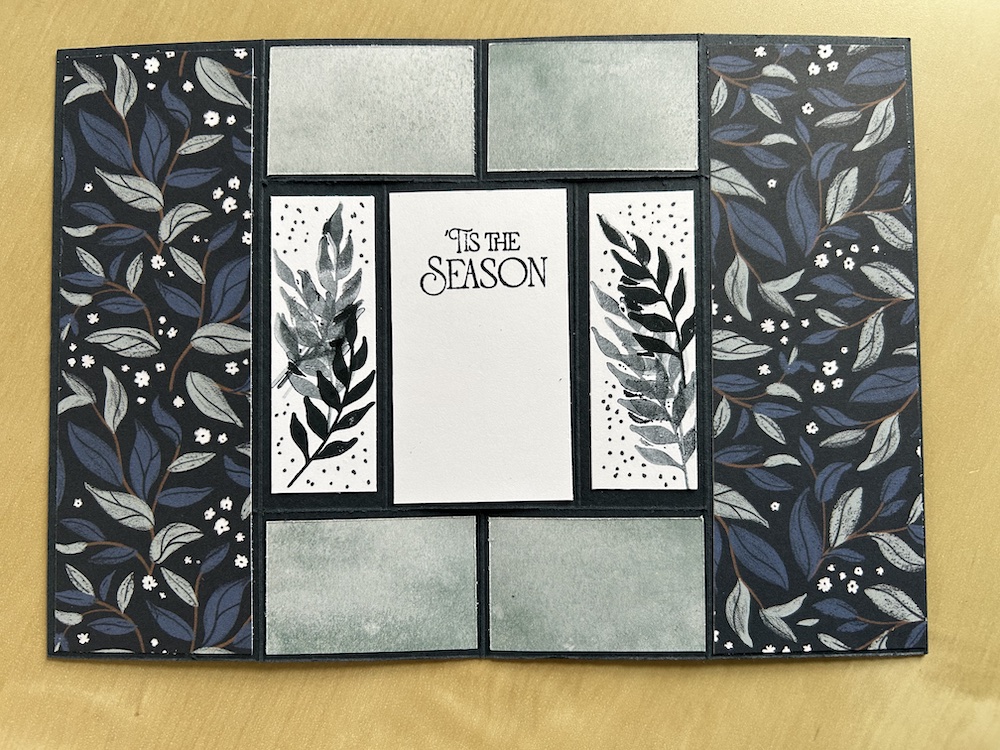
Or with the side and centre top/bottom folds backwards:
This card uses a lot of pieces, however to make it simpler you could just use the layer 1 measurements to cut one layer of DSP, ignoring the sparkle layer if you want! But I like sparkle at Christmas. There is room on the reverse side to write your greeting – see the photos below.
It looks complex to make and there is quite a bit of measuring, but it is easier than it first looks! Watch the video below if you prefer or/and follow the instructions and you’ll be grand!
You will need:
- Card base 21cm x 14.8cm
- Layer 1 pieces:
- Side panels (x2): 4.8cm x 14.4cm
- Centre side panels (x2): 2.6cm x 7.4cm
- Top / bottom panels (x4) 4.9cm x 3.1cm
- Centre panel (x1) 4.2cm x 7.4cm
- Layer 2 DSP pieces:
- Side panels (x2) 4.4cm x 14cm
- Centre side panels (x2) 2.2cm x 7cm
- Top / bottom panels (x4) 4.5cm x 2.7cm
- Secret Sea centre panel (x1) 3.8cm x 7cm
- Back side panels DSP 4.8cm x 14.4cm
- Back centre panel (Basic White): 4.2cm x 7.4cm
- Back side panels (Basic White) 2.6cm x 7.4cm
- OPTIONAL: DSP panels x 4 for the top and bottom sections 4.9cm x 3.1cm
- Scraps of Basic White for die-cutting/stamping sentiment.
Here are all the pieces:

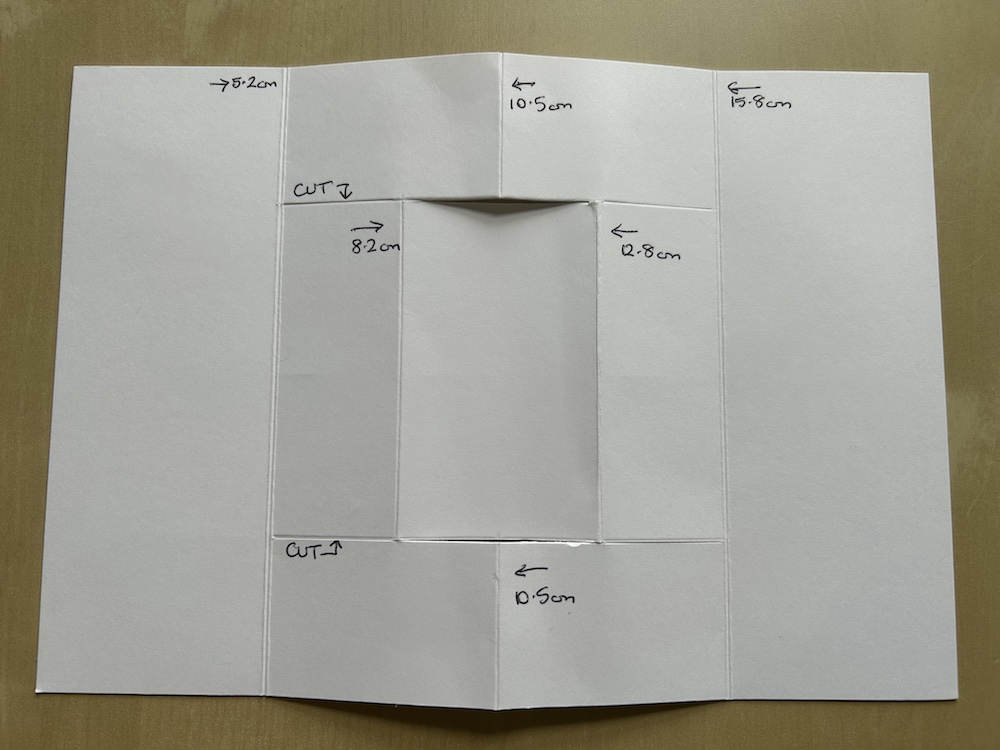
Score the card base (shown below in white for clarity) at 5.2cm and 15.8cm (or 5.2cm from the other side).
Turn 180 degrees and cut between these score lines at 3.5cm from the top and the bottom.
Turn back and score the top and bottom sections at 10.5cm.
Score the centre panel only at 8.2cm and 12.8cm.
Fold each side panel inwards (valley), fold th centre top and bottom folds outwards (mountain) and fold the side centre folds as mountain. Burnish all folds well.
This forms the centre panel fun fold card base. (The two sides can be folded inwards for posting.)
Adhere the DSP layers 2 to the appropriate glimmer paper layers 1. Stick the Secret Sea centre panel to the glimmer centre layer 1.
Adhere the panels to the card base – see the video below if you are unsure.
Die-cut a dove from Basic White and a tiny branch from blue glimmer paper. Stick the branch behind the dove’s beak. Add to the centre panel using a dimensional.
Stamp any appropriate sentiment you want to add. I used the Seasons Greeting and Joy sentiments from the retired Brightest Glow stamp set using Secret Sea ink then trimmer / cut them out. Add to your card using dimensionals.
I added a few low profile sparkle dots to finish my card.
For the back, I added six more pieces of DSP cut using the Layer 1 measurements. I added three Basic White panels across the centre of the card cut (again using the layer 1 measurements) for stamping another sentiment and writing my greeting. Then I added further decoration with a leaf stamp from another set, stamped off. on the two side panels I added a few dots with my Secret Sea stampin Write marker to these panels too:
Here is the video of me making this card:
I hope you like this card and will have a go at making one – please show me what you come up with.
Thank you for taking the time to read my post.

Don’t forget – you get a FREE pdf when you place any order with me as your demonstrator. And, if your order is over £40, you will also get to choose stuff from my online shop to the value of your order!
Product List ![Peace On Earth Dies [ 165924 ]](https://assets1.tamsnetwork.com/images/EC042017NF/165924s.jpg "Peace On Earth Dies [ 165924 ]") | ![Low Profile Sparkle Dots [ 166157 ]](https://assets1.tamsnetwork.com/images/EC042017NF/166157s.jpg "Low Profile Sparkle Dots [ 166157 ]") | ![Secret Sea A4 Cardstock [ 165296 ]](https://assets1.tamsnetwork.com/images/EC042017NF/165296s.jpg "Secret Sea A4 Cardstock [ 165296 ]") | ||
![Basic White A4 Cardstock [ 166781 ]](https://assets1.tamsnetwork.com/images/EC042017NF/166781s.jpg "Basic White A4 Cardstock [ 166781 ]") | ![Paper Trimmer [ 152392 ]](https://assets1.tamsnetwork.com/images/EC042017NF/152392s.jpg "Paper Trimmer [ 152392 ]") |
![Peaceful Garden 12" X 12" (30.5 X 30.5 Cm) Designer Series Paper [ 165917 ]](https://assets1.tamsnetwork.com/images/EC042017NF/165917s.jpg "Peaceful Garden 12\" X 12\" (30.5 X 30.5 Cm) Designer Series Paper [ 165917 ]")
![Peaceful Garden 12" X 12" (30.5 X 30.5 Cm) Glimmer Paper [ 165929 ]](https://assets1.tamsnetwork.com/images/EC042017NF/165929s.jpg "Peaceful Garden 12\" X 12\" (30.5 X 30.5 Cm) Glimmer Paper [ 165929 ]")
![Secret Sea Classic Stampin' Pad [ 165285 ]](https://assets1.tamsnetwork.com/images/EC042017NF/165285s.jpg "Secret Sea Classic Stampin' Pad [ 165285 ]")

