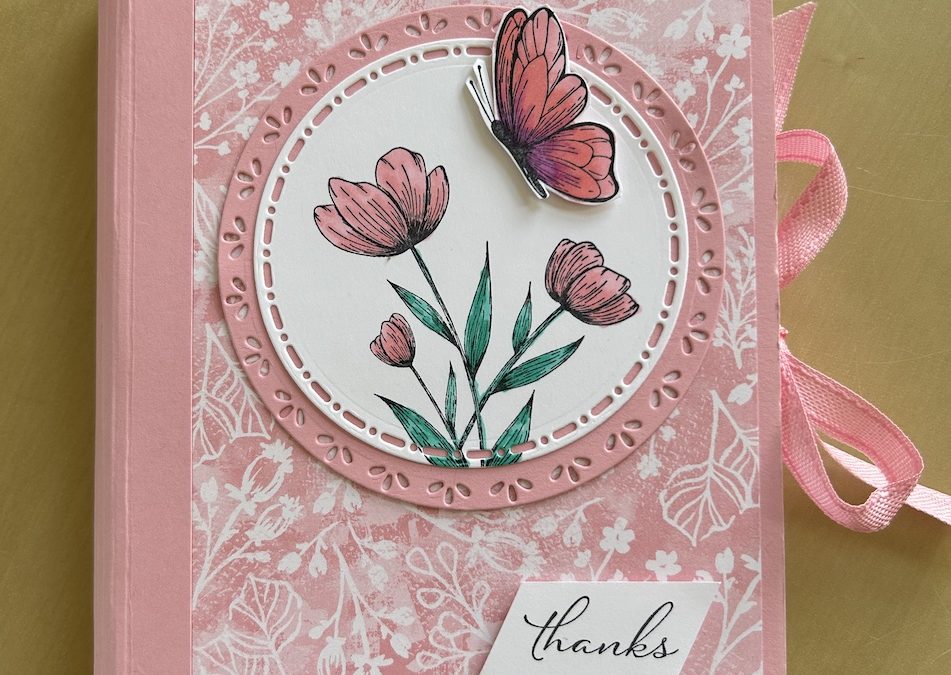
I love making gift boxes for small gifts and when I saw this book fold box I knew I had to make one. I first saw one made by Création Francine Roberge who I think is a French or Belgian demonstrator. I have worked out the measurements in both inches and centimetres for this book fold box. The Spotlight on Nature stamp set and dies finish it beautifully.
It looks like a book with a spine but it is actually a gift box. The box measures 11cm x 16cm (4 ¼” x 6 ¼”) so it will fit a set of four or six normal A6 size cards and envelopes, several chocolate bars or small cosmetics. A very useful size box!
I used the gorgeous Unbounded Beauty paper to make my book fold box but you could use any colour and DSP combination you want. I made my box from Basic White but again you could make it from coloured cardstock.
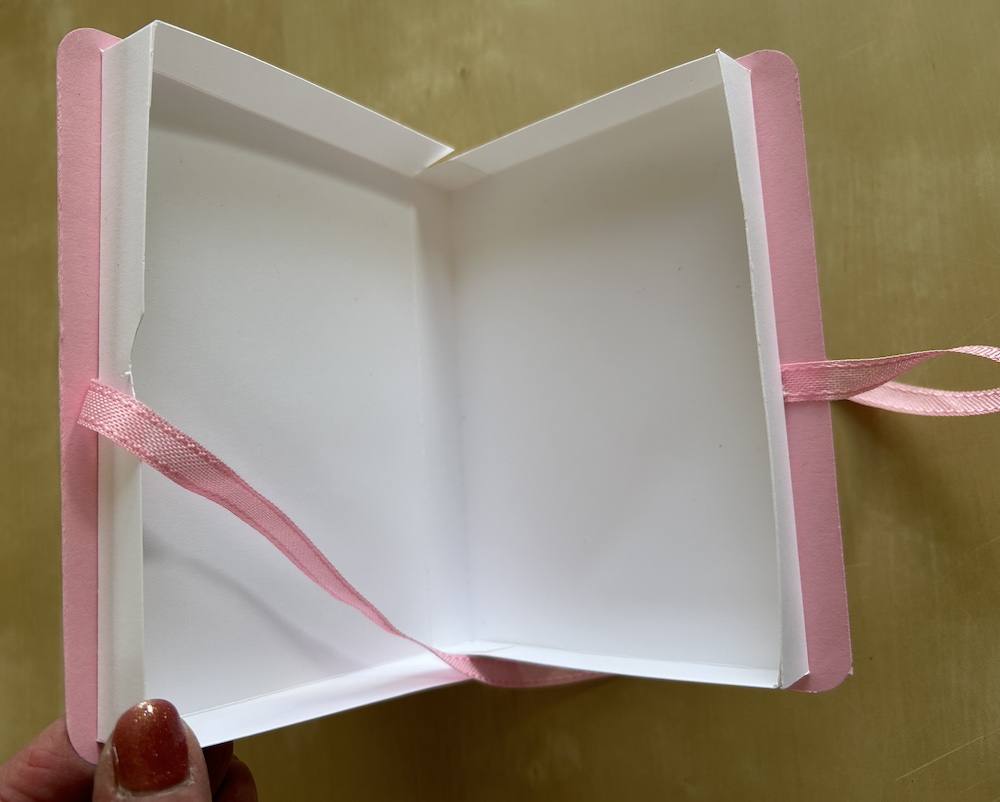
Here’s how it looks when opened:
You will need:
- Basic White (or colour cardstock) for box 7 ½” x 10 ¾” – (19cm x 27cm)
- Front and back covers: Colour cardstock (x2) 4 7/16” x 6 3/8” (12.5cm x 16cm)
- Unbounded beauty (or other) DSP: (x2) 4 ¼” x 6” (10.5cm x 15cm)
- Colour cardstock for spine 2 ¼” x 6 3/8” (5.5cm x 16cm)
- Colour cardstock for die cut 4 ¼” x 4 ¼” (11cm x 11cm)
- Basic White for die cut 3 ½” x 3 ½” (9cm x 9cm)
- Coordinating ribbon approx 22″ (55cm)
- Scraps of basic White for the butterfly and sentiment
- Stampin Blends to colour the images
The instructions are given below or/and you can watch the video if you prefer:
Instructions:
To make the box, score on the long side at ¾ ”, 5”, 5 ¾” and 10”. (2cm, 12.5cm, 14.5cm and 25cm). Turn the cardstock through 90 degrees and score on the short side at ¾” (2cm) on both sides.
Cut the centre tabs and mitre the edges. Cut and mitre all four end tabs. It should look like this picture below – see the video if you are unsure:
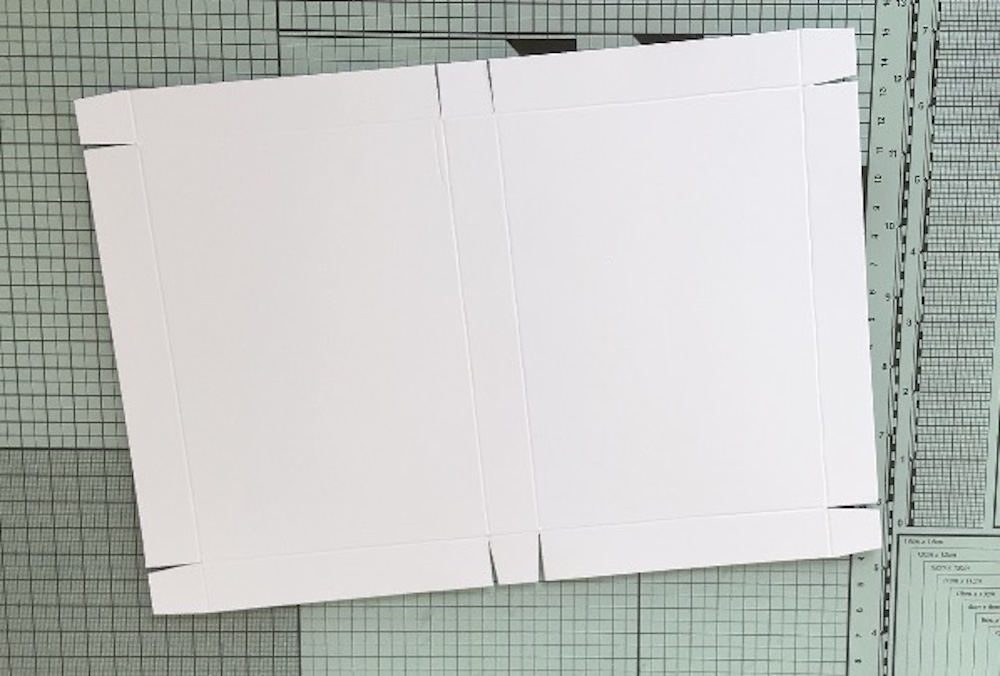
Use a circle cutter to cut a notch into the front of the upper box – I forgot to do this in the video!
Add tear & tape to the tabs. Carefully form the box being sure to match up the corners – take your time to get this right!. The lid should fit snugly over the base. Stick a length of ribbon approximately 9″ (23cm) to the back of the box.
Use a corner rounder to round the outer corners of each cover and the DSP. Stick the DSP to the cardstock covers as shown in the video. Add the remaining ribbon behind the top cover.
Stick the covers onto the box with the same border at the box opening side, top and bottom. They will jut out more at the back – this is correct!
Score the spine cardstock at ½” (1.5cm) on each side and every ¼” (0.5cm) between. Gently shape it into a curve. Stick the unscored areas to the front and back covers using tear & tape.
Die cut the coloured cardstock using the largest Spotlight on Nature trefoil circle die. Use the next size down slot pattern die to cut a Basic White circle.
Stamp the large flower stamp on the Basic White circle using Memento ink. Stamp the butterfly in Memento onto a scrap of Basic White. Colour using Stampin Blends. Fussy cut the butterfly.
Use a colour ink or Memento to stamp the sentiment. Trim as you wish.
Stick the pink die-cut circle to your card. Add the Basic White circle on top then add the butterfly using dimensionals. Add your sentiment also using dimensionals.
You could finish with some gems if you wish.
I hope you like this card and will have a go at making one – please show me what you come up with.
Thank you for taking the time to read my post.

Don’t forget – you get a FREE pdf when you place any order with me as your demonstrator. And, if your order is over £40, you will also get to choose stuff from my online shop to the value of your order!
Product List  |  | |||
 |  |  |
")
 Designer Series Paper")
 Bordered Ribbon")


