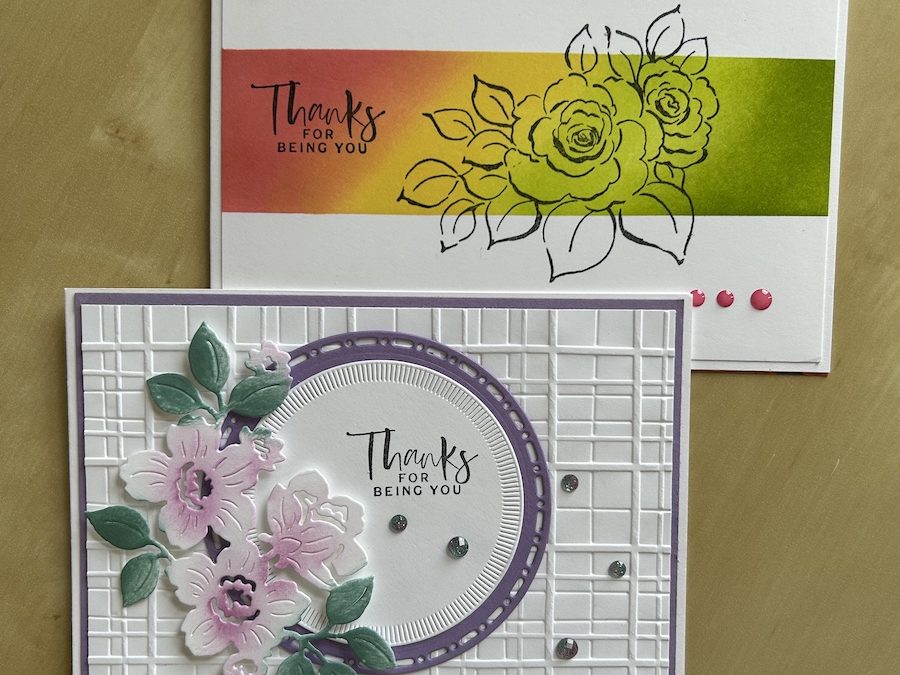
For my Live today, I showed two techniques for using blending brushes to give two very different effects.
The first card uses coloured layers and a stamped image coloured with blending brushes as the focal point. The second card uses blending brushes to make a stripey strip background on which is stamped a simple outline image. I used the gorgeous Online Exclusive Charming Day bundle for these cards.
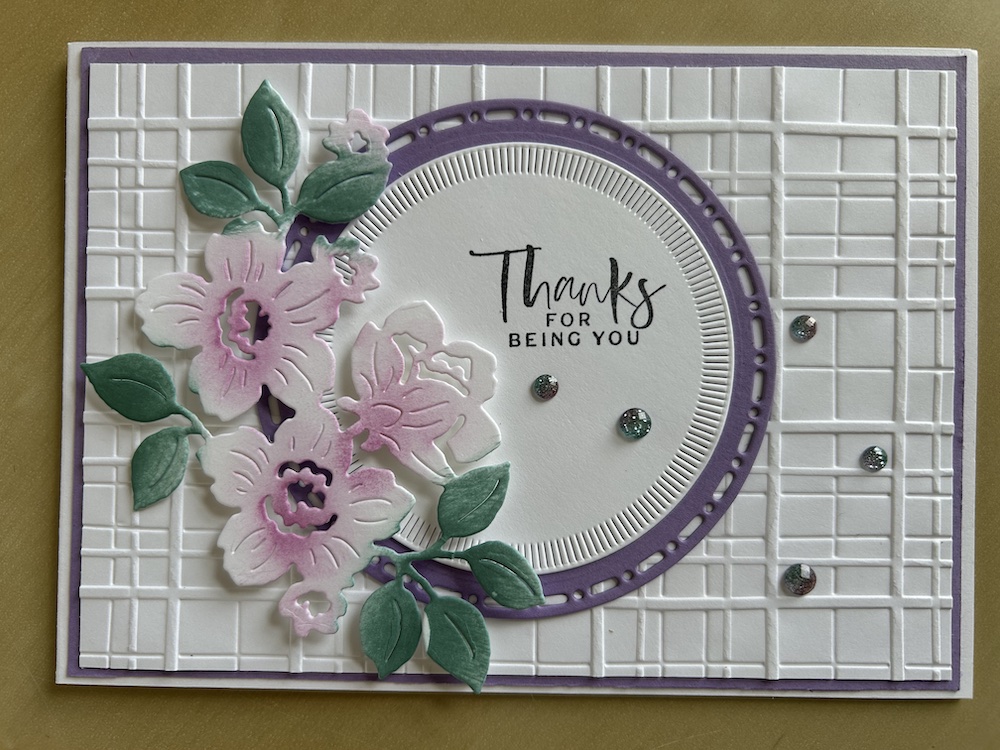
Blending brush card 1
You will need:
- Thick Basic White Card base 10.5cm x 29.6cm scored at 14.8cm (11” x 4¼” scored at 5½”)
- Highland Heather Layer 1: 10cm x 14.3cm (4” x 5¼”)
- Basic White Layer 2: 9.5cm x 13.8cm (3¾” x 5”)
- Highland Heather 10cm square (3½” square)
- Basic White strip 8cm x 20cm (3″ x 7½”)
- Small blending brushes
- Highland Heather (or Fresh Freesia) and Lost Lagoon ink pads
- Embossing folder and gems of your choice
Fold and burnish your card base.
Emboss the Basic White panel using an embossing folder of your choice (I used Forever Plaid).
Adhere the coloured layer then the embossed white layer to your card base.
Die cut a larger circle from the coloured card and a smaller circle from the Basic White strip. (I used the Spotlight on Nature dies, but you could use plain circle dies.)
Die cut the Charming Day flower cluster from the remainder of the Basic White strip.
Using small blending brushes, carefully add some colour to the flowers and the leaves. See the video for details if you need.
Stamp your sentiment in Memento to the top right of the smaller circle.
Adhere the circles to the centre of your card then add the coloured flower cluster on top using dimensionals.
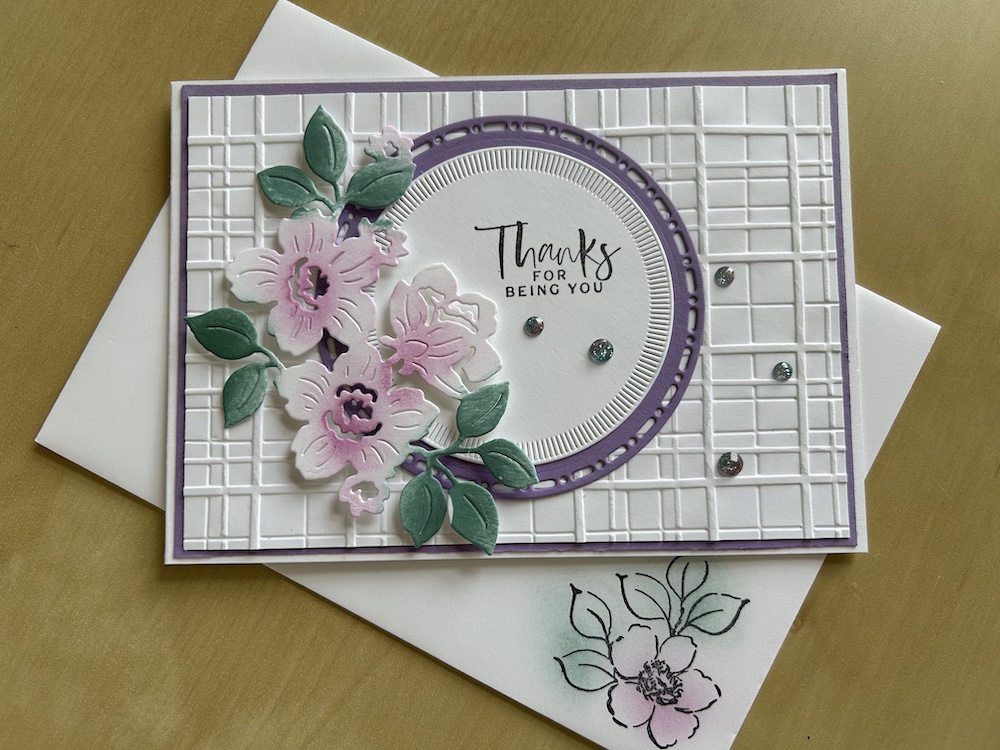
I stamped the smaller flower inside the card and on the envelope and added some colour with blending brushes.
I finished the card by adding a few gems as shown.
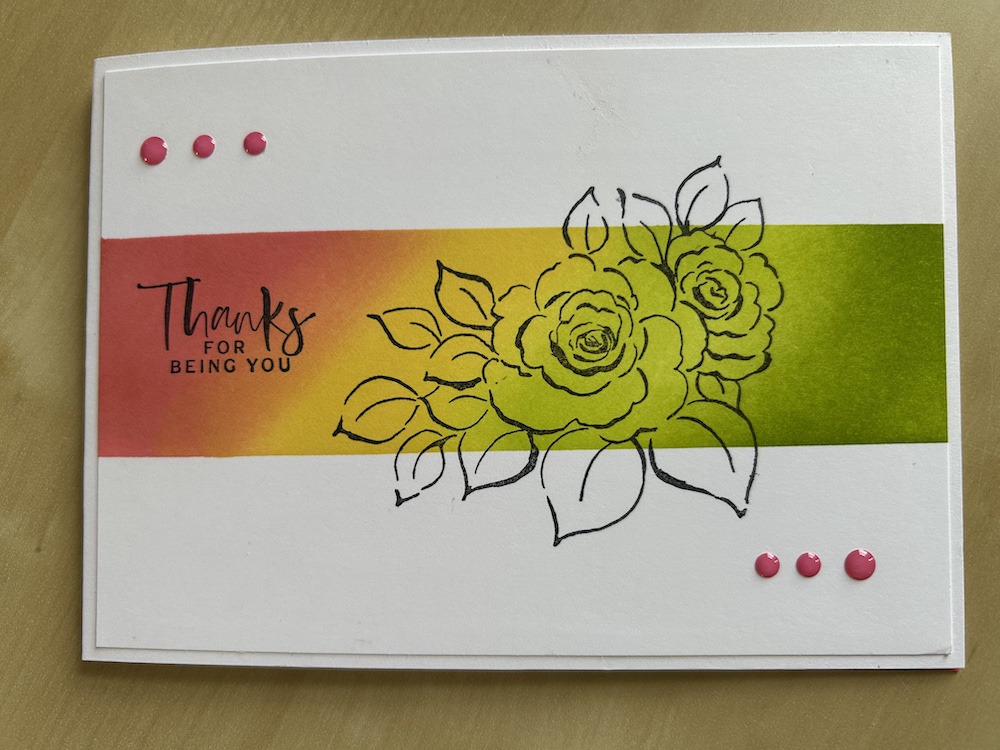
Blending card 2
You will need:
- Thick Basic White card base 10.5cm x 29.6cm scored at 14.8cm (11” x 4¼” scored at 5½”)
- Basic White Layer: 10cm x 14.3cm (4” x 5¼”)
- Ink pads: I used Flirty Flamingo, Daffodil Delight, Lemon Lime Twist and Granny Apple Green
- Large blending brushes
- Low tack tape and copy paper
Take some of the stickiness off the masking tape by pressing it onto your trousers a couple of times. Place your Basic White layer on your work surface. Stick the copy paper across your card top and bottom, leaving a gap across the middle of around 5cm (1¾”). See the video below for details if you are unsure.
Use your blending brushes to add strips of colour across the card, blending each colour into the next. Remove the tape anad copy paper.
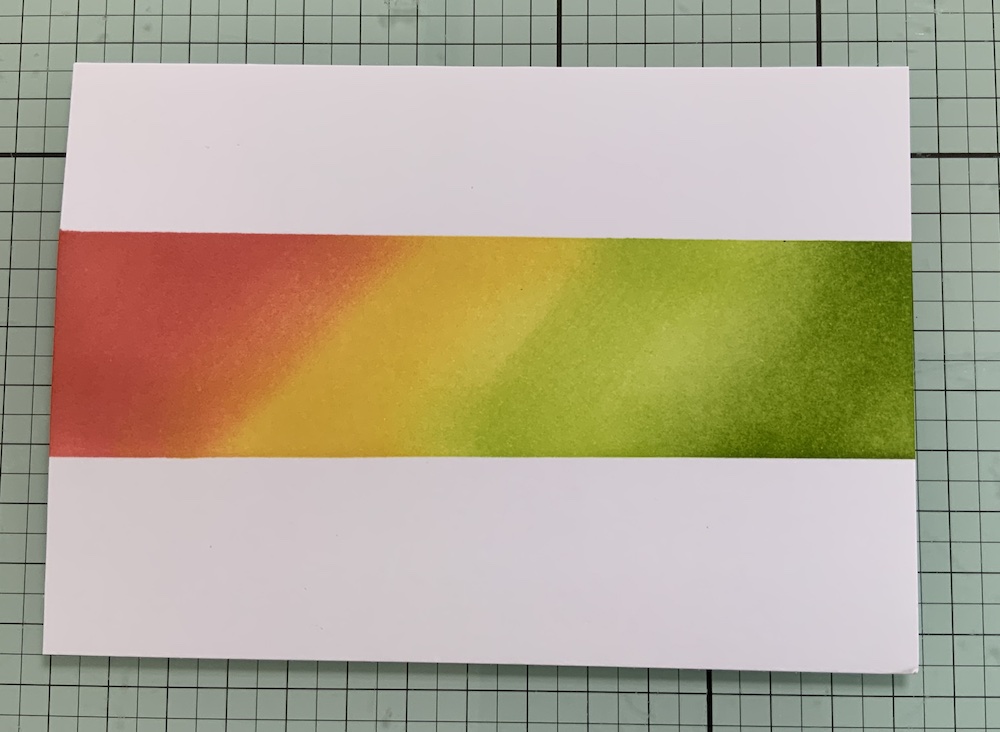
Stamp the large flower cluster image op top of the coloured strip using Memento. Add your sentiment to the side.
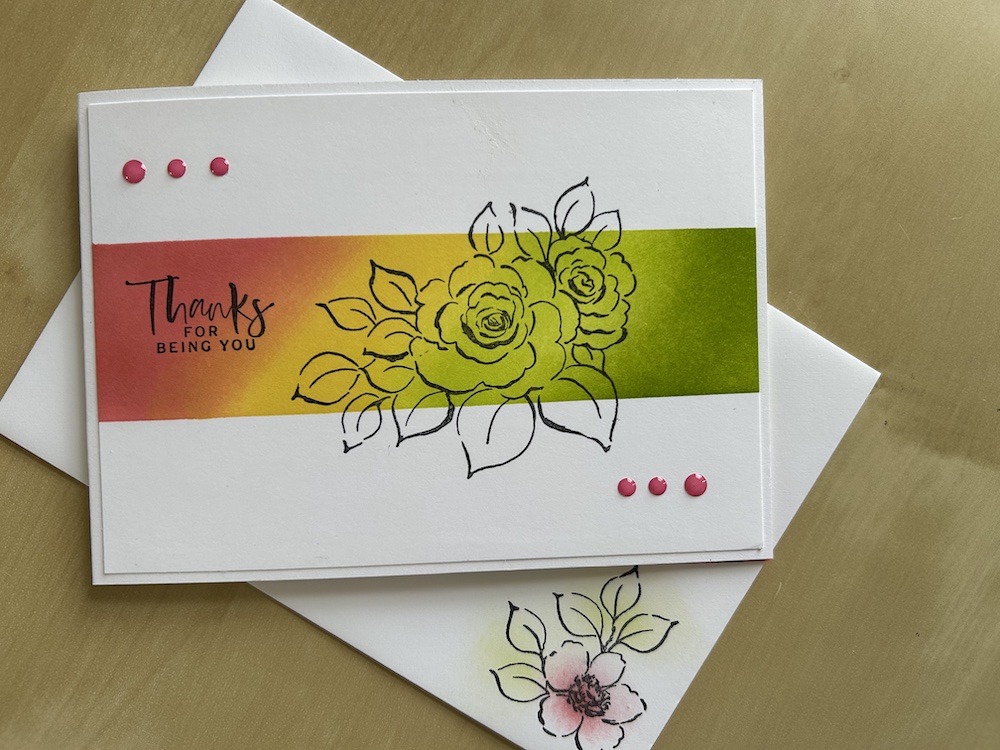
Add a few gems and the card is complete!
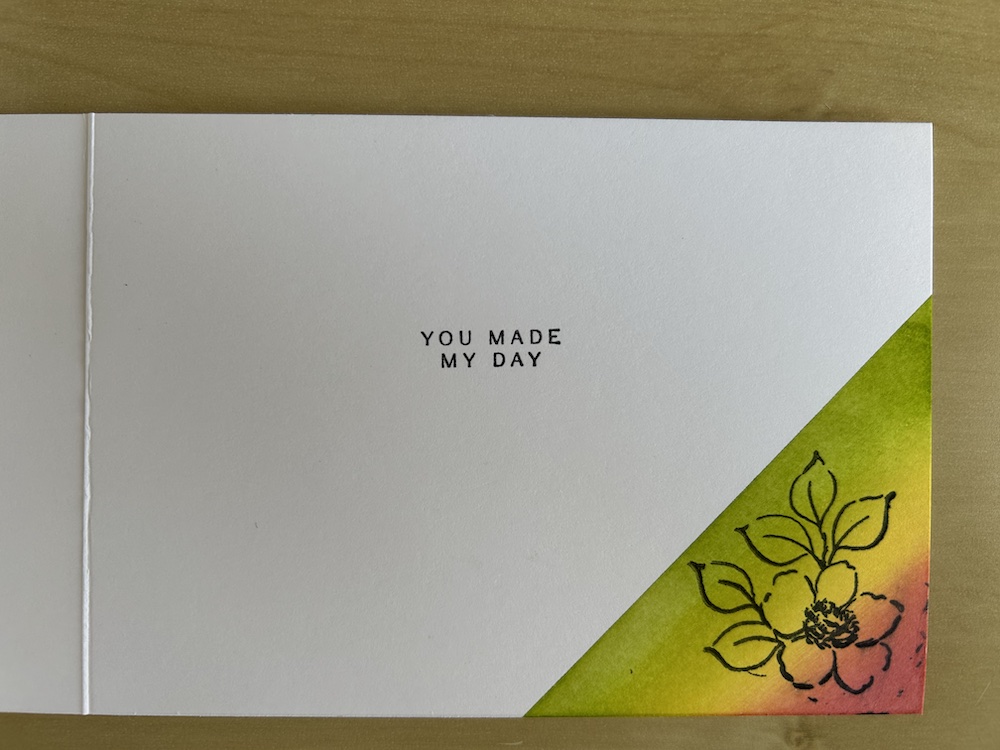
I added diagonal stripes of colour inside the card across the corner and stamped on top using the small flower. Ignore the mess I made of the stamping in the picture!
I also stamped the envelope and added some colour from my blending brushes.
Here is the video from my Live. Why not join me on a future Live Tuesdays at 2pm on YouTube and my Facebook page?
I hope you like this card and will have a go at making one – please show me what you come up with.
Thank you for taking the time to read my post.

Don’t forget – you get a FREE pdf when you place any order with me as your demonstrator. And, if your order is over £40, you will also get to choose stuff from my online shop to the value of your order!
Product List ![Charming Day Bundle (English) [ 166136 ]](https://assets1.tamsnetwork.com/images/EC042017NF/166136s.jpg "Charming Day Bundle (English) [ 166136 ]") | ![Spotlight On Nature Dies [ 163580 ]](https://assets1.tamsnetwork.com/images/EC042017NF/163580s.jpg "Spotlight On Nature Dies [ 163580 ]") | ![Basic White A4 Cardstock [ 166781 ]](https://assets1.tamsnetwork.com/images/EC042017NF/166781s.jpg "Basic White A4 Cardstock [ 166781 ]") | ![Highland Heather A4 Cardstock [ 147010 ]](https://assets1.tamsnetwork.com/images/EC042017NF/147010s.jpg "Highland Heather A4 Cardstock [ 147010 ]") | |
![Blending Brushes [ 153611 ]](https://assets1.tamsnetwork.com/images/EC042017NF/153611s.jpg "Blending Brushes [ 153611 ]") | ![Small Blending Brushes [ 160518 ]](https://assets1.tamsnetwork.com/images/EC042017NF/160518s.jpg "Small Blending Brushes [ 160518 ]") |
![Highland Heather Classic Stampin' Pad [ 147103 ]](https://assets1.tamsnetwork.com/images/EC042017NF/147103s.jpg "Highland Heather Classic Stampin' Pad [ 147103 ]")
![Lost Lagoon Classic Stampin' Pad [ 161678 ]](https://assets1.tamsnetwork.com/images/EC042017NF/161678s.jpg "Lost Lagoon Classic Stampin' Pad [ 161678 ]")
![Flirty Flamingo Classic Stampin' Pad [ 147052 ]](https://assets1.tamsnetwork.com/images/EC042017NF/147052s.jpg "Flirty Flamingo Classic Stampin' Pad [ 147052 ]")
![Daffodil Delight Classic Stampin' Pad [ 147094 ]](https://assets1.tamsnetwork.com/images/EC042017NF/147094s.jpg "Daffodil Delight Classic Stampin' Pad [ 147094 ]")
![Lemon Lime Twist Classic Stampin' Pad [ 147145 ]](https://assets1.tamsnetwork.com/images/EC042017NF/147145s.jpg "Lemon Lime Twist Classic Stampin' Pad [ 147145 ]")
![Granny Apple Green Stampin' Pad [ 147095 ]](https://assets1.tamsnetwork.com/images/EC042017NF/147095s.jpg "Granny Apple Green Stampin' Pad [ 147095 ]")

