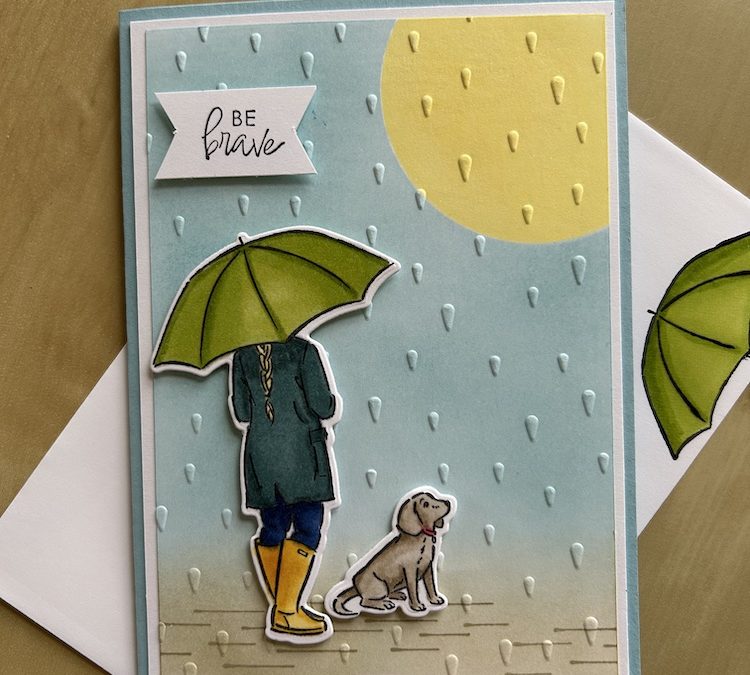
Did you know that it is easy to make your own coloured blended background for card making? All you need are ink pads in the colours you want and some blending brushes.
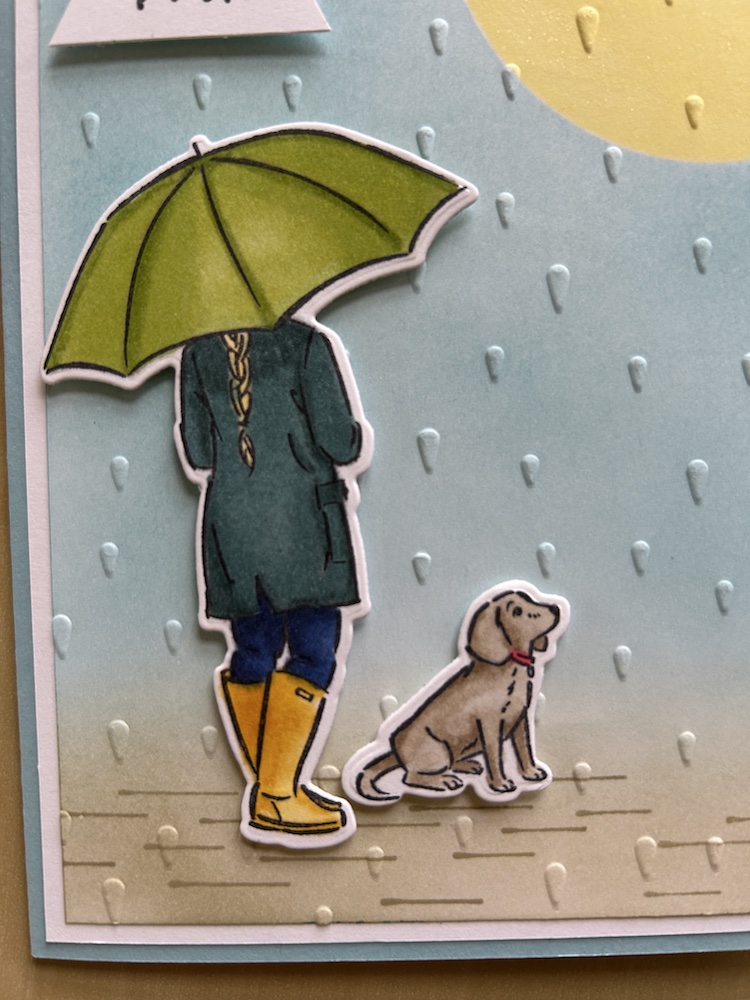
Blending is a fun technique. I find it quite relaxing. It comes out best if you take your time when adding the colour, gradually building to the depth of colour you want for that particular blended background. Here is a close up of the front of my card.
This type of blended background card can be used for various supportive messages and events. Here, I used Be Brave, but you could use Get Well Soon, or it could be a sympathy card. I love a versatile card design!
To make this blended background card you need:
- Balmy Blue card base 21cm x 14.8cm (8½” x 5½”)
- Basic White layer 10cm x 14.3cm (4” x 5¼”)
- Basic White second layer (x2) 9.5cm x 13.8cm (3¾” x 5”)
- Pieces of Basic White to stamp the images and sentiment
- Lemon Lolly, Balmy Blue, Crumb Cake and Memento ink pads
- Umbrella Days bundle
- Raindrop embossing folder
- Stampin Blends various for colouring the images
Score the card base at 10.5cm (4¼”), fold and burnish. Adhere the Basic White layer on the front of the card.
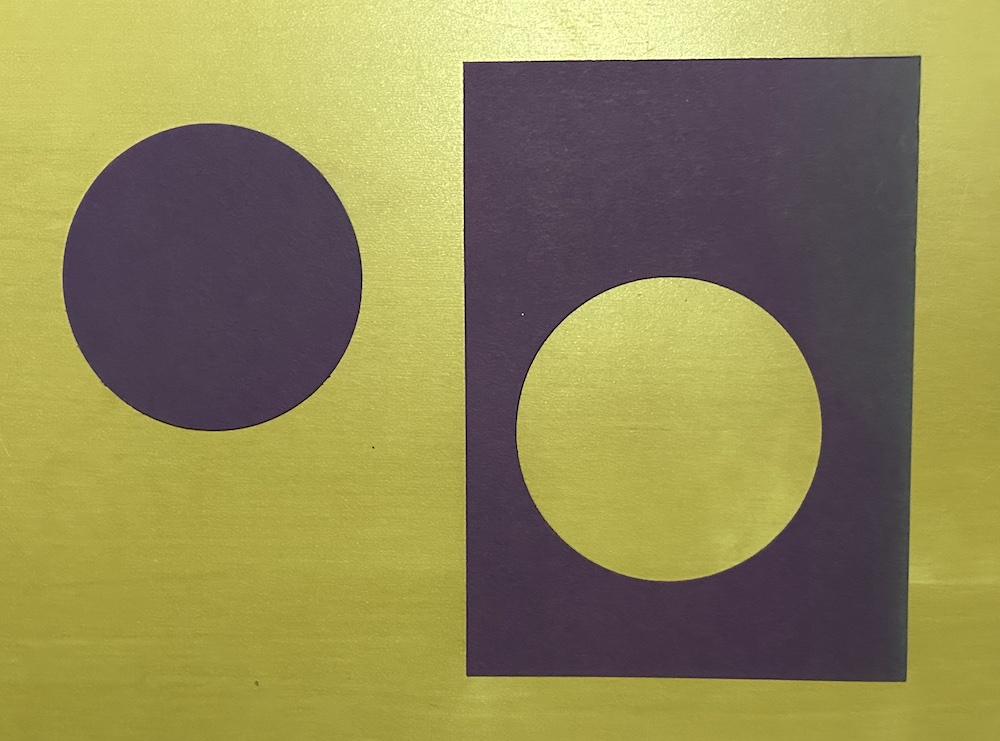
Die cut or punch a large (2-2 1/2″) circle from a piece of scrap cardstock to form a mask for the sun.
Create the blended background
Place the negative piece over the top right corner of one of the second layer pieces of Basic White, securing with double-sided tape. Pick up Lemon Lolly ink from the ink pad using a blending brush then gently and slowly add the ink to your cardstock through the mask. Once you are happy with the colour, remove the mask.
Position the cut-out circle over your sun and use temporary adhesive or double-sded tape to hold it in place. Use a second blending brush to pick up Balmy Blue and add this to the rest of the layer, leaving a small area near the bottom unlinked.
Use a third blending brush to add Crumb Cake ink across the bottom of the piece. Complete the “ground” by stamping the raindrops sideways in Crumb Cake across that Crumb Cake area.
Emboss your completed piece with the Raindrop embossing folder. Once embossed, use your blending brush to add a little more Balmy Blue across the “sky” to enhance the raindrops.
Stick the completed panel to the front of your card. I used some wink of Stella on the “sun” to give some sparkle.
Complete the card
Stamp the girl with umbrella and the dog in Memento onto scraps of Basic White. Colour as you wish using Stampin Blends then die cut the images. Add to the card front using dimensionals.
Stamp the sentiment of your choice onto a scrap of Basic White then flag each end – see the video if you are unsure about this. Add to the card upper left using dimensionals.
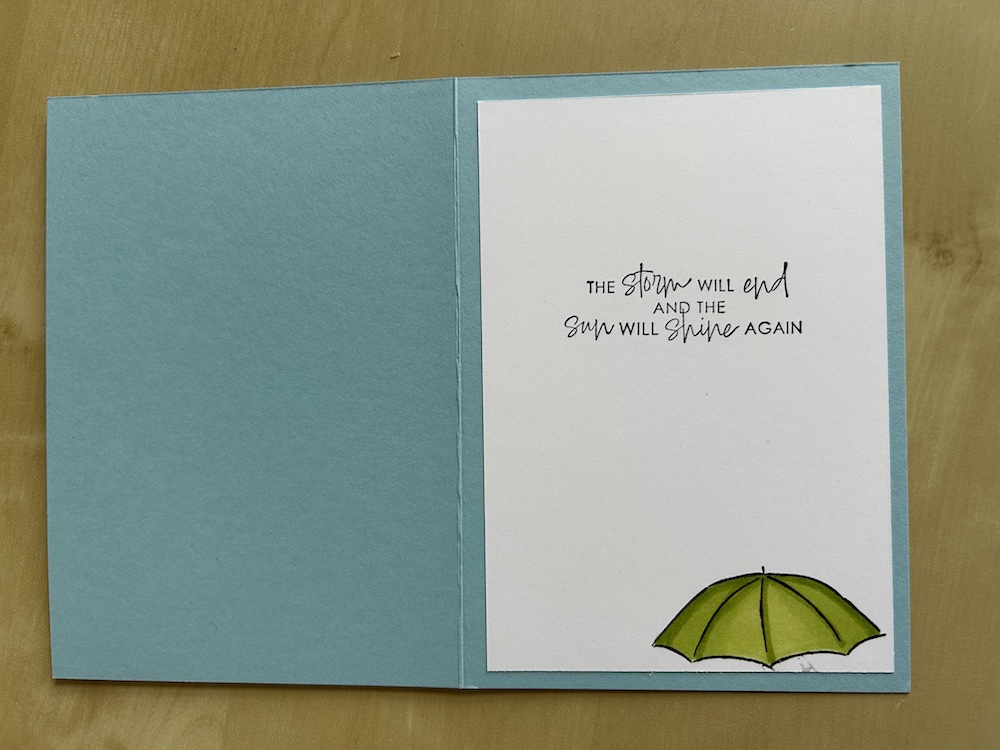
The second smaller panel is for the inside of the card. I stamped just the umbrella to decorate the inside and coloured it in. Add a sentiment inside if you wish.
Here is the video of how to make this blended background card:
I hope you like this card and will have a go at making one – please show me what you come up with.
Thank you for taking the time to read my post.

Don’t forget – you get a FREE pdf when you place any order with me as your demonstrator. And, if your order is over £40, you will also get to choose stuff from my online shop to the value of your order!
Product List ") |  |  |  | |
 |  |  |


