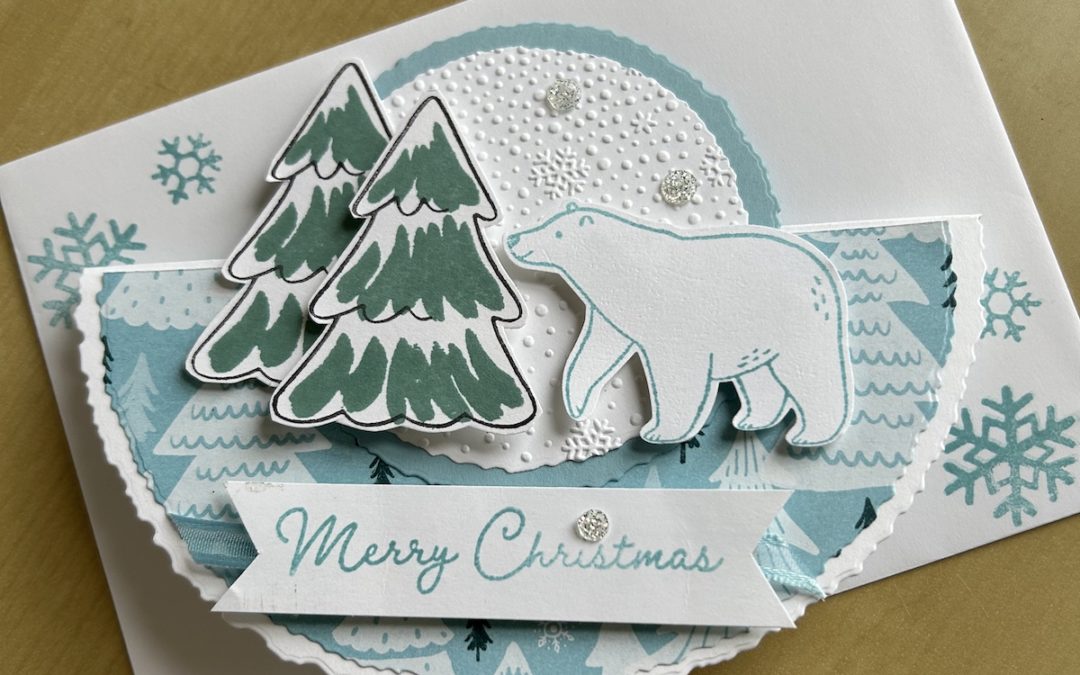
I have totally fallen in love with the Beary Cute bundle. It has a gorgeous stamp set with cute polar bears and a polar bear punch. The punch also fits several sheets of the A Walk in the Forest DSP (£2.50 from every sale in the UK goes to The Salvation Army).
So I wanted to use the Beary Cute bundle for this rocker card. I’ve teemed it together with the deckled circle dies from the mini catalogue that you might not have spotted – see p63. These are a set of 14 dies, the largest being 14.6cm and the smallest 2.5cm. The dies mean that making this unusual card is easy. The additional decoration uses the Beary Cute stamps and punch with some ribbon.
Measurements and instructions are given below.
You will need:
- Thick Basic White 15cm x 15cm
- A Walk in the Forest DSP 15cm x 15cm
- Balmy Blue cardstock 9cm x 9cm
- Basic White cardstock 8cm x approx 22cm
- Small length of coordinating ribbon
- Adhesive backed glitter sequins or other coordinating gems
Here is the video of how to make this card.
- Cut the largest deckled circle from the thick Basic White piece.
- Test out which area of the cut-out circle “stands” best on your desk, then fold over the top half and burnish well.
- Use the next largest deckled circle to cut out your DSP. (NOTE: If there is a directional pattern, make sure the other side of the DSP is appropriate for your project.)
- Hold the DSP against your card, turn over and mark along the fold line of your base (see the video for details). Use your trimmer to cut this circle in half.
- Glue the DSP half circles to your card, reversing the DSP on the back half of the card if necessary.
- Using the sixth die (counting from the smallest) to cut a Balmy Blue circle and use the fifth die to cut a Basic White circle.
- From the remaining Basic White cardstock piece, stamp two trees in Memento and fill in with Lost Lagoon. Stamp the stamping polar bear in Balmy Blue. Stamp a sentiment in Balmy Blue.
- Cut out the two trees (you have to fussy cut them) and punch out the polar bear.
- Trim your sentiment by flagging one or both ends or cut a diagonal end as you wish.
- Stamp a sentiment and the snowflakes as decoration on the inside of your card.
- Stick the Balmy Blue circle to the centre front of your card, margin sure it will fit in your envelope.
- Emboss the Basic White circle using the Snowflake Sky embossing folder. Stick on top of the Balmy Blue circle.
- Add the two trees using dimensionals for the second tree. Add your polar bear.
- Add a strip of ribbon across the bottom of your card then add your sentiment on top using dimensionals.
- Add three adhesive-backed glitter sequins to finish your card.
- Don’t forget to decorate your envelope!
I hope you like this card – your recipients certainly will! Let me know by leaving a comment below.
I’ll be back next week with some more Beary Cute Christmas Countdown projects.
Product List ") |  |  | ||
 |  |  |
 Designer Series Paper")

 Sparkle Ribbon")


Loved this too at our latest in person card class. Another simple effective card to bring joy at Christmas, Thank you Carol for both these projects including the HO HO HO favour box
So glad you liked the card!
I just found this on line. I wanted to let you know I absolutely love it.
I’m so happy you like it. Thanks for commenting!