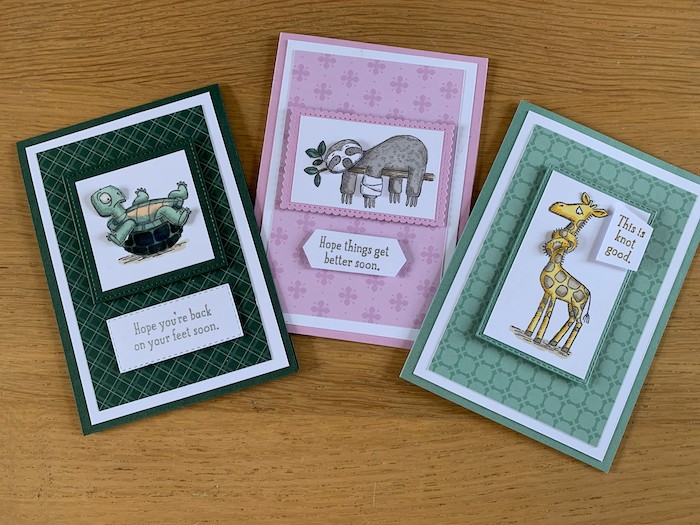
Here are some simple Get Well cards – plus one more intricate one! – made from the lovely Back of Your Feet stamp set.
I used the 2021-23 In Color card, DSP and Stamping Blends throughout, except for the flap card which uses Daffodil Delight.
Embossing powders used are the metallic set of silver, gold and copper.
Measurements
These measurements apply to all three get well cards. Feel free to mix and match different colours and use different dies to cut them out!
- Base card 21cm x 14.8cm, score in half 10.5cm
- White card layer 9.5cm x 14cm
- DSP layer 8.5cm x 13 cm
- Coloured card of suitable size to fit chosen image
- Basic White for image stamping plus scraps for sentiments
- Silver, Gold and Copper embossing powders
- Small length of ribbon for the flap pull
All colouring was done with Stampin Blends. For each card I chose part of the image to cut out and raise on dimensionals. I also used the beautiful Shimmery Crystal Effects to add highlights as noted.
When embossing sentiments, remember to use your emboss buddy on the card first! Stamp image with Versamark, add chosen embossing powder and set with heat tool. Heating your tool up first for a few moments before applying it to your embossing powder helps reduce the risk of curling your card or heating for too long.
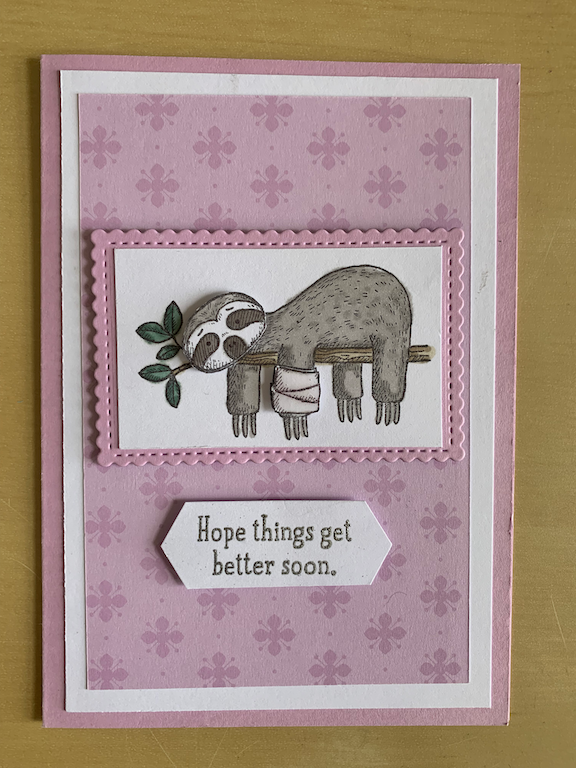
Sloth card: Fresh Freesia card plus same In Color DSP. I used Stitched so Sweetly dies for the colour layer behind the image. Coloured with Grey Granite, Crumb Cake and Soft Succulent. I cut out the face and bandage, raised them on dimensionals and also filled them in with Shimmery Crystal Effects.
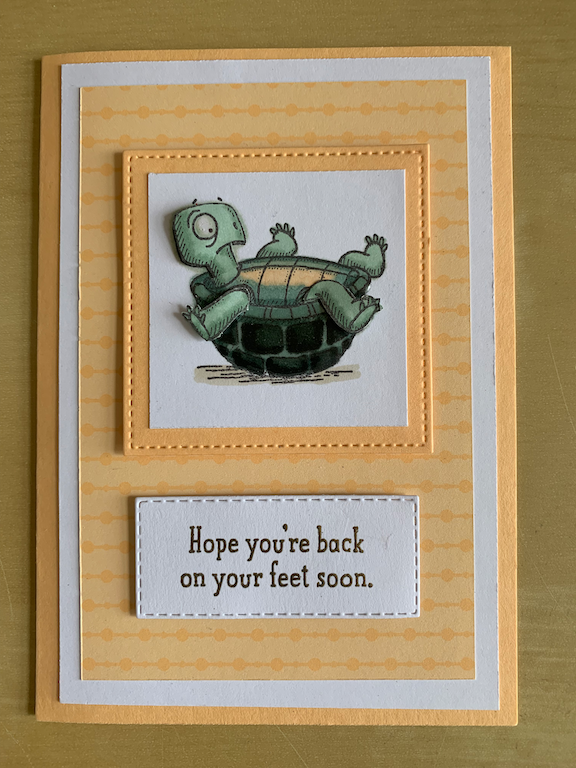
Turtle card: Pale Papaya card plus same In Color DSP. I used Stitched Square dies (now retired) for the colour layer behind the image. Coloured with Pale Papaya, Mint Macaron, Soft Succulent and Evening Evergreen, and Crumb Cake for the ground shading. I cut out the front legs and raised them on dimensionals and filled in the shell markings with Shimmery Crystal Effects.
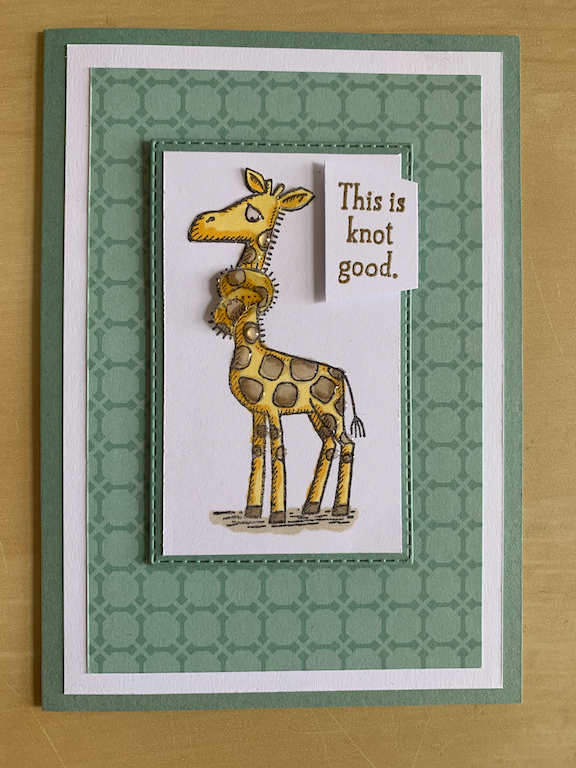
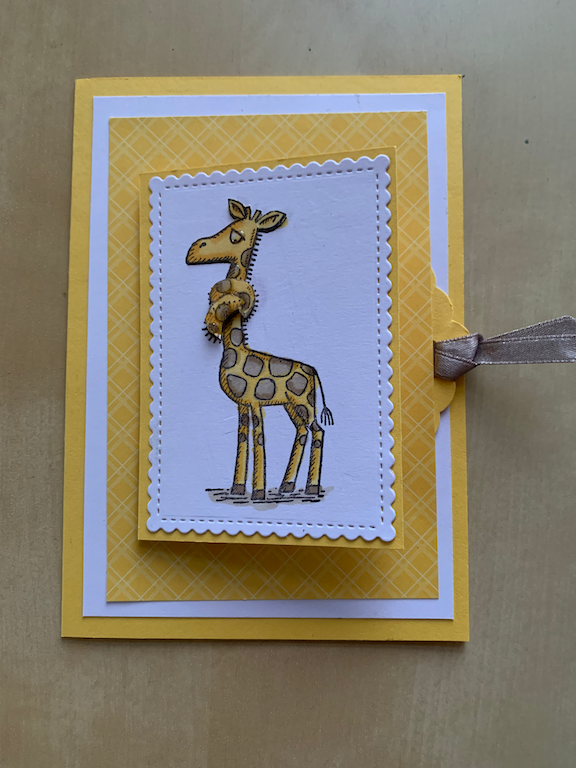
Giraffe card: Soft Succulent card plus same In Color DSP. I used Stitched Rectangle dies for the colour layer behind the image. Coloured with Daffodil Delight and Crumb Cake blends. I cut out the face and neck knot, raised them on dimensionals and filled in the crumb cake markings with Shimmery Crystal Effects.
Measurements
- Base card 21cm x 14.8cm, scored in half at 10.5cm
- White layer 9.5cm x 13.7cm
- Daffodil Yellow DSP layer 8.5cm x 12.7cm
- Daffodil Yellow strip 5cm x 15 cm for flap mechanism
- Daffodil Yellow 6.5 x 9.5cm – or required size for chosen image, plus sentiment back 5.3 x 6.5cm
- Basic White card for stamping image plus 4.7 x 6cm for sentiment
Giraffe (or chosen) image stamped and coloured as in previous cards, with appropriate highlights cut out and mounted on dimensionals. Stick to coloured card layer.
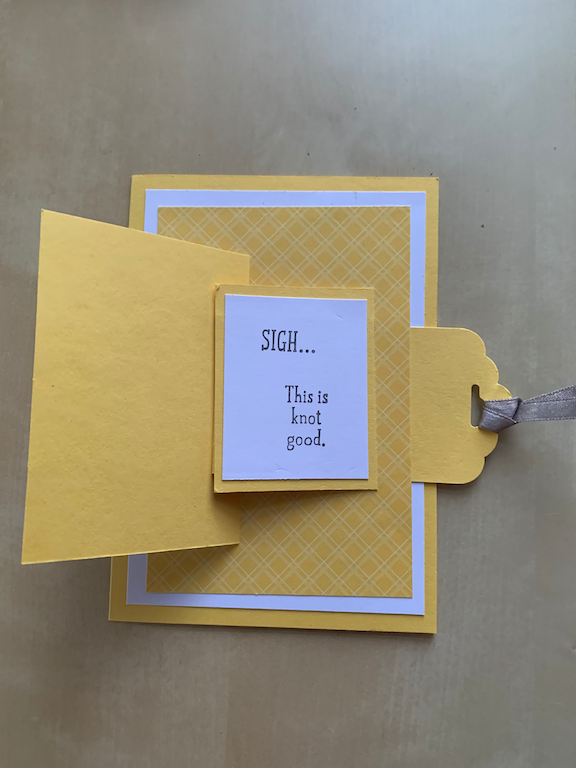
Stamp required sentiment on small white card piece and add to small coloured layer.
Punch one end of the long strip with Fancy Tag Topper punch. Score across strip at 5cm and 6cm from the other end.
Make a slot in the DSP layer as shown in the Back on Your Feet instructional video, using your layered image to mark where it needs to go (remember to mark on the reverse of the DSP which end goes towards the top!)
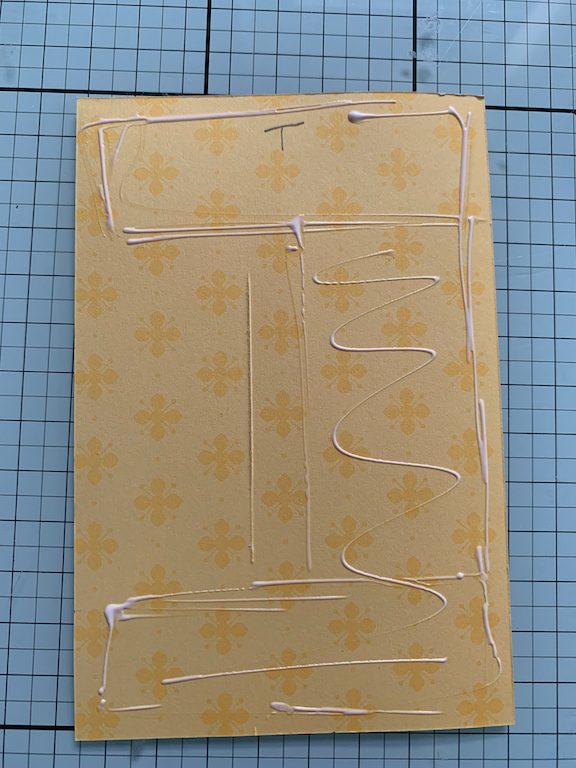
Stick your DSP layer to your white card layer, being carful not to put adhesive where the flap need to move – see image below.
Slide your mechanism into place. Adhere the top image against the 6cm fold, putting your glue to the 5cm fold being careful not to spread adhesive beyond the fold lines. Stick the sentiment image to the remaining end of the flap, jutting against the 5cm fold. Add a strip of tear and tape behind the right hand side of the sentiment panel and stick down. Make sure the mechanism works freely and add your ribbon.
Enjoy making this wow card!

