When I saw the Arches dies I knew I wanted them! They match with two stamp sets, Everyday Arches and Arched Wishes. I used these sets with the fabulous Wildflower birthday DSP for these easy arch shaped cards.
We made these arch shaped cards at my in person Craft’n’Chat class today with a choice of which colour to use based on the cardstock that coordinates with that DSP. Each arch shaped card can be made easily from one sheet of coloured cardstock and half a sheet of Basic White.
Note: I uses centimetre measurements for my cards and these relate to A4 cardstock. The inch measurements are for US size cardstock.
To make an arch shaped card you will need:
- Coloured cardstock strip 29/6cm x 5cm (11½” x 2″)
- Coloured cardstock piece for die-cutting largest arch 14cm x 10.5cm (5½” x 4¼”)
- DSP for die-cutting arch 13.5cm x 10cm (4¾” x 3½”)
- Basic White for die-cutting arch 13.5cm x 10cm (4¾” x 3½”)
- Basic White for die-cutting inside arch 13cm x 9.5cm (4½” x 3¼”)
- Basic White strip for sentiment 9cm x 1.8cm (3½” x ¾”)
- Coloured cardstock strip for sentiment layer (9.4cm x 2.2cm (3¾” x 1″)
Score the long cardstock strip at 9.8cm (3 5/8″) from both ends.
Die-cut an arch from the coloured cardstock piece using the largest arch die.
Die-cut arches from the DSP piece and the larger Basic White piece using the third largest arch die.
Dir-cut the smallest arch in Basic White using the fourth largest die.
Adhere the large coloured arch to the cardstock base in the centre area between the folds.
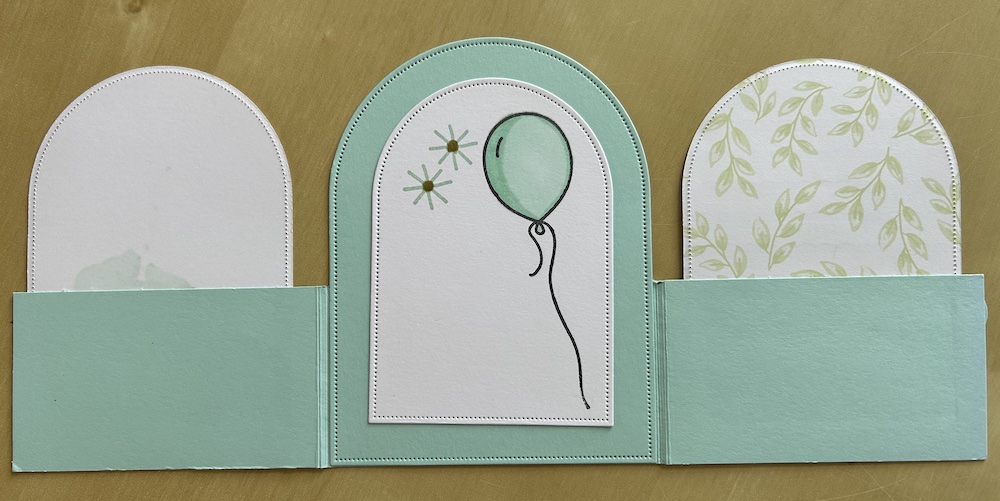
Stamp a decoration on the smallest Basic White arch – I used the balloon and the starburst from Arched Wishes stamp set. I stamped the balloon in Memento (then coloured it using blends) and then stamped the starburst in the coordinating ink (Pretty in Pink or Pool Party)
Stick the completed inner panel centrally to the middle (back) arch as shown below:
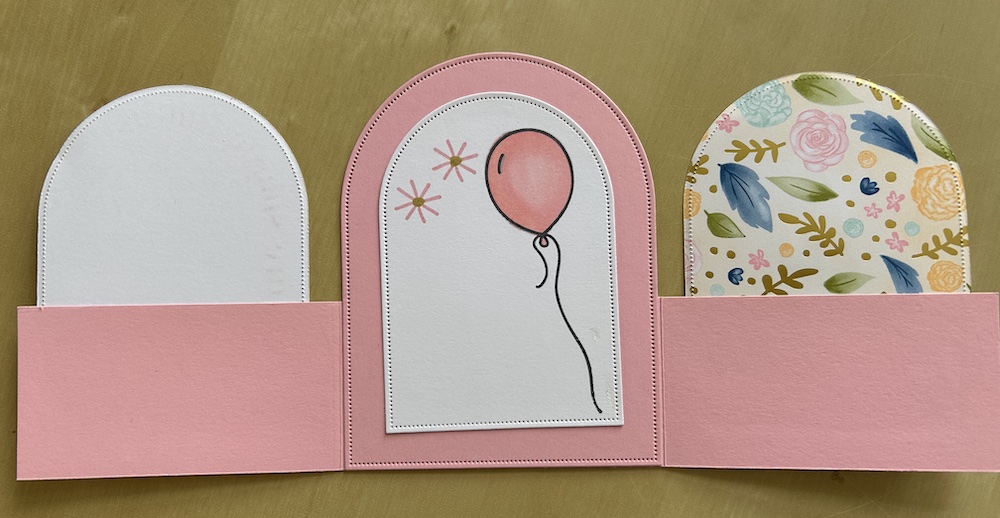
Now fold the right hand strip inwards and stick the DSP panel to it, making sure it is central against the inside panel at the back. See the video if you are unsure.
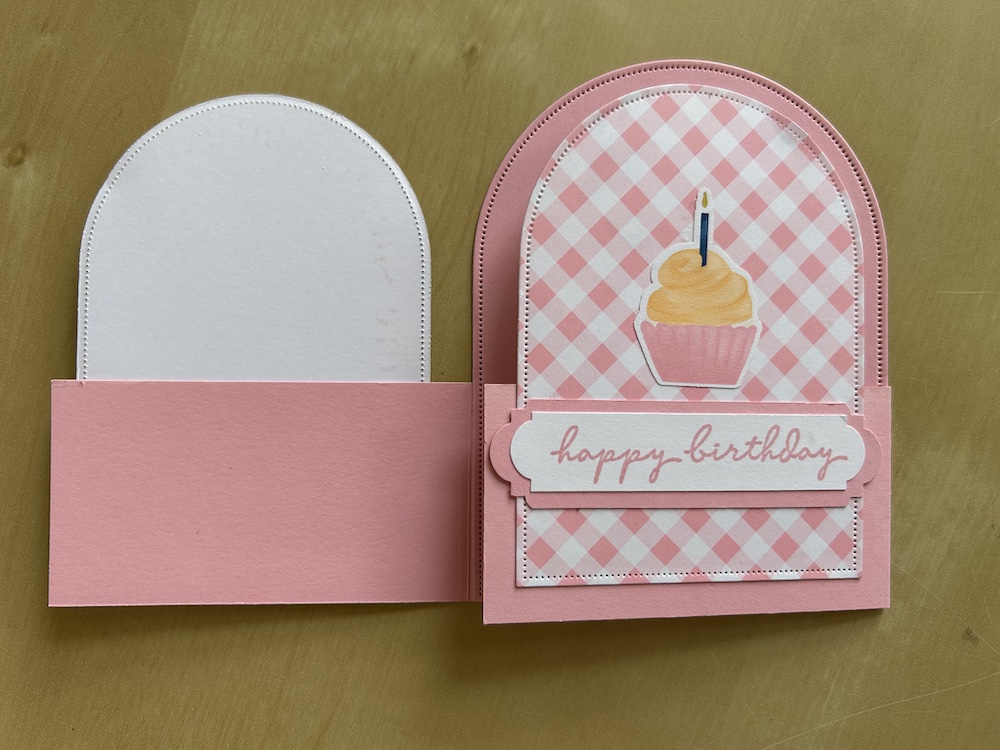
Stamp your greeting (I used the Arched Wishes Happy Birthday ) on the Basic White strip. Shape the ends using the Treasured Tags punch. Alternatively you could just shape the ends by cutting them diagonally.
Stick this sentiment to the coloured card strip and again shape the ends using the punch or by cutting them.
Adhere the completed sentiment strip flat to the DSP as shown. Add a decoration – either stamp an image, colour adn cut out, or use a pre-printed and die-cut image from the Wildflower Birthday DSP pack. Just remember not to use dimensionals as this is a second fold in the card!
Here is my Pretty in Pink arch shaped card opened to show you:
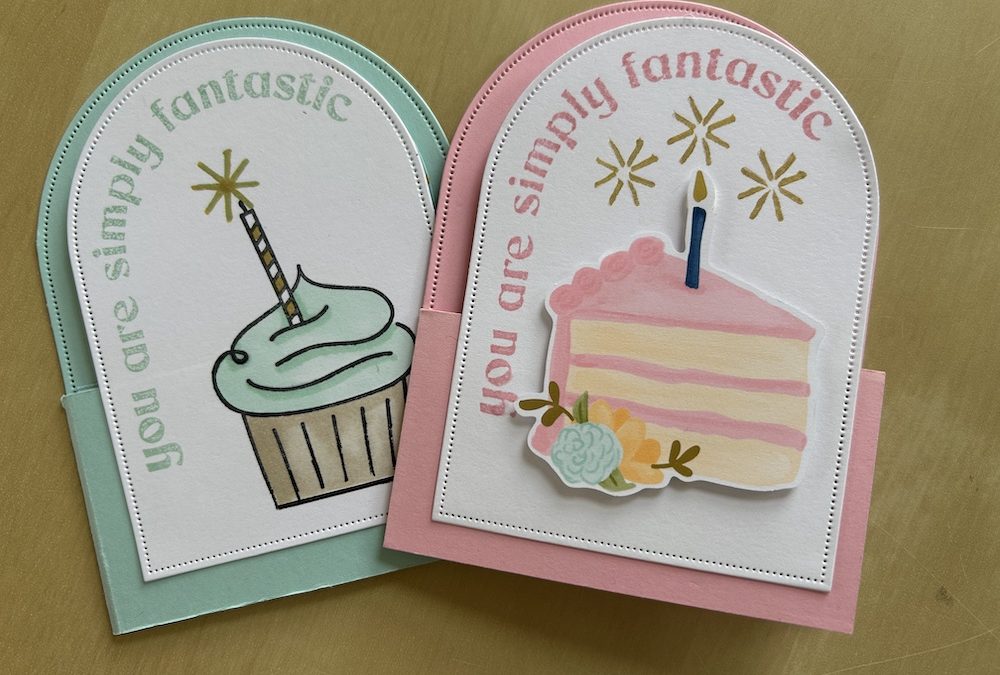
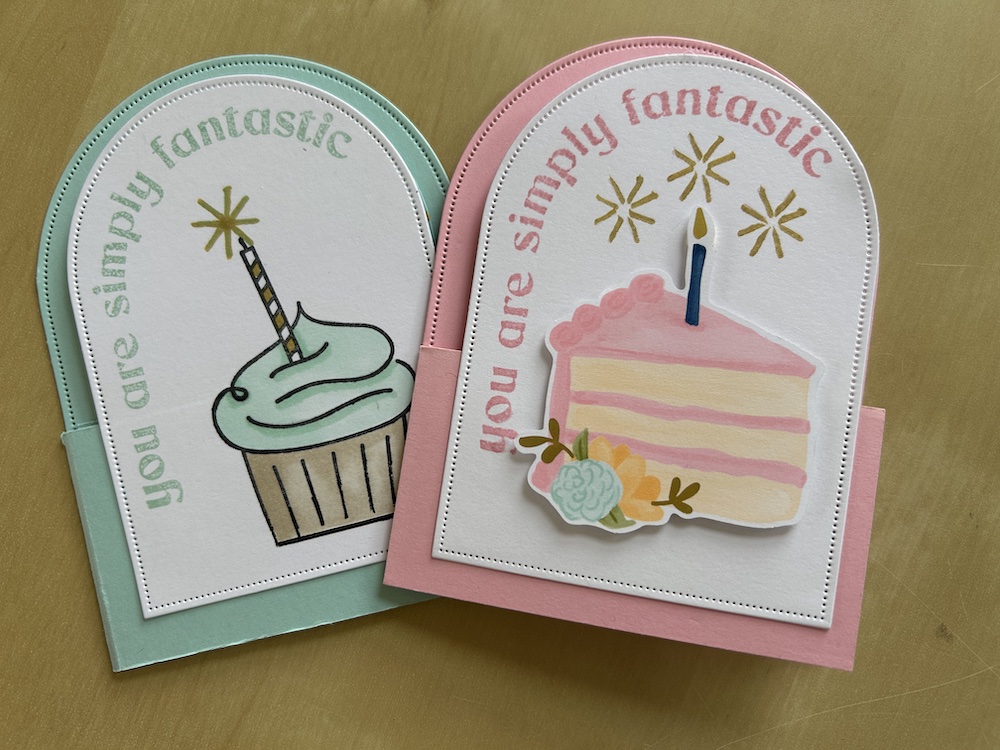
Stamp your curved greeting on the final front Basic White panel. I used the one from the Everyday Arches set, stamped in Pretty in Pink ink.
Add decoration to the front of your arch shaped card – either stamp and cut out an image, such as the cupcake, or use a pre-printed image from the DSP pack for the pink card. I stamped and coloured the image for the Pool Party card.
Stick the completed arch to the left hand base strip, lining it up carefully so it lies directly over the DSP arch on the second fold. See the video if you are unsure. You arch shaped card is now complete!
Here is the video of me making the pink arch shaped card:
I hope you like this card and will have a go at making one – please show me what you come up with.
Thank you for taking the time to read my post.

Don’t forget – you get a FREE pdf when you place any order with me as your demonstrator. And, if your order is over £40, you will also get to choose stuff from my online shop to the value of your order!
Product List ![Everyday Arches Dies [ 164629 ]](https://assets1.tamsnetwork.com/images/EC042017NF/164629s.jpg "Everyday Arches Dies [ 164629 ]") | ![Pretty In Pink A4 Cardstock [ 163794 ]](https://assets1.tamsnetwork.com/images/EC042017NF/163794s.jpg "Pretty In Pink A4 Cardstock [ 163794 ]") | |||
![Pool Party A4 Card Stock [ 124391 ]](https://assets1.tamsnetwork.com/images/EC042017NF/124391s.jpg "Pool Party A4 Card Stock [ 124391 ]") | ||||
![Basic White A4 Cardstock [ 166781 ]](https://assets1.tamsnetwork.com/images/EC042017NF/166781s.jpg "Basic White A4 Cardstock [ 166781 ]") | ![Stampin' Cut & Emboss Machine [ 149653 ]](https://assets1.tamsnetwork.com/images/EC042017NF/149653s.jpg "Stampin' Cut & Emboss Machine [ 149653 ]") | ![Multipurpose Liquid Glue [ 154974 ]](https://assets1.tamsnetwork.com/images/EC042017NF/154974s.jpg "Multipurpose Liquid Glue [ 154974 ]") |
![Everyday Arches Photopolymer Stamp Set (English) [ 164623 ]](https://assets1.tamsnetwork.com/images/EC042017NF/164623s.jpg "Everyday Arches Photopolymer Stamp Set (English) [ 164623 ]")
![Arched Wishes Cling Stamp Set (English) [ 165428 ]](https://assets1.tamsnetwork.com/images/EC042017NF/165428s.jpg "Arched Wishes Cling Stamp Set (English) [ 165428 ]")
![Wildflower Birthday 12" X 12" (30.5 X 30.5 Cm) Designer Series Paper & Sticker Sheet (English) [ 166620 ]](https://assets1.tamsnetwork.com/images/EC042017NF/166620s.jpg "Wildflower Birthday 12\" X 12\" (30.5 X 30.5 Cm) Designer Series Paper & Sticker Sheet (English) [ 166620 ]")
![Pretty In Pink Classic Stampin Pad [ 163807 ]](https://assets1.tamsnetwork.com/images/EC042017NF/163807s.jpg "Pretty In Pink Classic Stampin Pad [ 163807 ]")
![Pretty In Pink Stampin’ Blends Combo Pack [ 163824 ]](https://assets1.tamsnetwork.com/images/EC042017NF/163824s.jpg "Pretty In Pink Stampin’ Blends Combo Pack [ 163824 ]")
![Pool Party Classic Stampin' Pad [ 147107 ]](https://assets1.tamsnetwork.com/images/EC042017NF/147107s.jpg "Pool Party Classic Stampin' Pad [ 147107 ]")
![Pool Party Stampin' Blends Combo Pack [ 154894 ]](https://assets1.tamsnetwork.com/images/EC042017NF/154894s.jpg "Pool Party Stampin' Blends Combo Pack [ 154894 ]")

