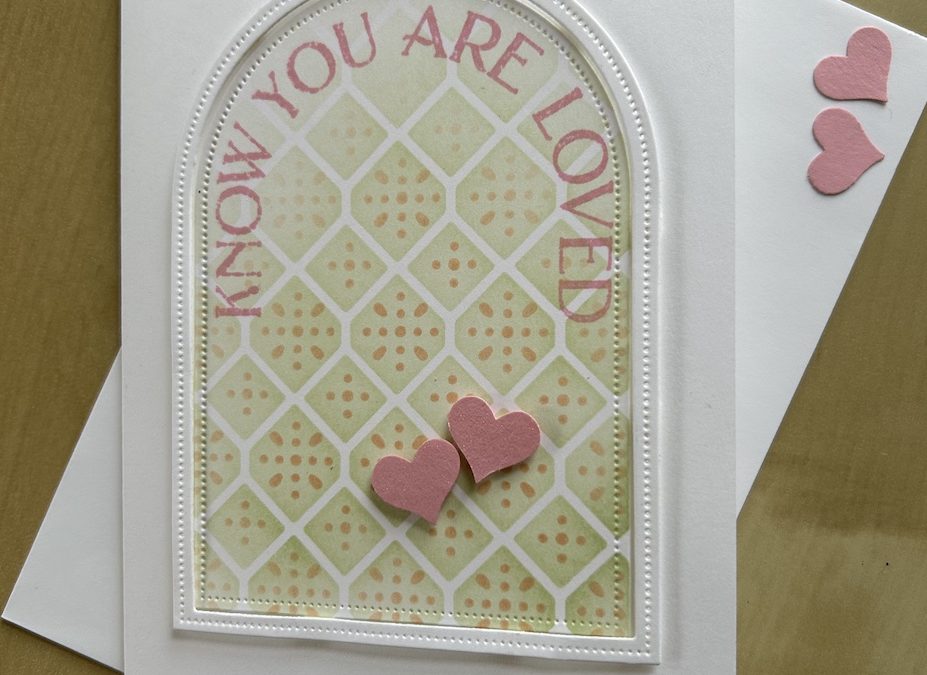
Love is in the air! It’s Valentine’s Day today and I’ve made a last-minute Valentine’s arch frame card, so my husband has had two cards today!
I used the new Everyday Arches bundle for this last minute Valentine’s arch frame card. This bundle is part of the Online Exclusive In the Air suite that also includes some gorgeous DSP, ribbon and gems. The arch dies are so versatile and I have plans for them for the future. Here I’ve used them to make the frame and inset for the arch frame card front. I also used the Linked Together masks for the blended background pattern, another Online Exclusive product. You can see all these products here.
The Everyday Arwches bundle and Linked Together masks together total just over £55, so you will earn a free item this month with Saleabration – and the new SAB items are stunning! (Alphabet dies anyone?). But you only have three more weeks to make the most of it…. Let me know if you want anything or order yourself using my Host Code NV2RHSRU.
To make this card you need:
- Basic White card base 21cm x 14.8cm (8½” x 5½”)
- Basic White piece 10cm x 13cm for die cutting
- Soft Sea Foam, Petal Pink and Pretty in Pink ink pads
- Blending brushes
- Linked Together masks
- Everyday Arches bundle
- Scrap of Pretty in Pink cardstock
Score the base card at 10.5cm (4¼”) and burnish well.
Take the third and fourth largest dies from the Everyday Arches set. Place them carefully on the Basic White piece and use washi tape or low tack tape to hold them down in position, making sure the gap between the dies is even all the way round. Die-cut and carefully remove the centre and arch frame pieces. See the video below if you are unsure.
Using the no 1 mask, place it over the centre arch die-cut piece. With a blending brush, pick up Soft Sea Foam ink and blend the colour through the mask, keeping it lighter around the top where the sentiment will be stamped. Once you are happy with the colour, remove the mask.
Place the no 5 mask over your coloured piece taking care to line up the pattern centrally in the blended diamonds. Use a second blending brush and Petal Pink ink to cover the pattern again not colouring around the top area. Use the picture below to help you work out where to add the ink.
Stamp Know You Are Loved around the top of this arch in Pretty in Pink ink. Adhere the completed piece to the card front, then stamp “so very much” underneath, directly onto the card front. Or you could stamp onto a seperate piece of card if you prefer!

Cut some mini dimensionals in half and use these around the arch frame. Add this to the card as shown.
I used an old retired heart punch to punch two small hearts and added them to the card. I coloured them with Wink of Stella to add some glitz.
I completed the card by using stamps from the Lifetime of Love stamp set inside the card and added two more punched out hearts.

Here is the video on how to make this arch frame card:
The products I used are listed below.
I hope you like this card and will have a go at making one – please show me what you come up with.
Thank you for taking the time to read my post.

Don’t forget – you get a FREE pdf when you place any order with me as your demonstrator. And, if your order is over £40, you will also get to choose stuff from my online shop to the value of your order!
Product List ") |  |  | ||
 |  |  |


During Saleabration (7 January to 28 February 2025) there are two fabulous joining options:
– Option 1: Get £130 products for £99 PLUS a bonus stamp set and TWO Stampin’ Write marker packs of your choice (value £220!)
– Option 2: Get £130 products for £99 PLUS an additional £30 of products (value £160!).
Contact me for more details or visit the Join Me page.