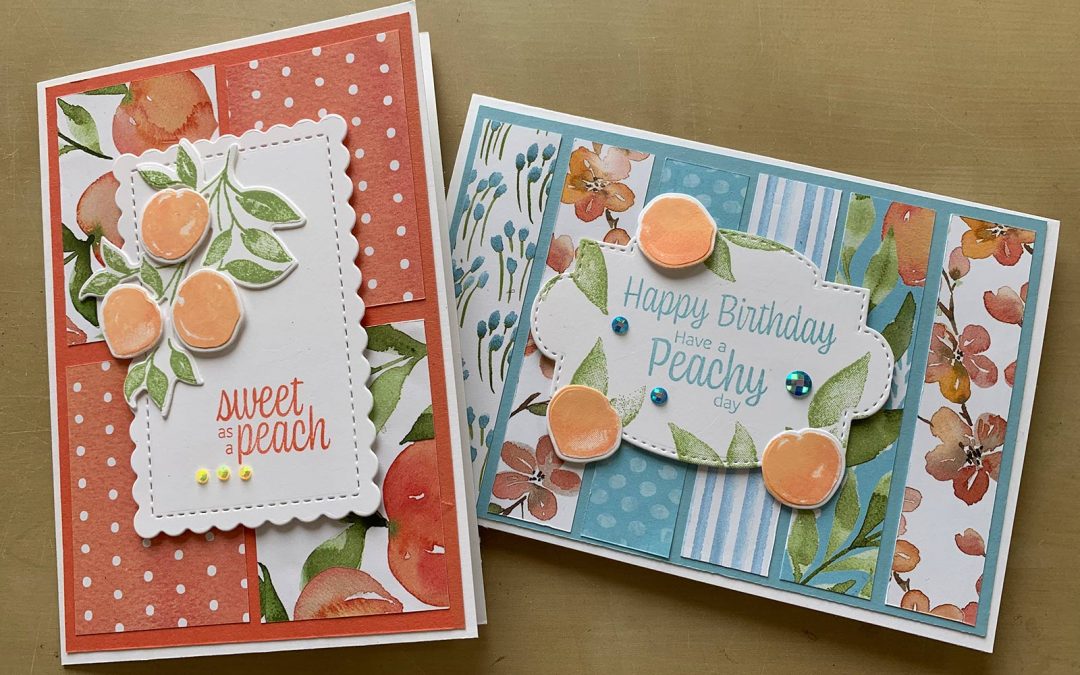
Here are some cards and gift bags made from this gorgeous stamp set and dies bundle. Don’t forget to stamp or decorate your envelopes, too! I used DSP to cover the rear envelope flap and you can stamp small peaches or flowers onto the front.
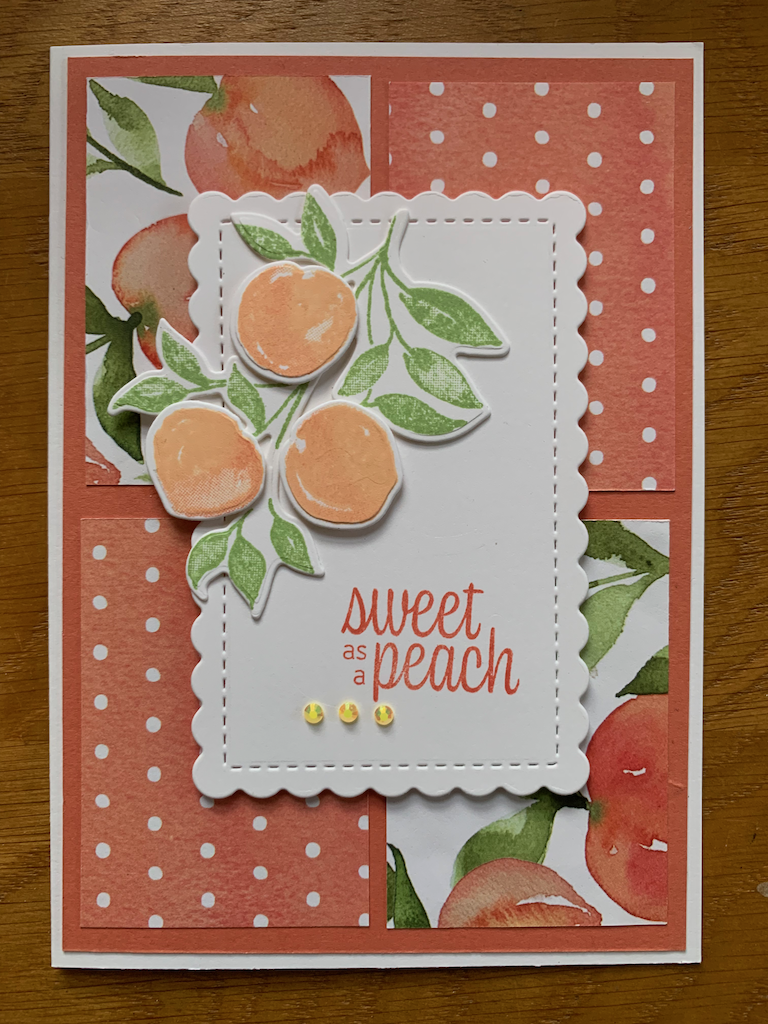
Measurements
- Base card 21cm x 14.8cm, score in half 10.5cm
- Calypso Coral card layer 10.1cm x 14.3cm
- DSP rectangles 4.5cm x 6.5 cm (four)
- Basic White 10cm x 7cm plus scraps for stamping
Stick DSP rectangles to Calypso Card layer and stick that to your base card
Stamp long leaves and small peaches on scrap card. Cut out using the matching dies.
Stamp sentiment onto die cut white scalloped rectangle. Adhere to base with dimensionals
Add leaves to white card then add peaches with dimensionals. Add gems as shown
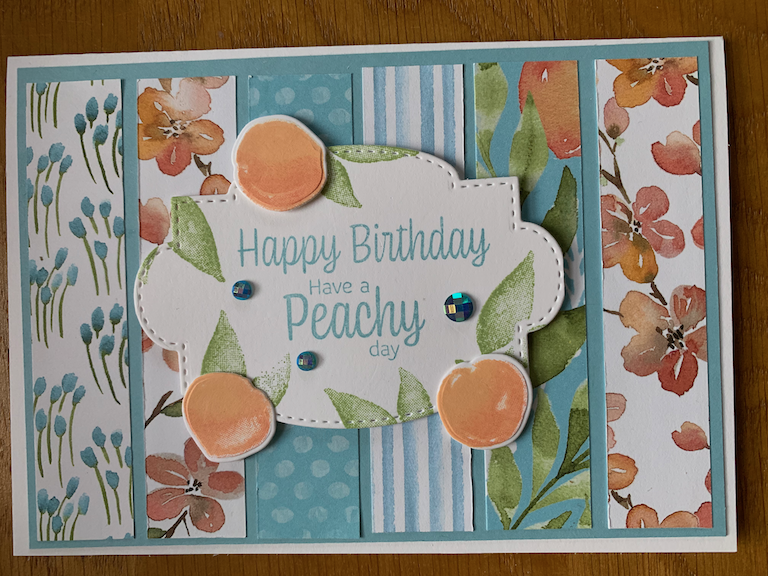
Measurements
- Base card 14.8cm x 21cm, scored in half LS at 10.5cm for both cards
Card A:
- Balmy blue layer 14.3cm x 10cm
- DSP strips 2cm x 9.5cm (use 4-6 assorted patterns)
- Basic white die cut shape for centre plus scraps
Stick DSP strips evenly onto Balmy Blue layer and adhere to base card.
Stamp sentiment and leaves onto centre shaped piece. Stamp small peaches onto scrap and die cut.
Attach with dimensionals. Add gems as required.
Card B:
- DSP layer 1: 14.3cm x 10cm
- DSP layer 2: 13.3cm x 9cm
- Basic white scraps for sentiment and leaves
Stick DSP layers onto base card
Stamp sentiment and die cut out.
Stamp leaves x 3 onto scrap and die cut.
Assemble as shown using dimensionals for sentiment and curling leaf edges

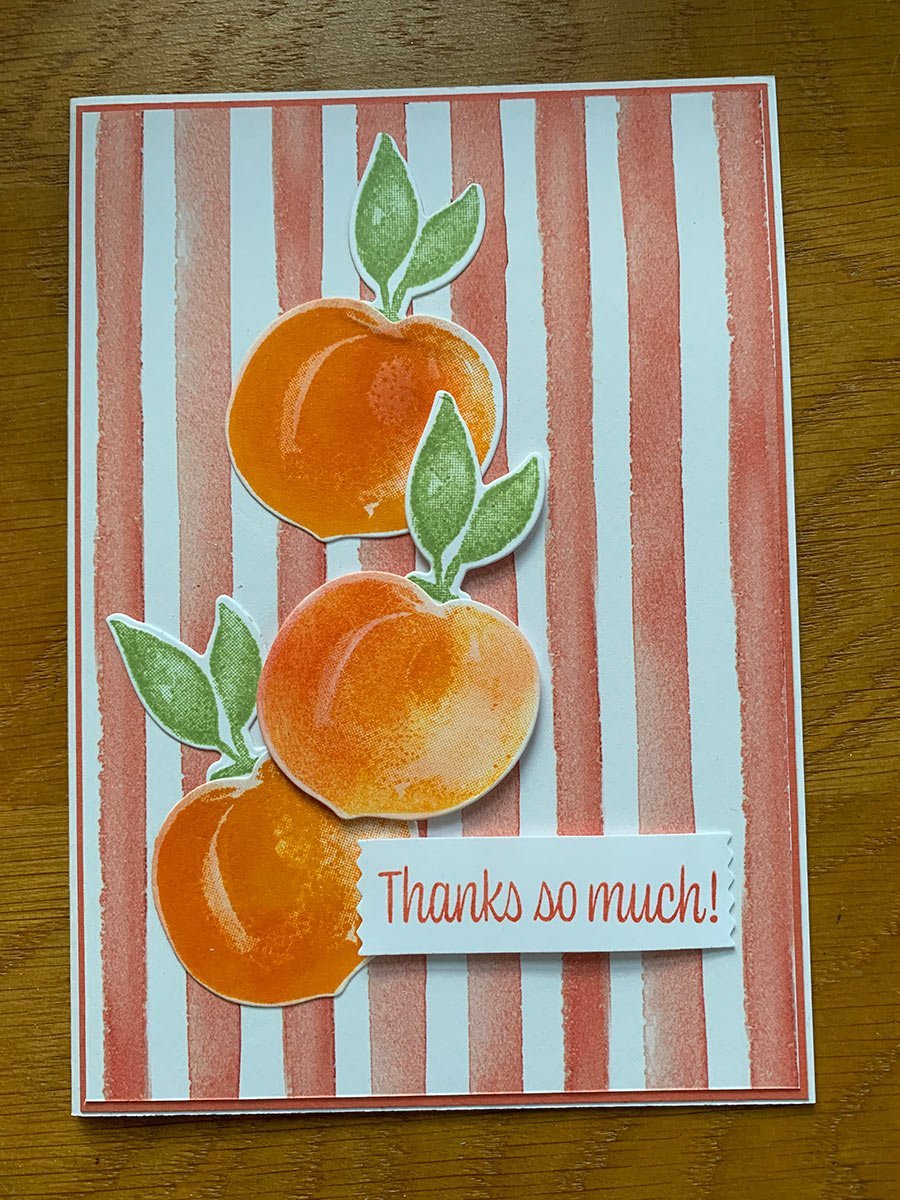
Measurements
- Base card 21cm x 14.8cm, scored in half at 10.5cm
- Calypso Coral layer 14.5cm x 10.2cm
- DSP layer 14.3cm x 10cm
- Basic White card for stamping
Stick DSP to Calypso Coral layer carefully (there is only a tiny edge!) then stick both onto base card.
Stamp three large peaches and three leaves on scrap white card and die cut.
Stamp sentiment and die cut (I used a stitched rectangles die)
Adhere peaches and leaves to the base. The centre ones are on dimensionals. Add leaves just behind the other two as you stick them down directly to the card.
Add sentiment with dimensionals.
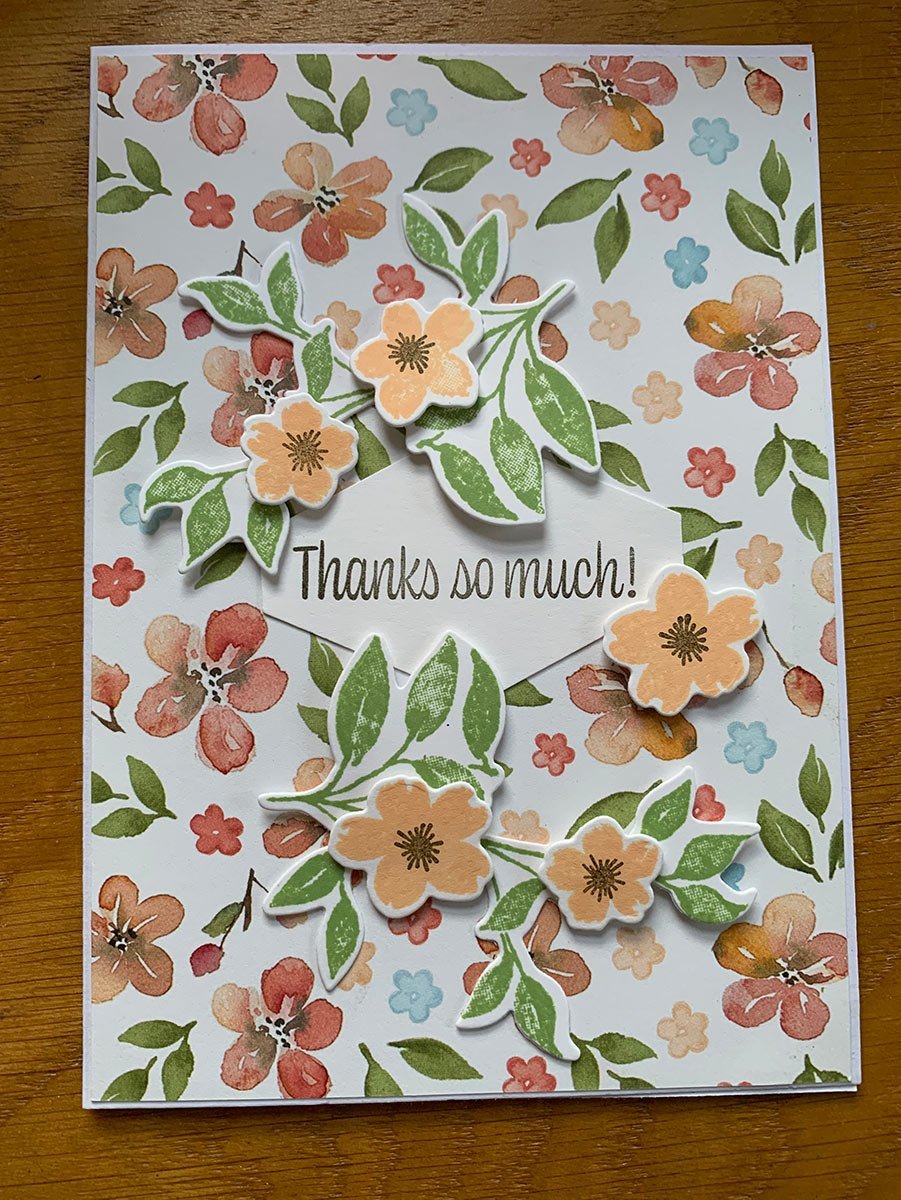
Measurements
- Base card 21cm x 14.8cm, scored in half at 10.5cm
- DSP layer 14.5cm x 10.2cm
- Basic White card for stamping
Stick DSP to base card
Stamp two sets of flowers and two large leaf clusters onto white card. Add early espresso centres to the flowers and die cut everything out.
Stamp sentiment onto white card and punch out using the Tailored Tag punch or similar.
Stick sentiment directly to DSP in the centre then add the leaves and flowers around it, using dimensionals.

Measurements
- Small bag: DSP 4” x 10.5”
- Tall bag: DSP 6” x 10.5”
Both scored the same:
- Score LS at 2.5”, 5”, 7.5”, and 10”
- Score SS at 1.25”
Fold and carefully burnish all score lines.
Trim small flap by mitring corners and cutting off the bottom part
Cut from bottom to the 1.25” score line along each longitudinal score line.
Glue outside of flap then stick bag together
Glue bottom pieces or fold as a box carton, whichever you prefer.
To form the star top, squeeze gently in from each side and pinch the folds
Tie ribbon around or use clip to close.
Decorate as required.

