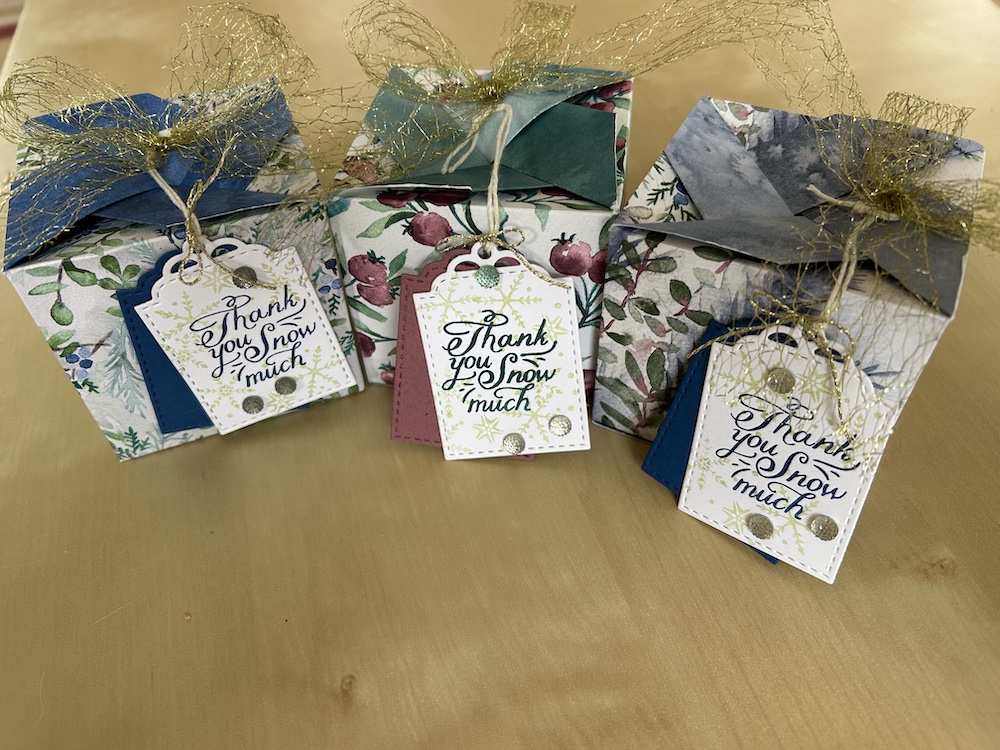
I bought a large box of Lindt chocolate teddies this year to make into gifts for family and friends, so of course I had to make some gift boxes for them! Here is the first. This Lindt teddy gift box fits five small Lindt chocolate teddies or similar sweets. It folds closed at the top and has an optional fitted insert.
You can use any DSP you want to make these boxes, so they are suitable for any occasion, not just for Christmas. The box will fit many small gifts. It measures 7.5cm x 7.5cm x 7cm (2 15/16″ x 2 15/16″ x 2 3/4″)
You can make this box using inch measurements, but they are fiddly, so I recommend using centimtres.
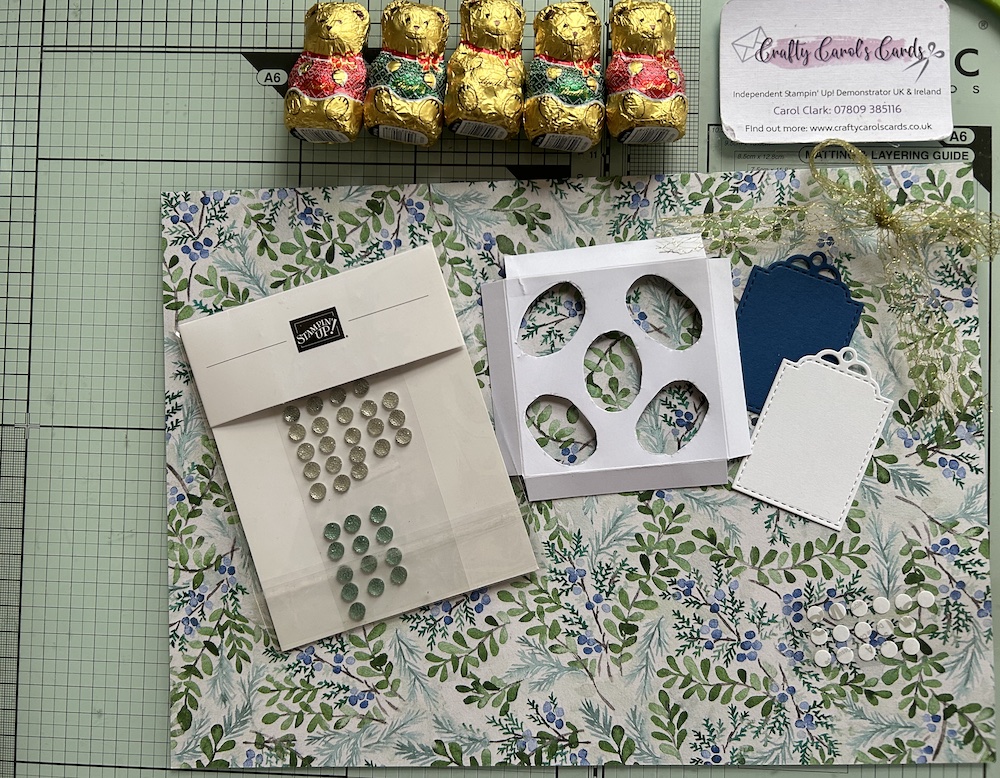
You will need:
- DSP with a coordinating colour on the back 30.5cm x 22cm (12″ x 8¾”) NB BEST TO WORK IN CM FOR THIS BOX
- Optional insert Basic White 9.5cm x 9.5cm (3 3/34″ x 3 3/4″)
- Paper snips
- Paper trimmer
- Basic White tag
- Coordinating colour tag
- Gems/ribbon to decorate
The instructions are given below, or watch the video on my YouTube channel here.
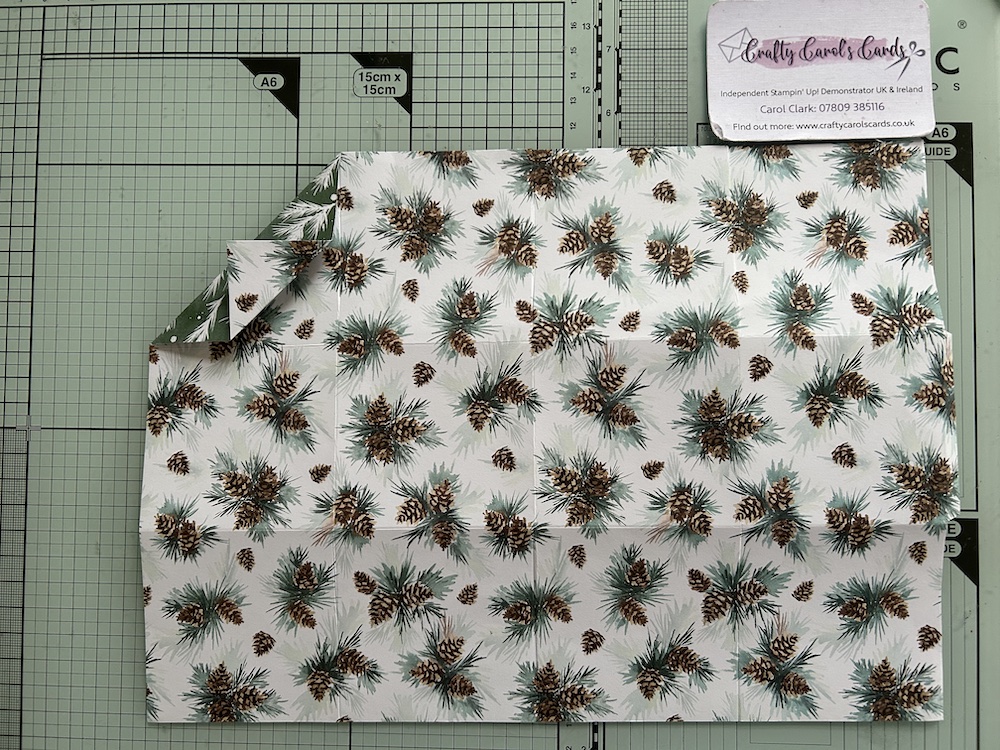
Score the DSP on the long side at 7.5cm, 15cm, 22.5cm and 30cm (2 15/16″, 5 7/8″, 8 13/16″ and 11 3/4″)
Turn through 90 degrees and score the short side at 7.5cm and 14.5cm (2 15/16″ and 5 13/16″)
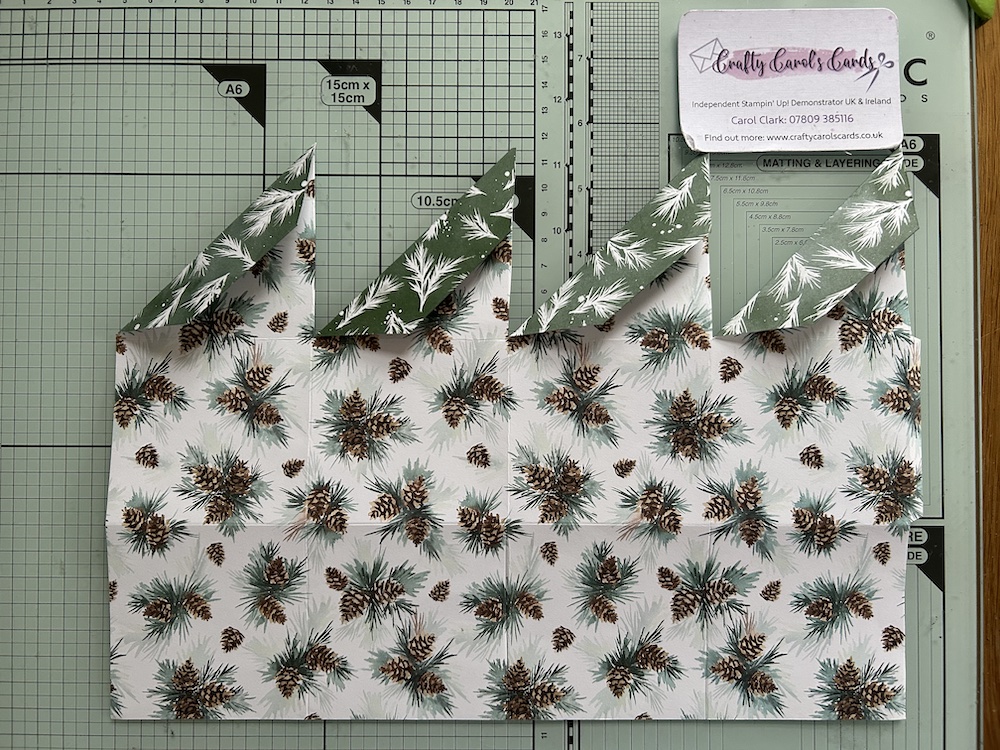
Fold and burnish all scorelines. Trim the tiny end flap by cutting off the pieces above and below the two centre folds. Cut up every score line from the top down the the top score line and from the bottom to the bottom score line.
Lie the paper right side up. Take the top corner of the top square of DSP and fold down to the opposite fold line, then turn the corner back out to meet the original fold:
Repeat for the other three pieces. Here is a close-up of the folds:
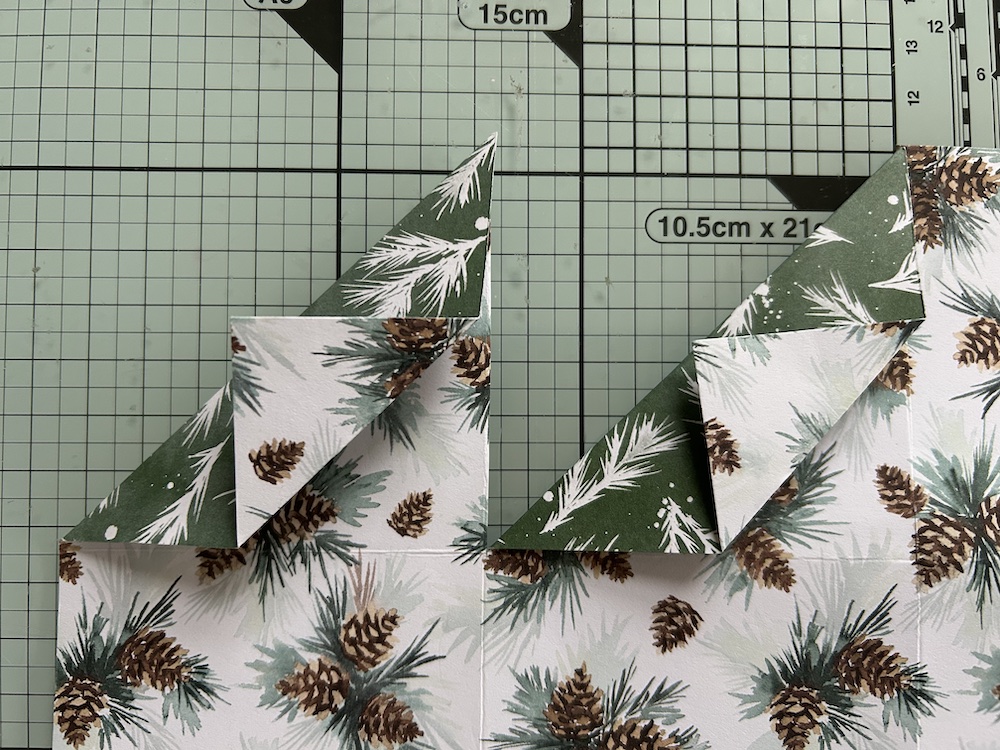
Now take each folded back corner and fold it under. Like this:
Turn the DSP over and fold one side inwards. Add tape to the tiny tab in the centre then fold the other side over to join the box together.
Decide which side you want st the front, then fold in the opposite botto tab, glueing the side tabs on top then finally the front tab to form the bottom of the box.
Making the optional insert
Score the Basic White insert at 1cm (1/2″) on each side. Cut off each corner on the outside of the score lines.
I used a template I had previously made to mark where I needed the oval shapes for my teddies – sadly, I could not find a suitable die! The Lindt teddy base measures 3cm x 2cm. Draw round your template (or teddies!) then cut out. I found it easiest to push my pokey tool through each oval in the centre so there was a hole for my scissors to go through.
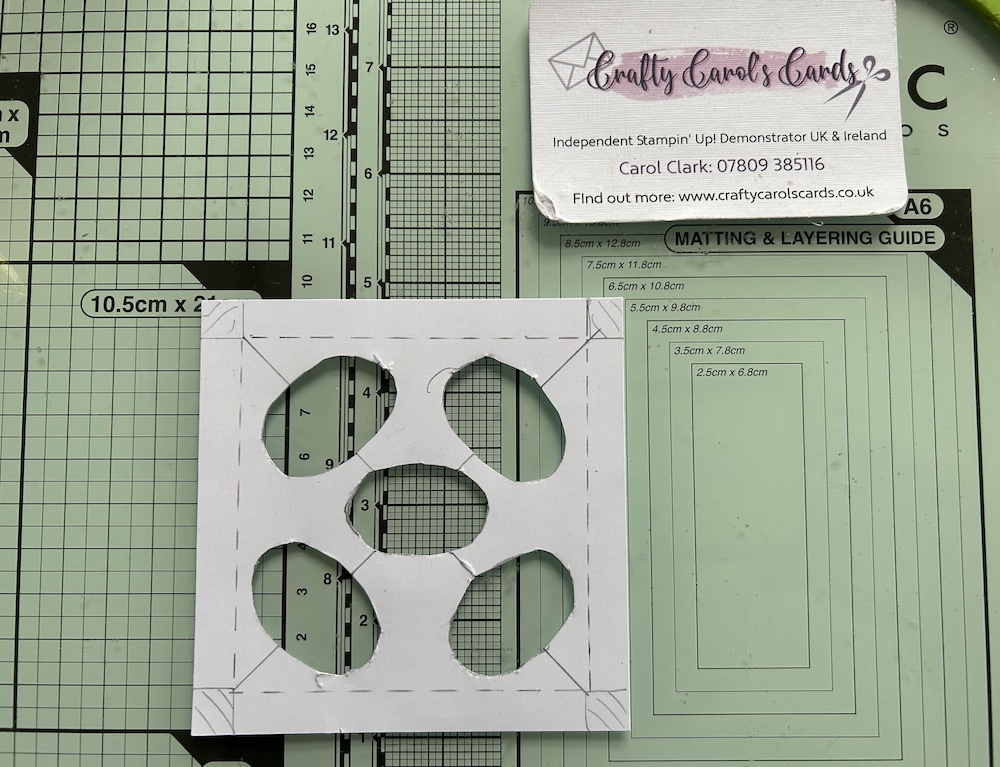
Fold back on each score line then insert into your box. This insert also provides additional stability for the box.
Add your Linidt teddies.

Fold over each top flap in turn, tucking the final one under the first one.
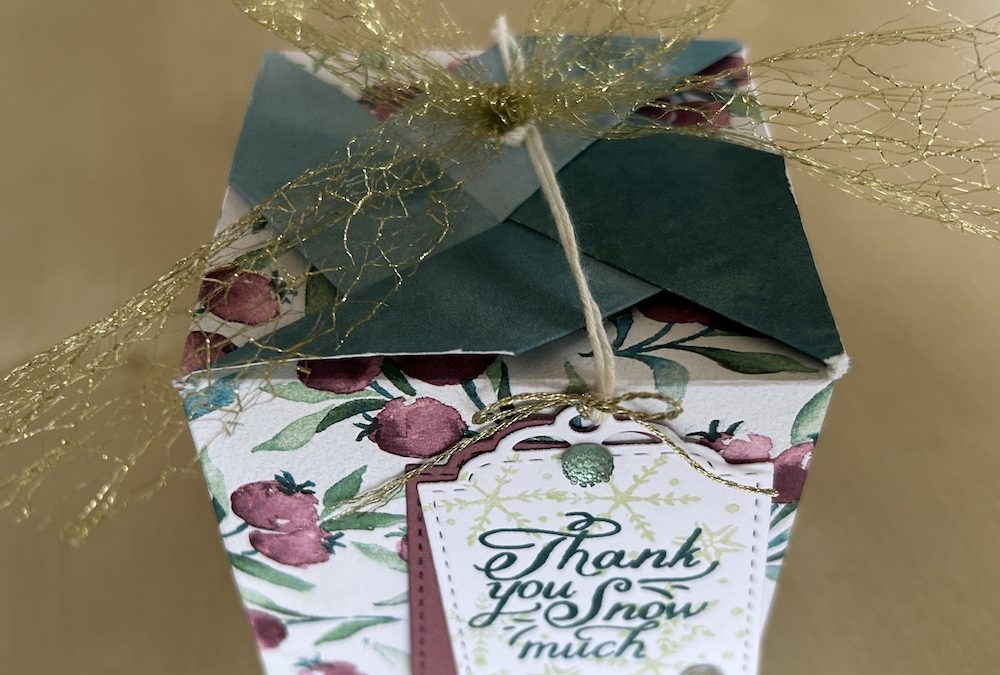
I added a ribbon bow using a glue dot and a tag made from one die-cut tag in a coordinating colour cardstock and a stamped Basic White tag. I used a retired stamp set for this – see the video. White twine completes the tag. I added a gold twine bow around the top for added bling, then added a few gems before adding the tag to the top of the box around the gold bow.
Here is the video link again on my YouTube channel @craftycarolscards.
These boxes are quick to make and so useful as small gifts for Christmas.
In a couple of weeks, I’ll be bringing you a different gift box for Lindt teddies – watch out for that one!
Thank you for taking the time to read my post.

Don’t forget – you get a FREE tutorial of eight cards when you place an order with me. There’s a different set every month. And, if your order is over £40, you will also get to choose stuff from my online shop to the value of your order!
