Do you end up with loads of scrap pieces of DSP that are just too big to throw away so you keep them? I do! So for my Live this week I decided to show an easy way to use up these DSP scraps to make some simple Christmas cards.
To make cards like mine you need:
- Basic White cardstock 21cm x 14.8cm scored at 10.5cm (8½” x 5½” scored at 4¼”)
- Scraps of DSP, two each of two coordinating pieces
- Scraps of coordinating colour cardstock for layers and sentiment
- Basic White scrap for sentiment
- Ribbon or gems to decorate
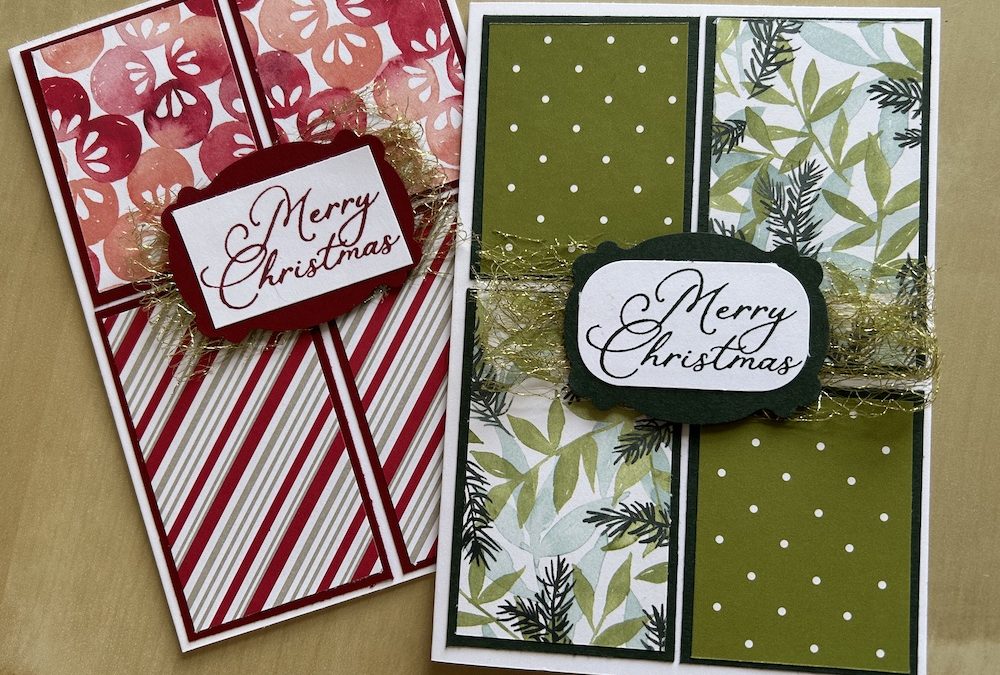
For my prototypes, I cut two pieces of DSP 4.5cm x 6cm and two from contrasting DSP scraps 4.5cm x 7.5cm. (Note: If your pattern is directional, make it run vertically.)
The layer cardstock pieces are two of 4.9cm x 6.4cm and two 4.9cm x 7.9cm.
(NB I have not worked out the sizes for US cardstock, however, you can use the method I describe in the video.)
Putting the card together is very simple. Stick each DSP scrap to the corresponding sized cardstock piece.
Lay them on the front of your card base. You can either stick the two smaller same sized pieces at the top of your card, or alternate a smaller and larger piece top and bottom – this produces a different effect, as seen in my cards here:
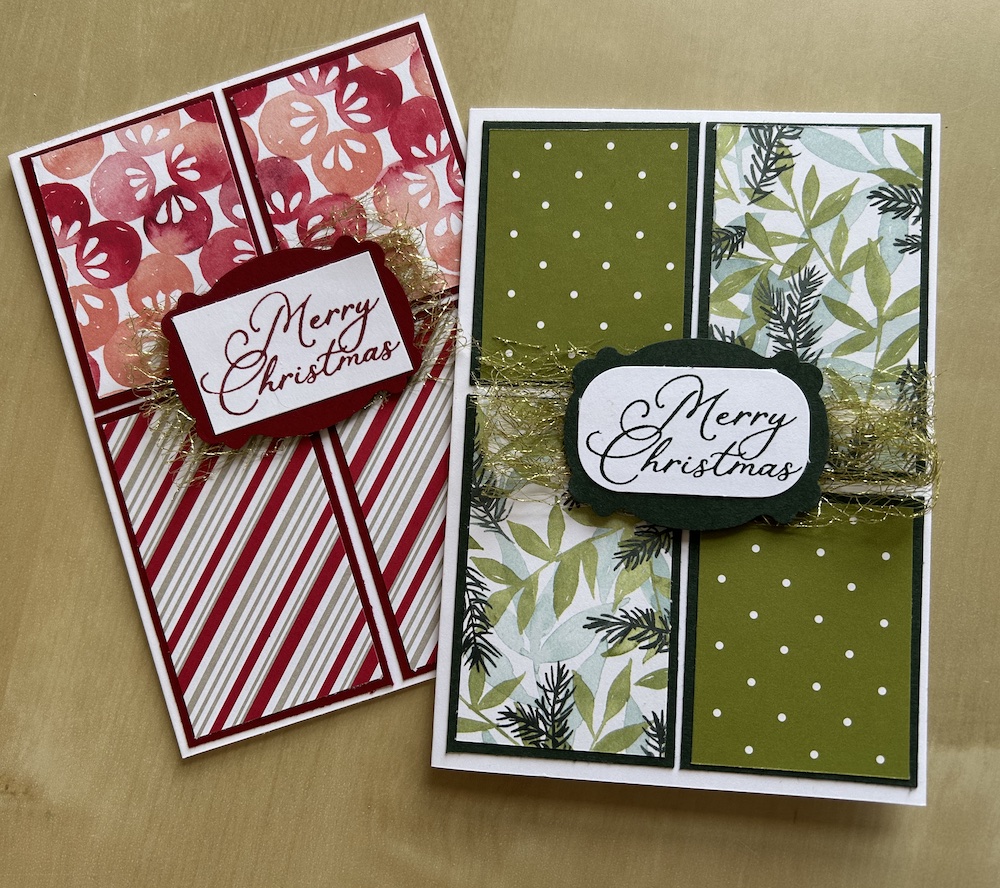
Stamp your sentiment on a small scrap of Basic White in the same colour as your layer cardstock. Add to a die-cut or punched base from the colour cardstock and add to the centre front of your card using dimensionals.
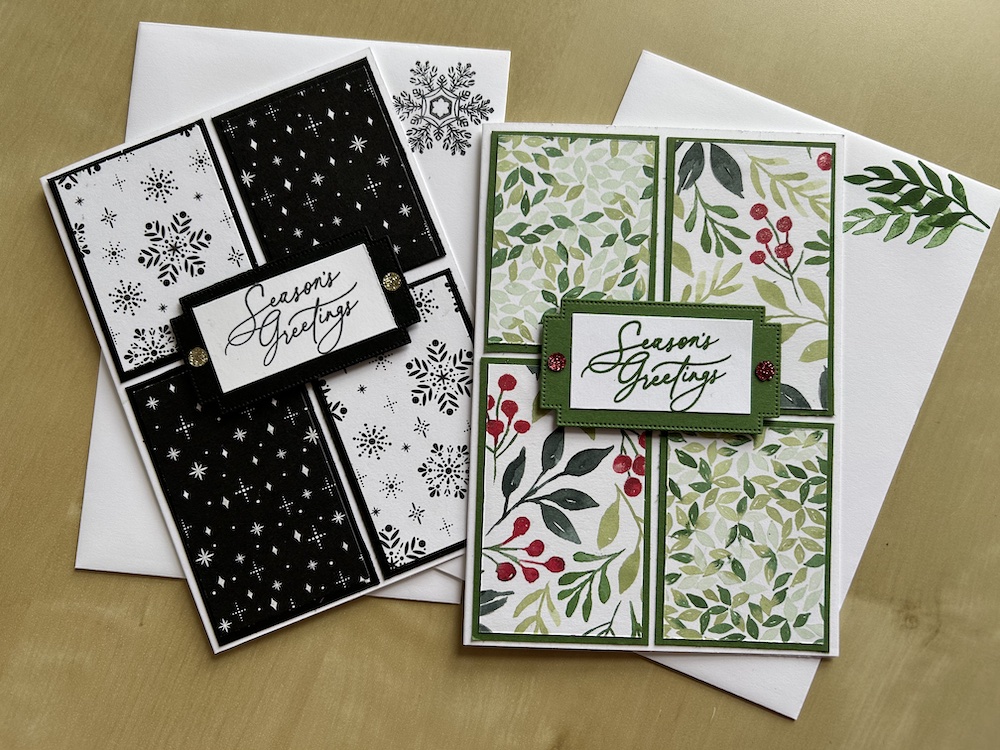
I added ribbon beneath my sentiments for the cards above, or you can add gems, as in the cards I made in the Live.
Watch the video to see how I worked out what size to cut the pieces. I’ve also described my method below, if you want to make your own sized ones.
Here are the two cards I made in the Live:
I worked out the DSP and cardstock layers by taking the width of my base card front (10.5cm) minus three times 0.5cm borders (two for outside and one in the centre) = 9cm. So I cut my pieces of DSP 4.5cm wide.
The same method was used for the depth/length of the pieces – the depth of the cardstock front is 14.8cm, minus 1.8cm (two 0.5cm borders for the outside and one for between the pieces) = 13.3cm. You could either cut this equally in two giving two pieces of the same size, or do what I did which is make one set smaller and one larger, thus my two small DSP scrap pieces were 6cm long and two larger pieces 7.3cm long.
I wanted my cardstock layers to be 0.2cm larger on each side, thus the width of the layers was 4.9cm and the length/depth for the smaller pieces was 6.4cm and for the larger pieces 7.7cm.
Applying the same method to US cardstock and using 1/4″ borders gives DSP scrap pieces that are (smaller) 1 3/4″ wide by 2″ deep and (larger) 1 3/4″ wide by 2 3/4″ deep. Cardstock pieces need to be slightly larger each way by approx 1/8″ each side. Do try them out first using scrap paper or card to make sure they look right!
You can apply this method to any size or orientation card.
Why not have a go at making your own DSP scraps cards? Let me know how you get on!
Thank you for taking the time to read my post.

Don’t forget – you get a FREE tutorial of eight cards when you place an order with me. There’s a different set every month. And, if your order is over £40, you will also get to choose stuff from my online shop to the value of your order!
