This card looks incredibly complicated, but it really is not! Just follow the instructions (or watch the video) and make a truly WOW card for a special friend or family member. There is an inner panel that is threaded through an outer panel to make this double interlocking card.
I first saw this made by Connie Stewart. She called it a Concertina card, but I have adapted it for UK centimetre measurements. Connie’s US cardstock measurements are given in brackets.
I made this double interlocking card for a special birthday. I used the retired Latte Love stamp set and retired DSP because I wanted a coffee theme for my coffee-mad husband, but you can make this card using any theme you want. In my Craft’n’Chat class today one attendee made a golf-themed double interlocking card, another made a flower double interlocking card and so on.
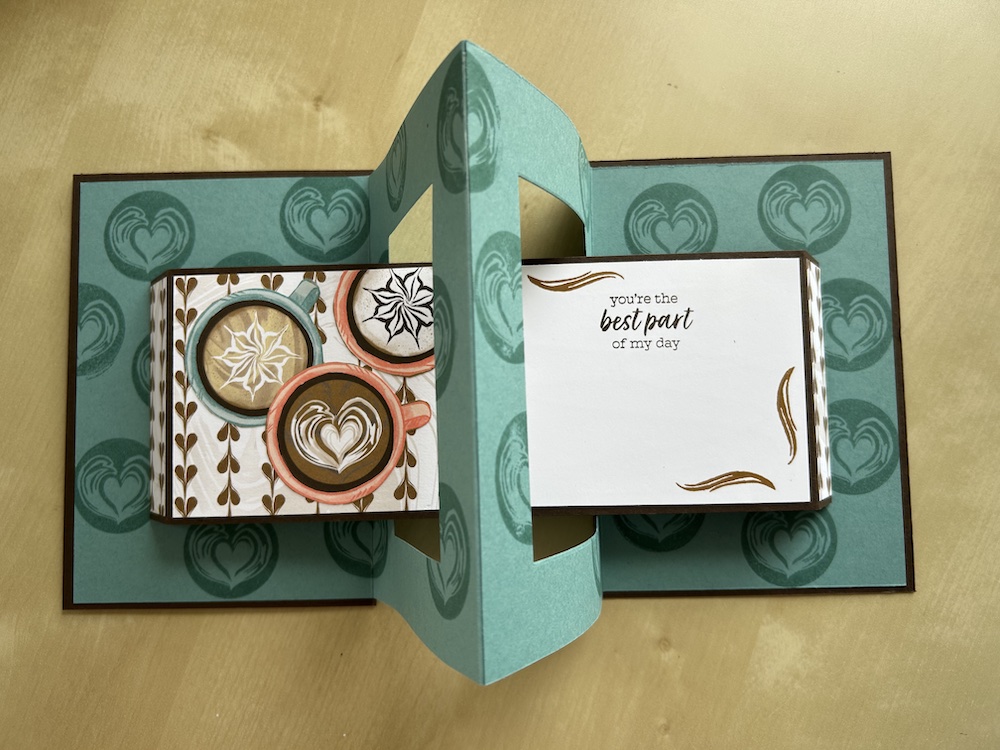
Here is the double interlocking card open to show the interlocking panels:
Choose your coloured cardstock on whatever DSP you are using. I used Early Espresso and Lost Lagoon.
To make this card you will need:
- Early Espresso colour 1 cardstock (x2): 10.5cm X 14.8cm (4¼” x 5½”)
- Early Espresso colour 1 cardstock: 29.5cm x 8cm (11″ x 3¼”)
- Lost Lagoon cardstock 21cm x 14.3cm (8½” x 5¼”)
- Lost Lagoon cardstock 20cm x 14.3cm (8″ x 5¼”)
- DSP 10cm x 14.3cm (4” x 5¼”) – cut a second piece for the back of your card if you wish
- DSP 9.5cm x 7.5cm (3 3/8″ x 1 7/8″)
- DSP (x2): 2cm x 7.5cm (½” x 3″)
- Basic White 9.5cm x 7.5cm (3 3/8″ x 1 7/8″)
- Basic White 4.5cm x 8.5cm (1¾” x 3 3/8″)
- Copy paper 10cm x 14.3cm (4″ x 5¼”)
- Scraps of Early Espresso and Basic White for sentiment
- Early Espresso and Lost Lagoon ink pads
- Textured Notes dies
Watch the video at the end of this post for how to make this card, or instructions are given below if you prefer.
Score the long piece of Early Espresso on the long side at 2.4cm, 4.8cm, 14.8cm, 24.8cm and 27.2cm (¾”, 1½”, 5½”, 9½” and 10¼”) – this forms the inside interlocking piece. Fold the outer two scores on each side as mountains and the centre one as valley. Burnish well.
Score the larger piece of Lost Lagoon on the long side at 10cm and 20cm (4″ and 8″). Score the smaller piece at 10cm (4″).
Take the middle-sized Textured Notes die and stick to the centre of your copy paper using low tack tape. Mark the top of the paper. Stick to the right-hand side panel of the larger scored Lost Lagoon piece and run through your die-cutting machine. Keep the card cut-out to decorate the front of your card and discard the copy paper cut-out.
Now carefully remove the copy paper template and place on the left-hand panel of the other Lost Lagoon piece, making sure the marked top in in the right place! Die-cut and keep the die-cut card centre for another project.
Add adhesive the the narrow overlap strip on the larger piece and stick the two pieces together. This forms the centre interlocking piece for the card.
Stamp a pattern randomly across this completed piece as shown above and in the video using the same colour ink pad.
Stick the two Early Espresso panels to the outer sides of this piece.
Adhere the DSP piece to the front (and one to the back if you wish).
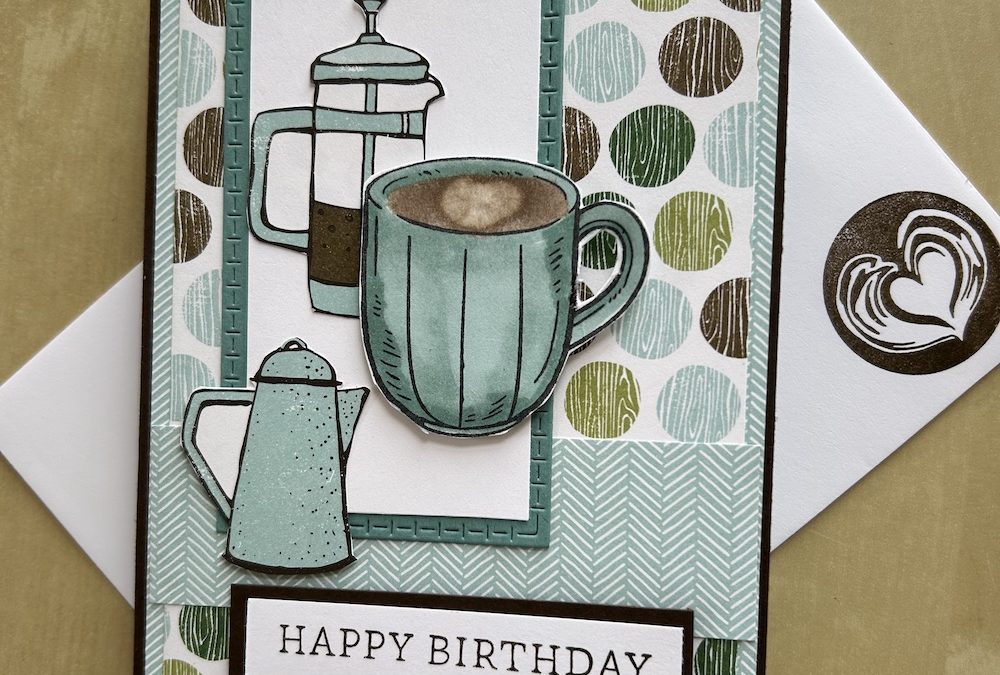
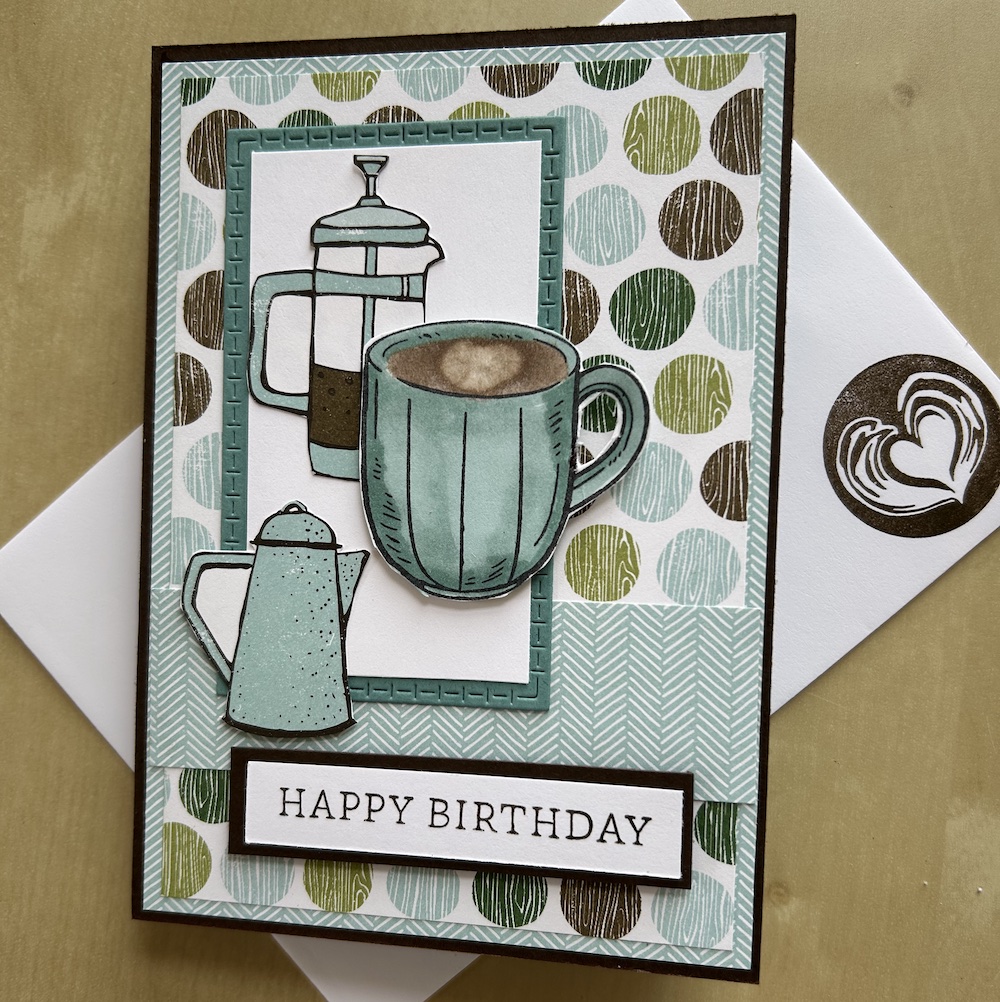
Stamp your front decoration to the Basic White 4.5cm x 8.5cm (1¾” x 3 3/8″) panel – I used fussy cut images from my DSP. Stick this panel to the kept die-cut Lost Lagoon panel and add to the front of your card.
Stamp a sentiment in Early Espresso, layer on a scrap of the same colour cardstock and add to the card front. Here is my completed card front. I added a second strip of DSP across it as well:
Complete the inside interlocking piece by stick the two small strips of DSP to the SECOND panel in on each side of the Early Espresso long piece. Add the larger DSP panel to the left-hand larger panel on this strip.
Stamp any decoration and greeting you want on the Basic White panel then stick to the right-hand side larger panel on the strip. This completes the inner interlocking piece.
I also added some fussy-cut images from my DSP to this piece as you can see above and in the video.
To put the card together, slide the inner strip through the holes in the main card piece, lining up the centre folds. See the video if you are unsure.
Open the card on one side. Fold the sides of the inside interlocking strip outwards at the SECOND scoreline (the fold should be touching the outside edge of the card). Holding everything in place, add adhesive to the outer (non-DSP) panel ONLY then close the card to stick it down. Repeat for the second side. See the video if you are unsure.
Don’t forget to decorate your envelope!
Here is the video of how to make the card:
I hope you like this card and will have a go at making one – please show me what you come up with.
Thank you for taking the time to read my post.

Don’t forget – you get a FREE pdf when you place any order with me as your demonstrator. And, if your order is over £40, you will also get to choose stuff from my online shop to the value of your order!
Product List ![Textured Notes Dies [ 165555 ]](https://assets1.tamsnetwork.com/images/EC042017NF/165555s.jpg "Textured Notes Dies [ 165555 ]") | ![Early Espresso A4 Card Stock [ 121686 ]](https://assets1.tamsnetwork.com/images/EC042017NF/121686s.jpg "Early Espresso A4 Card Stock [ 121686 ]") | ![Lost Lagoon A4 Cardstock [ 133686 ]](https://assets1.tamsnetwork.com/images/EC042017NF/133686s.jpg "Lost Lagoon A4 Cardstock [ 133686 ]") |
![Early Espresso Classic Stampin' Pad [ 147114 ]](https://assets1.tamsnetwork.com/images/EC042017NF/147114s.jpg "Early Espresso Classic Stampin' Pad [ 147114 ]")
![Lost Lagoon Classic Stampin' Pad [ 161678 ]](https://assets1.tamsnetwork.com/images/EC042017NF/161678s.jpg "Lost Lagoon Classic Stampin' Pad [ 161678 ]")
