I first saw a chevron fold gatefold card made by the lovely Connie Stewart. I have adapted it for our UK measurements for our June free Craftalong on Zoom. Please sign up for my emails so you’ll get all the info about the next Craftalong, there’s one each month and you can join in for free.
It uses strips of DSP folded to make the chevron fold shapes and stuck in a zigzag down the side of the card. I had to have a few goes to get it right for our UK size cards, but I finally did it!
Choose your colour cardstock to match your DSP. For the card pictured, I used Pretty in Pink with Wildflower Birthday DSP. For the Craftalong, I used Fresh Freesia cardstock and Lovely Garden DSP.
You’ll need quite a few pieces for this card (US measurements in brackets):

- Card base 21cm x 14.8cm (8½” x 5½”)
- Basic White 10cm x 14.3cm (4” x 5¼”)
- DSP panels: 1 of 6cm x 14.3cm (2¼” x 5¼”)
- 2 of 3.5cm x 14.3cm (1½” x 5¼”)
- 6 of 6cm x 2.5cm (5 of 2½” x 1″) for the chevron folds
- Scraps of colour cardstock and Basic White for sentiment
- Stamp set for sentiment and inside (and envelope) decoration (I used Regal Flora)
Score your card base at 4cm and 14.5cm (1¾” and 6″) to form the gatefold card. Fold each side in and burnish well.
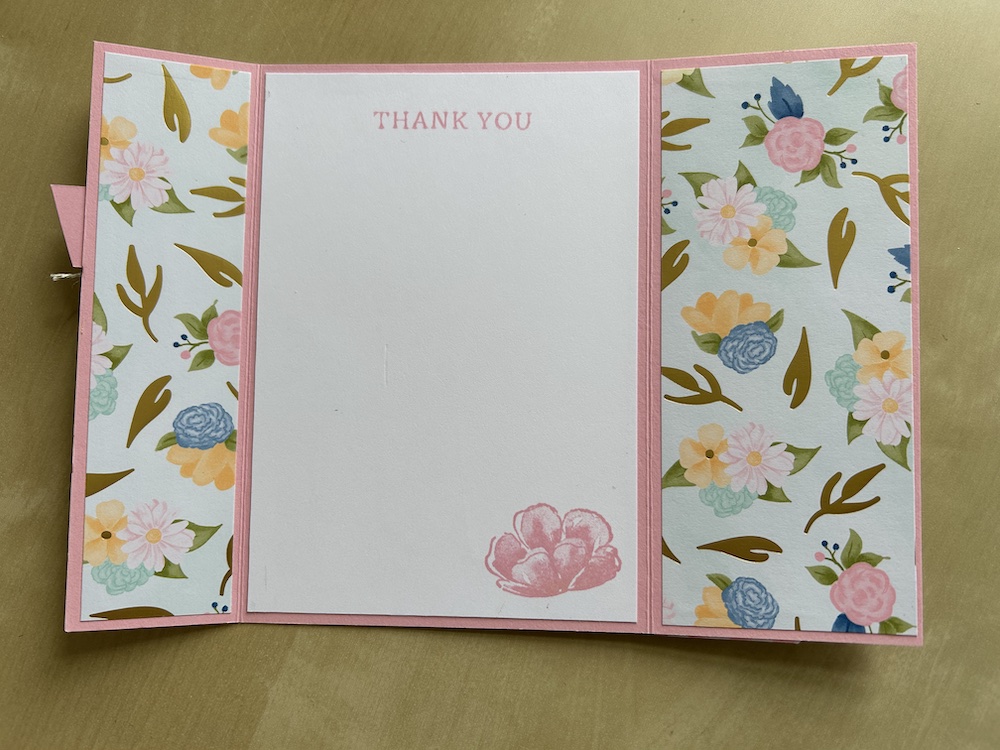
Adhere the large DSP panel to the right-hand inside flap and one of the two smaller pieces to the left-hand inside flap. The Basic White panel is for the centre of the inside but don’t stick this down until you have stamped it!
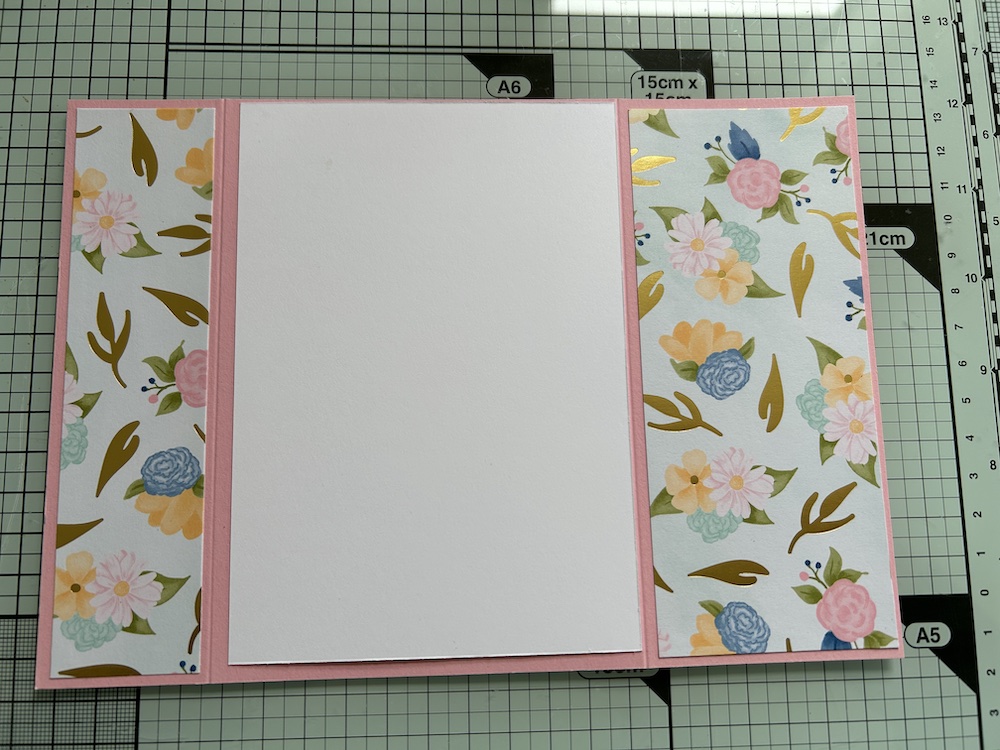
Stick the second smaller DSP panel to the outside of the left-hand flap of your card.
Stamp a sentiment and a decoration onto your Basic White panel and adhere inside your card.
Now fold your chevron pieces. Divide the pieces into two sets of three. For one set, fold the bottom right-hand corner up to the top edge and the top left-hand corner down to the bottom edge as shown below. Reverse this for the other set of three, so that the top right-hand corner folds down to the bottom edge and the bottom left-hand corner folds up to the edge.
Stick these chevron folds centrally down the left-hand card front. Start at the top and line up the first chevron fold with the top edge. Line up the second (opposite) chevron fold with the bottom fold on the top piece. Continue on down the chevron fold card as shown.
Stamp your chosen sentiment onto a scrap of Basic White in the ink to match your colour cardbase. (I chose the Thanks from the Thoughtful Wishes stamp set.) I angled one side then stuck it to a scrap of coloured cardstock then trimmed it to leave a small border all the way round.
Stick the sentiment to the left -hand gatefold panel – it is fine to overlap onto the right-hand panel, but make sure you don’t add any glue on any overlapping bit.
Add a twine or ribbon bow and some gems if you wish to finish the card.
Don’t forget to decorate your envelope!
I hope you like this card and will have a go at making one – please show me what you come up with.
Thank you for taking the time to read my post.

Don’t forget – you get a FREE pdf when you place any order with me as your demonstrator. And, if your order is over £40, you will also get to choose stuff from my online shop to the value of your order!
Product List ![Pretty In Pink A4 Cardstock [ 163794 ]](https://assets1.tamsnetwork.com/images/EC042017NF/163794s.jpg "Pretty In Pink A4 Cardstock [ 163794 ]") | ![Basic White A4 Cardstock [ 166781 ]](https://assets1.tamsnetwork.com/images/EC042017NF/166781s.jpg "Basic White A4 Cardstock [ 166781 ]") | |||
![Linen Thread [ 104199 ]](https://assets1.tamsnetwork.com/images/EC042017NF/104199s.jpg "Linen Thread [ 104199 ]") | ![Paper Trimmer [ 152392 ]](https://assets1.tamsnetwork.com/images/EC042017NF/152392s.jpg "Paper Trimmer [ 152392 ]") |
![Wildflower Birthday 12" X 12" (30.5 X 30.5 Cm) Designer Series Paper & Sticker Sheet (English) [ 166620 ]](https://assets1.tamsnetwork.com/images/EC042017NF/166620s.jpg "Wildflower Birthday 12\" X 12\" (30.5 X 30.5 Cm) Designer Series Paper & Sticker Sheet (English) [ 166620 ]")
![Regal Flora Cling Stamp Set (English) [ 164157 ]](https://assets1.tamsnetwork.com/images/EC042017NF/164157s.jpg "Regal Flora Cling Stamp Set (English) [ 164157 ]")
![Pretty In Pink Classic Stampin Pad [ 163807 ]](https://assets1.tamsnetwork.com/images/EC042017NF/163807s.jpg "Pretty In Pink Classic Stampin Pad [ 163807 ]")
