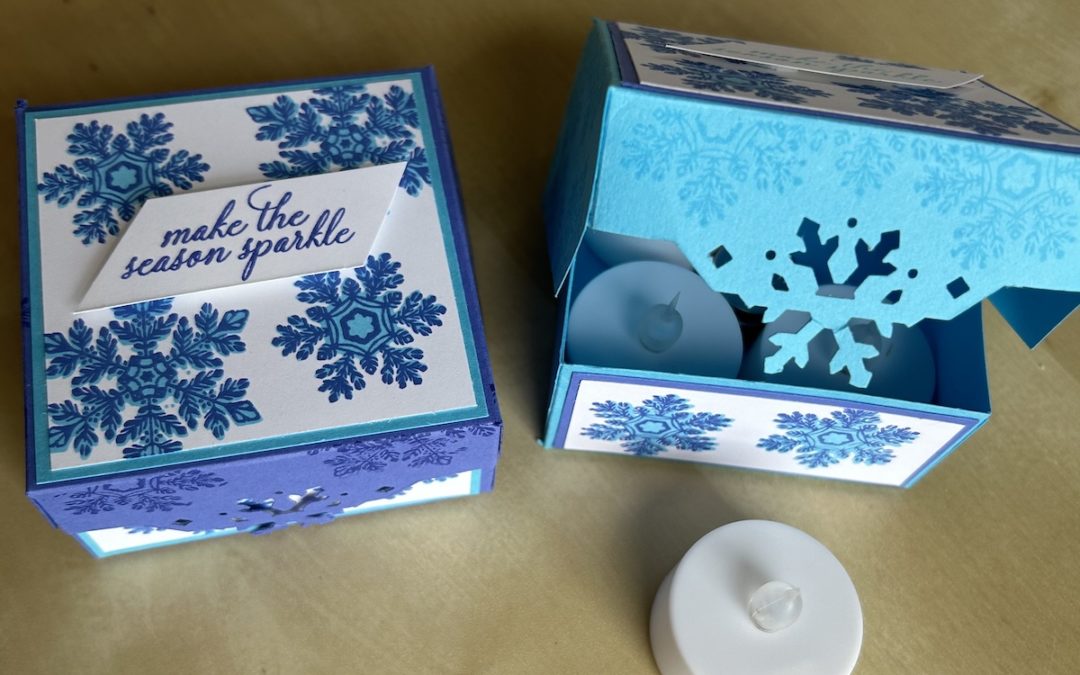
This cute snowflake box uses the Sparkling Snowflake tag topper and is welcome as my final project for 2023. It fits four battery tea lights (and their batteries), or several sweets or a small gift.
You could make this gift box for any occasion using a different punch for the edge. I got the idea from Heidi Smith and adapted it to fit my battery tea lights.
Here is the video on how to make this snowflake box. The measurements and instructions are given below.
You will need:
- Orchid Oasis cardstock base 28cm x 16 cm
- Tahitian Tide cardstock layer 1 7.6cm x 7.6cm
- Tahitian Tide cardstock layer 2 3.6cm x 7.6cm
- Basic White layer 1 7.2cm x 7.2cm
- Basic White layer 2 3.2cm x 7.2cm
- Scrap of Basic White for sentiment
Score the long side of your cardstock base at 4cm, 12cm, 16cm and 24 cm. Score the short side at 4cm and 12cm.
Punch the middle on one short edge with the Sparkling Snowflake Tag Topper punch, lining it up with the two side score lines.
Burnish all score lines.
Cut off the end pieces level with the punched shape. Cut up each side score line and notch the narrowest pieces to form tabs as shown in the image below.
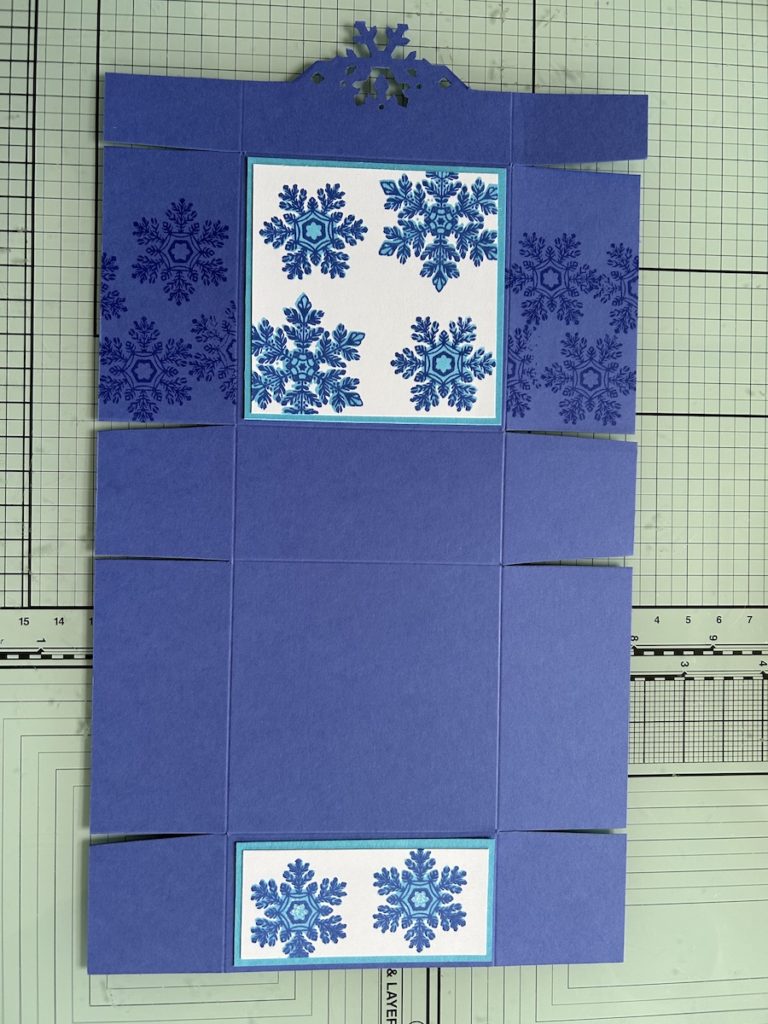
Stamp the smallest and middle Sparkling Snowflake outline stamps in Tahitian Tide randomly over each Basic White piece. Stamp the smallest and middle Sparkling Snowflake detailed stamps on top using Orchid Oasis. Also stamp the smallest detailed Snowflake stamp randomly across the two side flaps as shown above.
Glue each piece of stamped Basic White to the corresponding pieces of Tahitian Tide cardstock and glue the completed pieces to the base card as shown in the photo above.
Measure and mark with a pencil 1.8cm up and also across from the front outer corner of the two side flaps. Cut off the triangle between the marks and rub out any remaining pencil marks. Note: this is not strictly necessary but I preferred the look!
Make up the box base by glueing each unstamped side tab inside the larger unstamped box flaps. Fold the top of the box over then glue the front side tabs to ensure a good snug fit.
Stamp your sentiment onto the scrap of Basic White. I used the angle of the letters to slant the sides – watch the video to see how if you are unsure. Add to the top of the box using dimensionals.
I hope you have enjoyed by Christmas Countdown projects. I’ve ended up sharing many more than the original twelve planned! I wish you all a very happy, peaceful and enjoyable Christmas and I’ll be back next year.
Love to you all, Carol xx
Product List  |  | |||
 |  |
")


