I thought I’d give you two final projects this week as a bonus Christmas present!
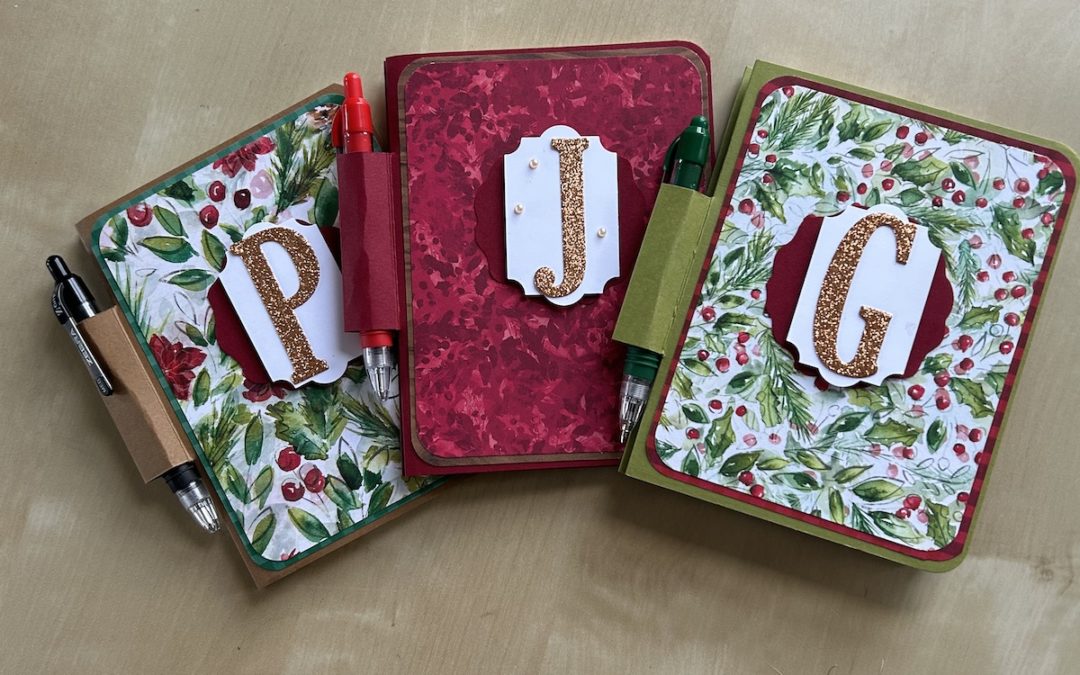
Here I show you how to make a pretty notebook and pen set for Christmas, although they could be used as a gift at any time of year using different colours and DSP. At this time of year they make a great stocking filler or they would be good small gifts for work colleagues.
I bought the notebooks and mini pens from Amazon.
Here is the video of how to make them. Measurements and instructions are below:
You will need:
- Colour cardstock 26cm x 14.4cm
- DSP layer 1: 10.5cm x 13.9cm
- DSP layer 2: 10cm x 13.4cm
- Scrap of Basic White approx 7cm x 4.5cm
- Scrap of cardstock or DSP approx 7.5cm x 7.5cm
- Shimmer or glitter card scrap
- Paper trimmer
I used the Joy of Christmas DSP and coloured cardstock to match. To make the set:
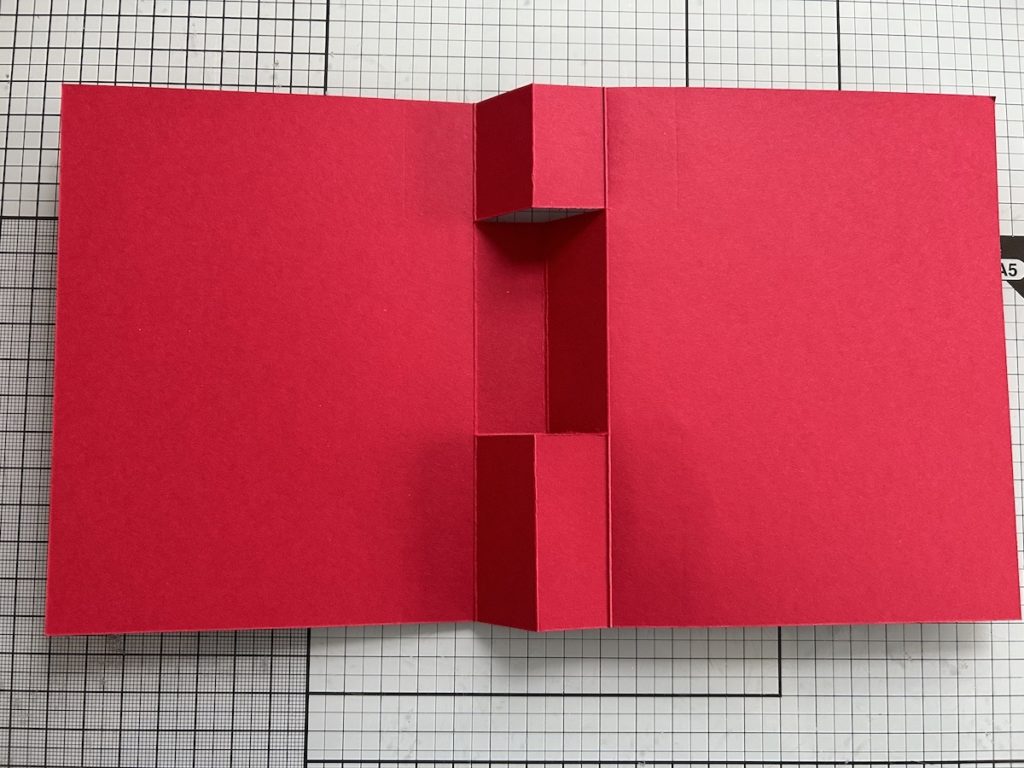
Score the cardstock on the long side at 11cm, 13cm and 15cm.
Turn the cardstock and measure to 5cm on the short side. Used the trimmer blade to cut a slit between the two outer score lines. (There is a centre line mark on the SU trimmer blade which makes it easy to line the cuts up exactly.) Move the cardstock to 11cm and cut a second slit between the score lines. This forms the pen holder.
Fold the two large outer flaps inwards. Fold the top and bottom score lines inwards and the centre pen holder one outwards. It should now look like this:

Use a corner rounder to round the top and bottom outside corners of the cover.
Slide the notebook into the holder above the inward-facing tabs. Glue the front cover to the holder. Turn over. Add glue or tape between the inward tabs and the back flap. Glue the back of the notebook to the inward tabs and the back cover.
Round all four corners of both pieces of DSP. Stick them to the front cover of your set.
Punch out a Decorative Circle (or similar size die-cut) from the scrap of coordinating cardstock or DSP. Stick to the upper centre of the notebook set.
Punch an Everyday (retired) or Lasting Label shape or (or use a similar die-cut) from the Basic White piece. Die-cut your required initial from glitter card or shimmer paper and stick to the Basic White piece. Add this completed piece to the centre of the first punched shape using dimensionals.
You could use any suitable punches or dies – work with what you have.
I hope you like this project and find it a useful project to bookmark for future use!
Product List


