Another month flashes by! This month’s T4S blog hop theme is “Events”.

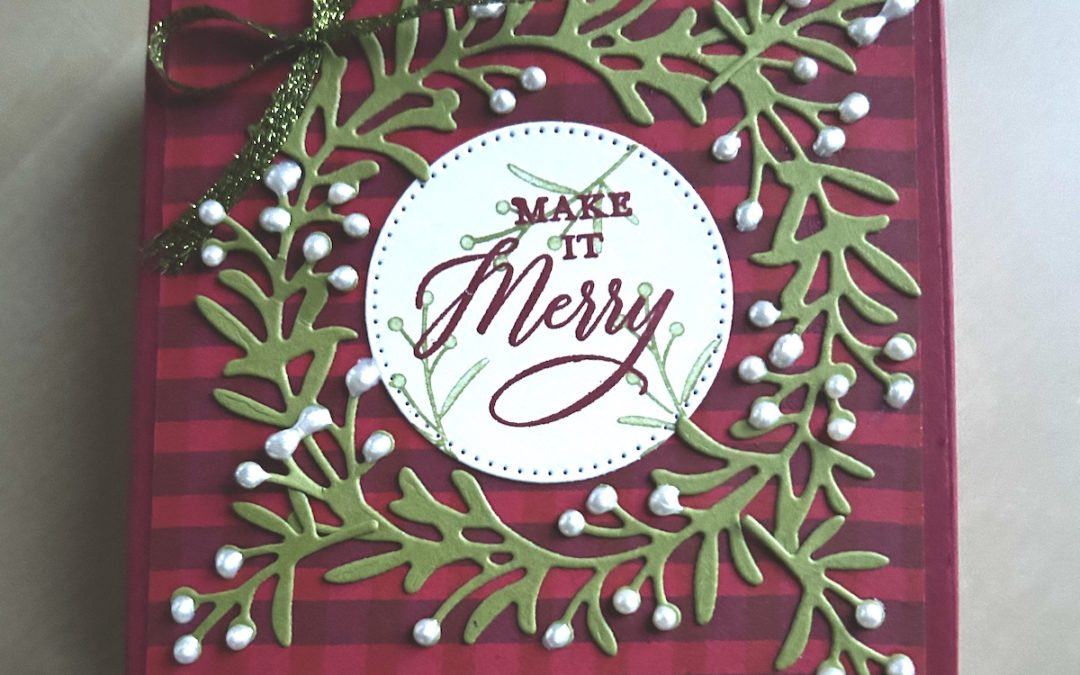
It’s the big event of the year for many of us very soon, so I made some small Wishes All Around boxes to fill with chocolates to give as gifts. I’ve made these boxes for Christmas, but you could make them for an event at any time of year using a different decoration.
We will be making these in our final December class next week. I run an in-person class every month and, from the New Year, I’ll also be live on YouTube and Facebook each week. I’ve also joined an exciting new venture with special gifts for my customers from January. Sign up to my emails so you get all the details.
The box is a simple square box made from one sheet of cardstock with some small pieces of DSP, a single sentiment and a die-cut circular shape for decoration from the Wishes All Around bundle.
Here’s the video to show how it is made. The measurements and instructions are also given below.
You will need:
- Cherry Cobbler cardstock 10 ½” x 7 ¾”
- Joy of Christmas DSP: 2 pieces 3 ½” x 3 ½”
- Joy of Christmas DSP: 4 strips 3 ½” x ¾”
- Scrap of Basic White approx. 2” square
Instructions
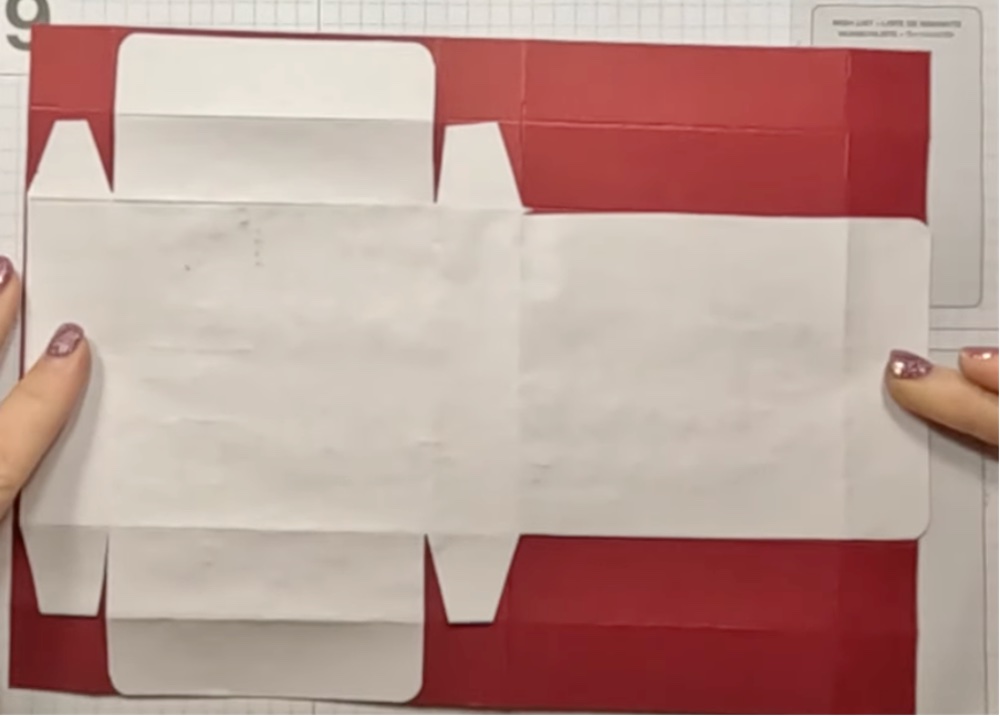
Score the cardstock on the LONG side st 1’, 4 ¾”, 5 ¾” and 9 ½”
Score on the SHORT side at 1”, 2”, 5 ¾” and 6 ¾”
Fold and burnish all score lines.
Cut as shown on the diagram below (and in the video)

Round the long-end lid outer corners and the two corners of each side box piece as shown above.
Make up the box base by sticking the shaped tabs inside the sides of the box. Make sure the corners are square.
Stick the two larger pieces of DSP to the outside and the inside of the lid of the box
Stick the four small pieces around the edges of the box.
Die cut the second smallest Stitched Shape circle from Basic White cardstock. Stamp this first using the sprig stamp from Wishes All Around stamped off in Old Olive as a background.
Add the Make it Merry sentiment in Cherry Cobbler. Stick the completed sentiment to the centre of the lid.
Die-cut the wreath plus three extra sprigs from the Wishes All Around dies using Old Olive cardstock. Stick the wreath around the sentiment on the top of the box and stick the three wreaths in each corner as shown.
Add a bow of thin co-ordinating ribbon to the top. (I used Parakeet Party metallic ribbon.)
I finished my box by adding white pearlised enamel dots to each berry on my wreath – just remember to give them plenty of time to dry properly!
Fill with sweets and watch the delight of your recipient with satisfaction.
Now please go and enjoy the wonderful projects of my colleagues by clicking the links below. I’ll see you next month for another fun project in the T4S blog hop.
Product List


