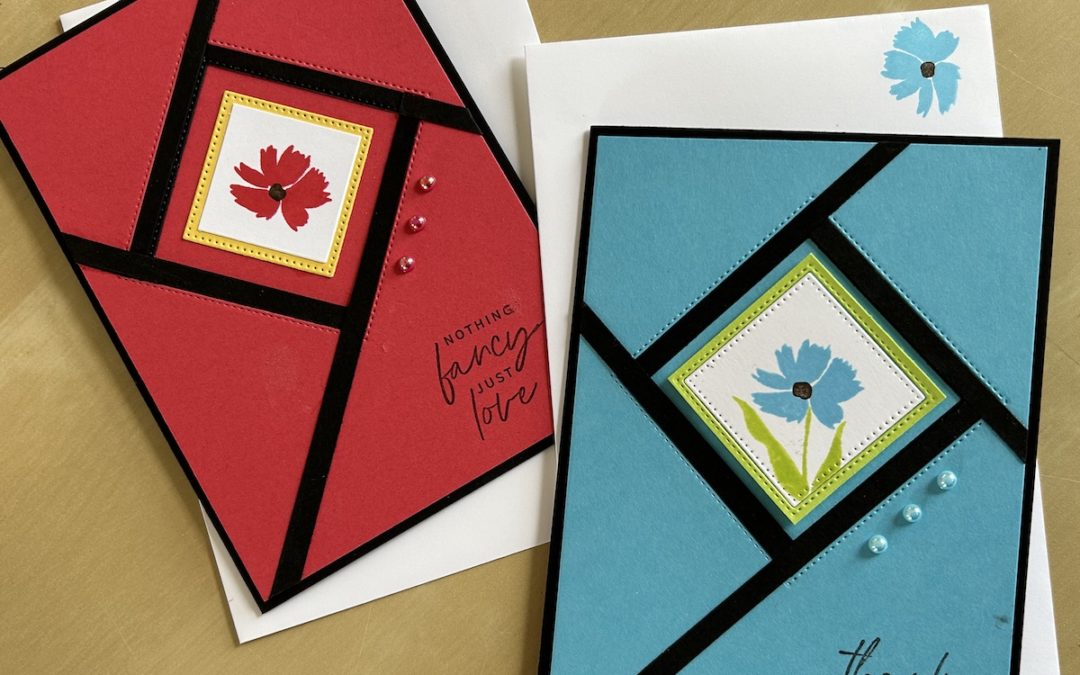
I came across this card on a German demonstrators site – thank you Wiffchens Bastelstube!
These stunning criss-cross cards are actually easy to make. They use thin strips of Basic Black card placed across a shaped aperture which is cut using dies. You need sets of nesting dies with at least three sizes.
In the video, I used square dies but you could use a triangle, hexagon, or other-sided shape (see below).
To make the square card shown you need:
- Basic Black cardstock base 21cm x 14.8cm scored and folded at 10.5cm
- Basic Black layer 10cm x 14.3cm
- Colour cardstock layer 10cm x 14.3cm
- Basic White inside layer 9.5cm x 13.8cm
- Coordinating colour cardstock piece 4.2cm x 4.2cm
- Several long 0.5cm wide Basic Black strips
- Scrap of Basic White approx 4cm square
- Stylish shapes square dies, second, third and fourth largest
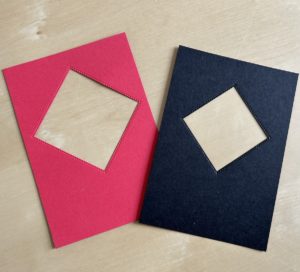
To make the front aperture, first cut out your largest die from the coloured cardstock piece. Keep the cut out piece.
Lay this cut-out piece over your black cardstock piece and tape the next size down die into the space making sure there is the same border all round. Cut this out.
 Then stick these two pieces together and stick the reserved coloured cut out piece behind your aperture. The video shows this in detail.
Cut several long basic Black strips 0.5cm wide.
Place a strip over one side of your aperture to cover the basic black layer and abutting to the coloured cardstock layer so that it lies to the edge of the card front piece. Again, see the video if you are unsure.
Repeat this process for all four sides of your square aperture to form the criss-cross card pattern. Trim off all the ends flush with the edge of your main card piece.
Stick the completed front piece to your base card.
Here’s the video of how to make the criss-cross card:
Make the centre image
When I made my first criss-cross card (the red one) I simply cut out a square with the next smallest die of the set, then cut a scrap of Basic White cardstock to put in the centre. But I didn’t really like it as I felt there was too much Sweet Sorbet showing around the centre image. So I adapted it for the second Tahitian Tide card so there was much less space and I think it looks better. Here’s how:
To make the centre image, use the remaining smallest die to cut out from your 4.2cm square cardstock in your chosen coordinating colour. The Stylish Shapes dies have stitching inside and outside the cut line. Do not remove the centre cut out, but use some tear and tape on the reverse side to make sure the centre sticks back into the piece. (Alternatively, you can use the 4.2cm piece on its own if you don’t want to bother with sticking the centre piece back!)
Cut out the smallest die again in Basic White and this time it is the centre cut out piece you want to keep. See the video if you are confused!
Stamp your chosen image onto this piece making sure to stamp in the right direction – if you look closely at my red card you’ll see I stamped it in the wrong place! I used the small flower head from the Sending Smiles stamp set with the minuscule flower centre dot stamp.
Add this completed piece to your prepared coordinating coloured square using dimensionals. Stick to your card.
Add a sentiment to the bottom right of the card and finish with a few gems.
Stamp a greeting and an image onto the Basic White inner and add this to your card. Don’t forget to decorate your envelope too.
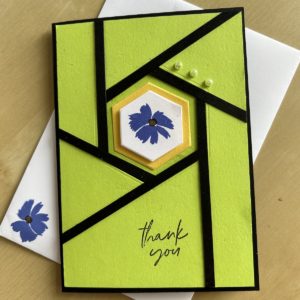
 You can also make a criss-cross card using other shapes. Here is the card I made live in our Craftalong yesterday using hexagon dies from the Beautiful Shapes die set.
There are more strips to add (six rather than four!) and it is worth cutting an angle on the hexagon end of each strip so the strips butt up against each other properly.
The hexagon dies do not have any stitching detail so I just used the two smallest dies to form the centre piece.
I hope you have a go at making one of these stunning criss-cross cards.
Product List
|
|
|
|
||
|
|
|
|
|


