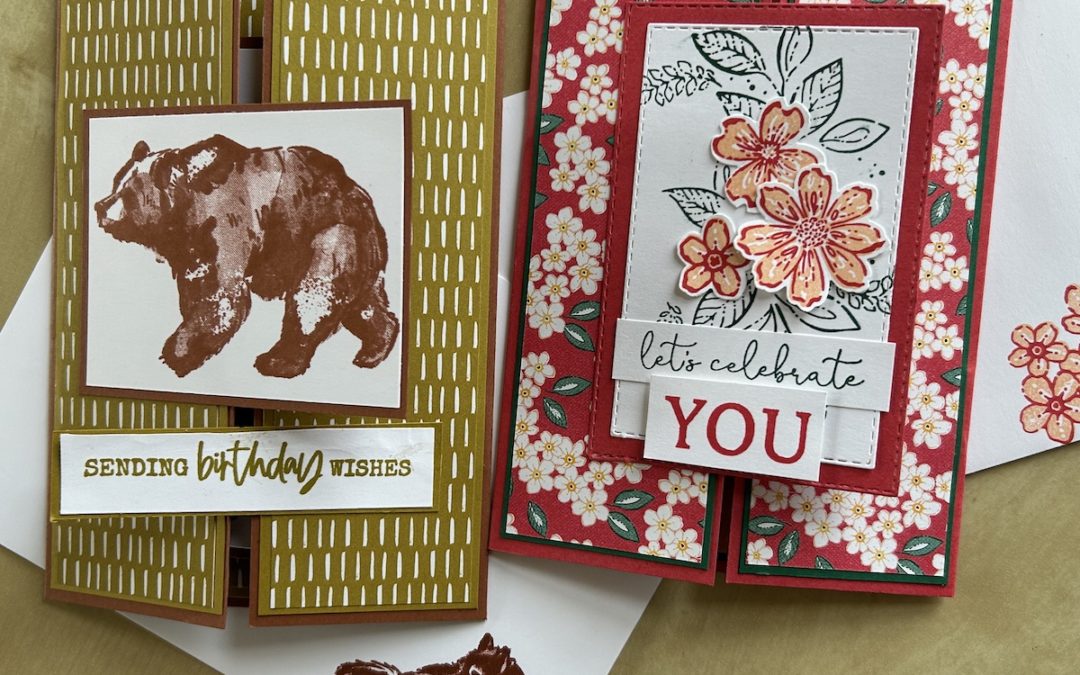
As you may have realised by now, I love a fun fold card! I first made this gatefold card several years ago so it was more than time I brought it out again. Thanks to the wonderful Jan Brown from whom I learnt this gatefold.
The first card I made used the Regency Park DSP and the two coordinating stamp sets, Sentimental Park and Petal Park with Sweet Sorbet cardstock as the base. You can see that card in the picture above. In the video, I made a male version of this floating panel gatefold card using the lovely Wildlife Wonder stamp set and the new 2023 – 2025 In Color cardstock and DSP.
To make the card you need:
- Colour 1 cardstock base 14.8cm x 21 cm (5 3/4″ x 8 1/4″)
- Colour 2 Front panels (x2): 4.8cm x 14.4cm (1 7/8″ x 5 5/8″)
- DSP (x2): 4.5cm x 14.1cm (1 3/4″ x 5 1/2″)
- Colour 2 inside panel: 10cm x 14.3cm (4″ x 5 5/8″”)
- DSP or Basic White inside panel: 9.5cm x13.8cm (3 7/8″ x 5 1/2″)
- Colour 1 cardstock for the front decoration – you can cut a stitched shape or a rectangle depending on the decoration you want to use and the size you want
- Basic White front decoration panel cut approx 0.5cm (1/8″) smaller for stamping
- Colour 1 cardstock for the inside floating panels (x2) either die-cut or cut to the size you want. The maximum width for an inside panel is 8cm or 3″.
- Basic White floating panels (x2) 0.5cm (1/8″) smaller than your colour 1 floating panels for stamping
- Two mechanism strips of Colour 1 card 1.5-2cm (3/4″-1″) wide x approx 12cm (4 1/2″) long
- Scraps of colour and Basic White cardstock for sentiments
Here is the video of how to put all this together. Instructions are also given below.
Score the cardstock base on the long edge at 5.25cm (2 1/16″) on both sides. Fold the side panels in to make sure they meet properly at the centre and bone fold.
Stick the DSP pieces to the front and centre panels and stick to the card
Stick the front decoration colour panel to the right-hand gatefold only – see the video if you are unsure about this.
Stamp and decorate the Basic White front panel and adhere to the card.
Stamp your desired sentiment on a scrap of Basic White. Add your sentiment piece on top or as a separate piece as desired. See the pictures for two different options.
You can also stamp sentiments for the inside if you wish, or simply use a Basic White panel inside instead of DSP which you can then write on.
Stamp your two inside Basic White floating panels as you wish and stick to your colour panels. Lay these completed panels aside.
Score your floating panel mechanism strips at 1′, 2′, 3′ and 4″. Fold inwards and use the remaining end tab to stick together to form a square on both pieces.
Add glue to two of the sides of the square and stick the mechanism to your card to the rear and side panels. One mechanism goes towards the top of the card on the left and the other towards the bottom on the right.
Stick your completed panels onto the top piece of your mechanism squares, making sure they sit slightly out from the fold as shown in the video.
Don’t forget to stamp your envelope!
Product List
|
|
|
|||
|
|
|


