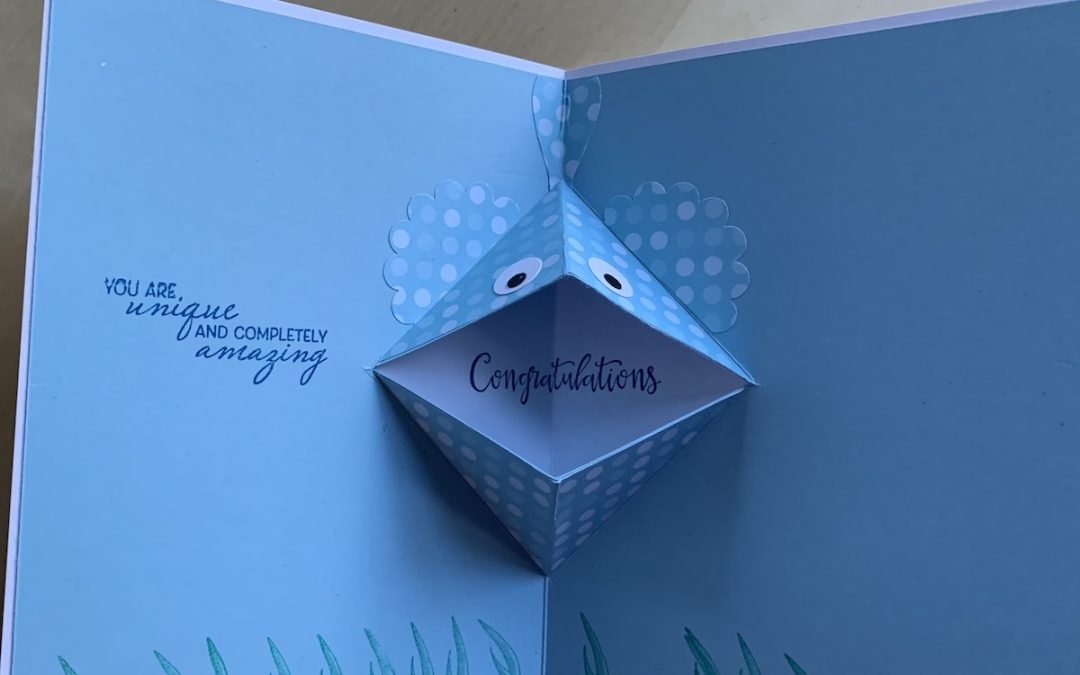
Pop-up cards are true wow cards for the recipient and they are easy to make. Below is a video and full instructions to make a simple fish pop-up card which can easily be adapted to any other animal you want to make.
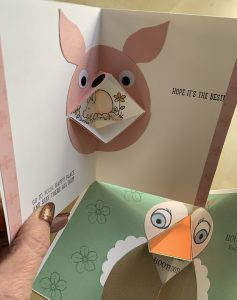
I decorated the front of the card with some punch art fish using the gorgeous In Color glimmer paper – watch the video to see how I made them. There is a fish builder punch but I don’t have it (see the products used at the bottom of the page). I also made two other pop-up cards, of a pig and an owl, which you can see in the video and in the picture above this post. The inners of these cards are shown in the video and at the bottom of the post.
The video below has the full instructions, which are also written out below. I apologise in advance for getting my inches and centimetres mixed up!
To make a simple pop-up card you need:
- Card base 21cm x 14.8cm scored on long side at 10.5cm
- Inner card piece in your chosen colour 20cm x 14.3cm, scored on long side at 10cm
- Scraps of appropriate paper/DSP to decorate
- A paper trimmer
- Panel for front of the card 14.3cm x 10cm
- Stamps and/or decorations for the front panel
To make the pop-up mechanism, mark your card fold where you want the centre of your animal’s “mouth” to open. For most animals, a total cut of 3″ (1 1/2″ each side) will make a good-sized mouth.
Place the folded card in your trimmer and cut a 1 1/2″ line horizontally from the centre fold. if you don’t want to use a trimmer, measure 1 1/2″ across from your centre fold mark, mark there and cut a slit using your scissors.
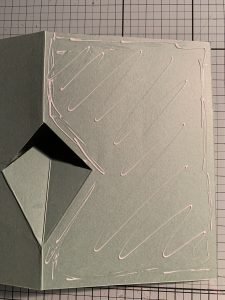
Then measure 1 1/2′ vertically above and also underneath your slit on the centre fold. Use your trimmer to score from those marks out to the ends of your slit. This creates two triangles.
Gently work these scorelines to fold your two triangles inwards – watch the video if you are unsure. Crease well, This creates your “open mouth” pop-up.
Cut pieces of DSP as required. For the mouth, cut a 2 1/8″ square then cut it across the diagonal to form the two pieces to stick to the top and bottom of your mouth, Add a tail, fins or whatever other appendages you need to form your animal. Stick these on flat using liquid glue.
 If you want to add an image or sentiment inside the “mouth”, mark the centre of the “mouth” by placing your inner card inside the base card to mark where to stamp.
Stamp and colour your chosen sentiment or image on your base card. Add any stamped sentiments to your inner card.
Finally, stick in your finished pop-up inner. Be careful only to put glue on the outer sides of your card as shown, not on the mouth mechanism.
Place the folded inner into the base card then close the card over it to stick down firmly.
Decorate the front of your card as you wish. I made punch art fishes for my card using some retired punches – use your imagination! For the owl and the pig cards, I used current sets from the catalogues. NOTE: do not add layers to the front of your card if you want to post it as the pop-up mechanism is already quite deep.
 Finally, here are the insides of the pig and owl cards I made – the front of these are shown in the featured image above.
I made the snout and beak slightly different shapes in these cards. The pig was made in a diamond shape and the owl beak as a pointing down diamond shape.
Play with the idea and see what you come up with. Please get in touch if you’d like to make these but need any help.
Why not have a go? I’d love to see what you make.
Product List
|
|
||||
|
|
|
|
|


