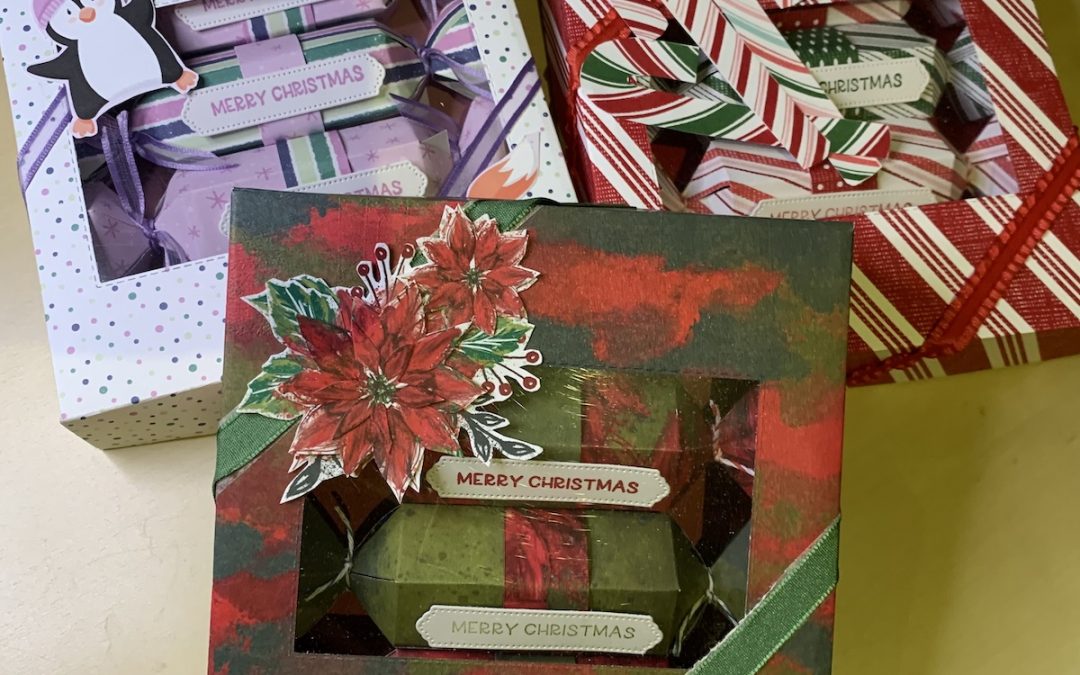
I’m very excited – Christmas is coming very soon! So for the last week of my Christmas Countdown, I’m showing you how to use the lovely Cracker Treat box dies to make a set of crackers AND a box to hold them.
The lovely Cracker & Treat Box dies mean making crackers is as easy as pie. I’ve used two different pieces of DSP to make two each of four crackers. You also need some ribbon or twine to tie the ends.
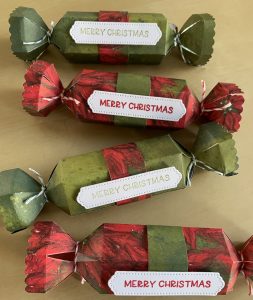 You could make the crackers all the same or use four different pieces of DSP – your choice. The DSP needs to be 6″ x 5 1/4″ (16cm x 13.5cm).
The strips left from 6×6″ paper can be used to form the band around the crackers if you want one or simply leave them plain as I have done in the birthday cracker set I made – the picture of those is at the bottom of this post. Again, it’s your choice.
You can fit a hat, motto and sweet(s) or chocolate(s) inside these crackers. I’ve made mine for my Christmas dinner table.
Use some scrap Basic White to stamp your sentiment – I used the Merry Christmas sentiment from the Framed & Festive stamp set and cut it out using the stitched die from the Cracker & Treat sentiment dies.
Watch the video to find out how to put the crackers together.
You can simply make any crackers you want and stop there, but I wanted to go one step further and make a box for them. I got the idea from a lovely US demonstrator, Tami White.
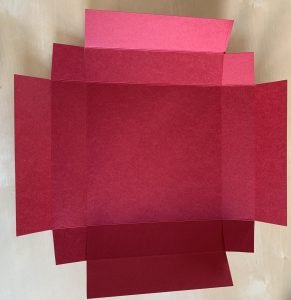 To make the box base you need a 12 x12″ piece of coordinating cardstock cut to 10 3/8″ square (26.5cm). The box lid is made from a 12×12″ sheet of coordinating DSP cut to 10 1/2″ square (27cm). Both box base and box lid are scored at 1 1/4″ and 2 1/2″ on all four sides (3.3cm and 6.6cm).
Cut out the redundant corner pieces and form tabs as shown in the picture and in video 2 below. Shave the edges of the tabs slightly to enable a good fit at each corner.
Fix the box base together using Stampin Seal (or fast fuse if you still have some as I used in the video). This gives a quick firm seal, but you can use liquid glue if you prefer.
My tip for getting a 90 degree corner is to hold the glued tab away as you hold the corner together and make sure it is square, then push the tab back against the box side to hold it firmly. Once all corners have been made, the sides of the box can be folded over and stuck down – see the video for details.
To add a window into the box lid I used the fourth largest stitched rectangle die, placed in the centre of the lid. Do this after you have scored, folded and cut the lid. It will all fit into the Cut & Emboss machine if after you have placed the die, you fold over the side pieces of the box lid – see the video for how to do this.
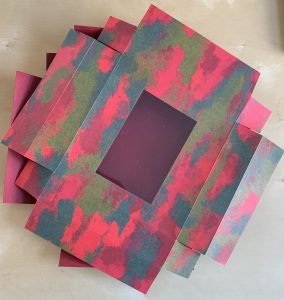 Cut a piece of acetate (window sheet) slightly larger than your rectangle die.
Place tear ‘n’ tape pieces around the opening on the underside of the lid. The video shows how to make sure the acetate piece lies flat.
Then glue the lid together in the same way as making up the box base.
I used fussy cut images from the DSP to decorate my boxes and added ribbon across two opposite corners as shown in the video.
I’m looking forward to seeing my family’s reaction to these crackers on Christmas Day!
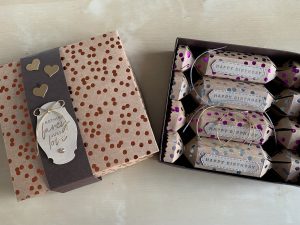 Of course, crackers need not be only for Christmas. This is a birthday set for a friend who has a birthday just after Christmas using some old foil DSP. I didn’t put a belly band around the crackers, and I didn’t put a window in the box lid. Instead, I added a belly band around the box itself.
This is my last blog before Christmas so it just remains for me to wish you a joyous and peaceful Christmas and I’ll be back in the New Year.
Happy Christmas
Carol x
Product List
|
|
|
|
||
|
|

 Designer Series Paper")
")


 Mini Ruffled Ribbon")


