For the penultimate week of my Christmas Countdown, week 11, I show you how to make a Christmas Tree box to use either as a tree decoration or you can use it as a table favour. Thanks to the lovely Kerstin Wolff, a German demonstrator, for the basic box idea. The box fits a few small chocolates or a small gift, depending on the shape!
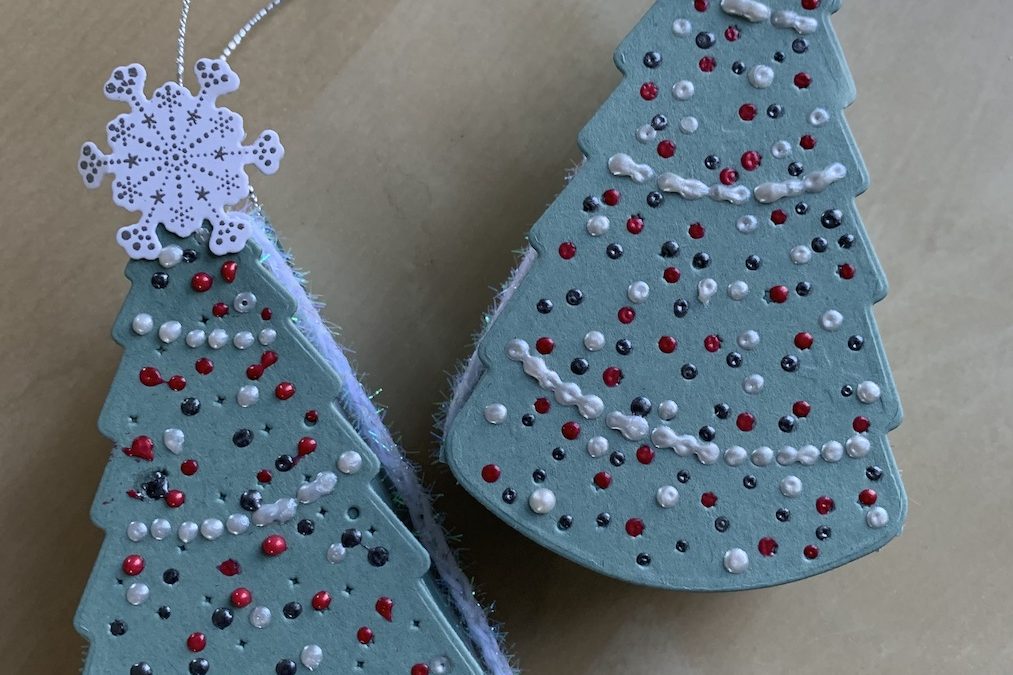
The box itself is a simple triangular box and you can of course decorate it in whatever way you want. For this project, I have used a Christmas tree as a decoration on the box front. You could use a snowflake or any other decoration of your choice and you may want to decorate the back too.
I’ve used the gorgeous Twinkling Lights Dies, currently on sale at 60% off in the Last Chance December 2022 sale. They are £10.80 instead of £27, but they may well sell out quickly – follow the link in the shop to buy them and check out the other bargains too. Or send me your shopping list.
This video shows how to make the box. Further instructions are below.
To make the box you need the following pieces of cardstock. I used Soft Succulent:
- Box piece: 5cm x 23.5cm
- Top and bottom pieces: 6cm x 8cm (two pieces)
- Scrap piece cardstock approx 7cm x 10cm to cut the tree die
- Twine for hanging if using as a tree decoration
To form the box edges, score on the short side of the box piece at 1cm and 4 cm (or 1cm each side). Score the long side at 8cm, 16cm and 21.5cm.
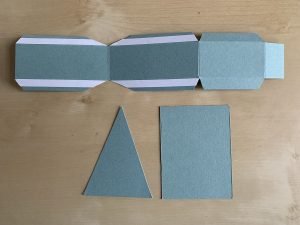 Fold and burnish all score lines then cut notches as shown in the picture and demonstrated in the video.
The notch between the two longer sections (tree apex) needs to be long and shallow. Fit the box together after cutting to adjust or trim if necessary.
Place tape as shown, making sure it goes right to the tip of the shallow tabs. Trim as necessary,
Punch a small hole at the apex of the box for your hanging twine if you want to use the box as a tree decoration. You can knot this through at this stage or once the box is made up.
Omit this stage if using the box as table favours.
The smaller top and bottom pieces are cut into triangles by marking one short side at 3cm then cutting from that mark to each bottom corner, See the video for details on how to do this easily.
Add one triangle to the back of the box using the tape previously put in place, being careful to line it up on each side. Add the second triangle in the same way to the front, ensuring the box tab is closed as you stick the second side down – see the video for details.
Punch a small semicircle in the box flap for ease of opening.
Add your die cut Christmas tree to the top of the box and decorate using the pearlised enamel effects or gems. I also added a silver embossed star (from the matching Christmas Lights stamp set) to the top of the tree as well.
I hope you have a go at this gorgeous little Christmas Tree box – let me know how you get on.
Product List
|
|
|
|
|
|
|
|
|
|


