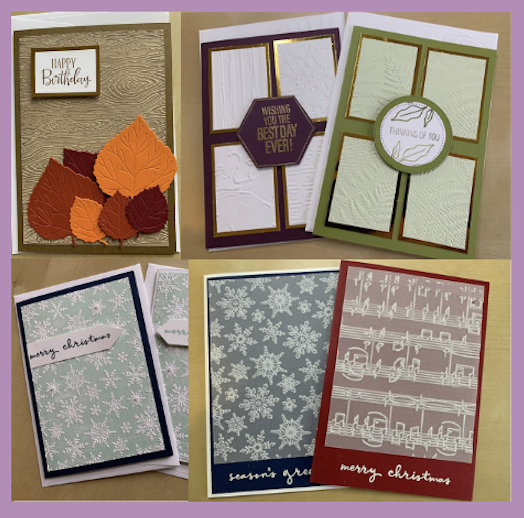
I love making the most of my crafting supplies. In this post and video, I talk about five different ways you can use your embossing folders to make some very different cards, one of which is a quick and easy Christmas card using vellum.
So without further ado….
All the cards use the usual card base of 21cm x 14.8cm scored at 10.5cm.
Front panels are 9.5cm x 13.8cm unless stated otherwise
Idea 1: Colour your embossed image
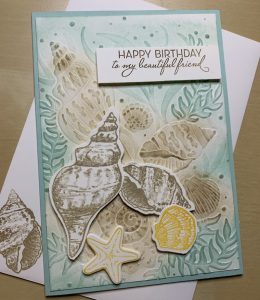
In the video below I showed a baby card in So Saffron. I used the hive embossing folder for the front panel and sponged it with So Saffron ink – see the video for more details. During our Craftalong I used the same technique to make the seashell card shown here.
Emboss your front panel with your chosen embossing folder. For the seashell card, I used Pool Party ink for the fronds and Crumb Cake ink for the shells. Using a stampin sponge, gently add ink to your embossed image or pattern. Always dab off any excess ink before using the sponge on your card.
I stamped some shells and the starfish on Basic White then cut out using the die. I also stamped the sentiment. I added them to the card with dimensionals.
Idea 2: Make a panel card
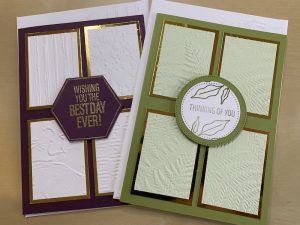 These cards are useful as multipurpose cards, including for those difficult men!
Create your coloured card base. The gold foil layers are 4.5cm x 6.3cm and the basic white panels are 4cm x 5.8cm.
For the Blackberry Bliss card I showcased four different embossing folders, for the old Olive card I used the Fern embossing folder for all four panels.
The centre sentiment can either be embossed or simply stamped. I used the lovely Splendid Thoughts set, which can be die cut using the Beautiful Shapes dies. Add a layer if you want, then added it to the centre of the card using dimensionals.
Idea 3: Embossed vellum
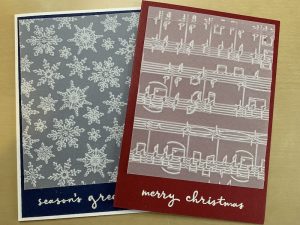 I used a favourite retired snowflakes embossing folder and the Merry Melody embossing folder to emboss pieces of vellum which are 10cm x12cm.
This allows for a sentiment (from the Christmas to Remember set) to be added to the bottom of the coloured card base. For these cards, I embossed the sentiment in white.
Use glue dots behind embossed bits of image to stick to your card base – liquid glue or tape shows through.
This idea is incredibly versatile as you can use different embossing folders and different base card colours to produce many different cards.
Idea 4: Ink your embossing folders
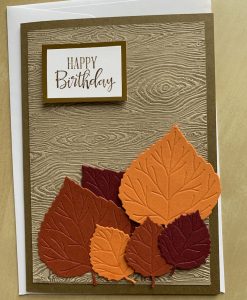 This is the technique I shared in the Christmas Countdown week 4 post a few days ago – there is a detailed video there. In the video below, I brayered Soft Suede ink onto the Timber embossing folder.
The leaves are die-cut using the Aspen dies and scraps of autumn-coloured cardstock. The sentiment is from the Pansy Patch stamps set.
I find it best to ink the debossed side of the folder (usually the top side) but you can play with this technique – try different inks and try inking the raised side to get different effects.
Both the brayer and the embossing folder can be cleaned easily in warm soapy water. Dry thoroughly.
Idea 5: Emboss your envelopes
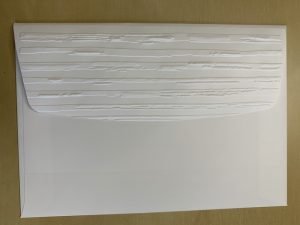 Did you know you can use an embossing folder to jazz up your envelopes?
Slide the envelope flap into the embossing folder, fold the envelope underneath and run through your machine – in this example I used the stripes from the stripes and splatters set.
You could also emboss the whole envelope if you wanted.
I hope you try some of these ideas. Watch the video below to see them all in action!
Let me know what you think about my ideas. Are you going to try them? What ideas do you have?
Product List
|
|
|
|||
|
|
|
|
|
|
|
|
|
|
||
|
|
|

