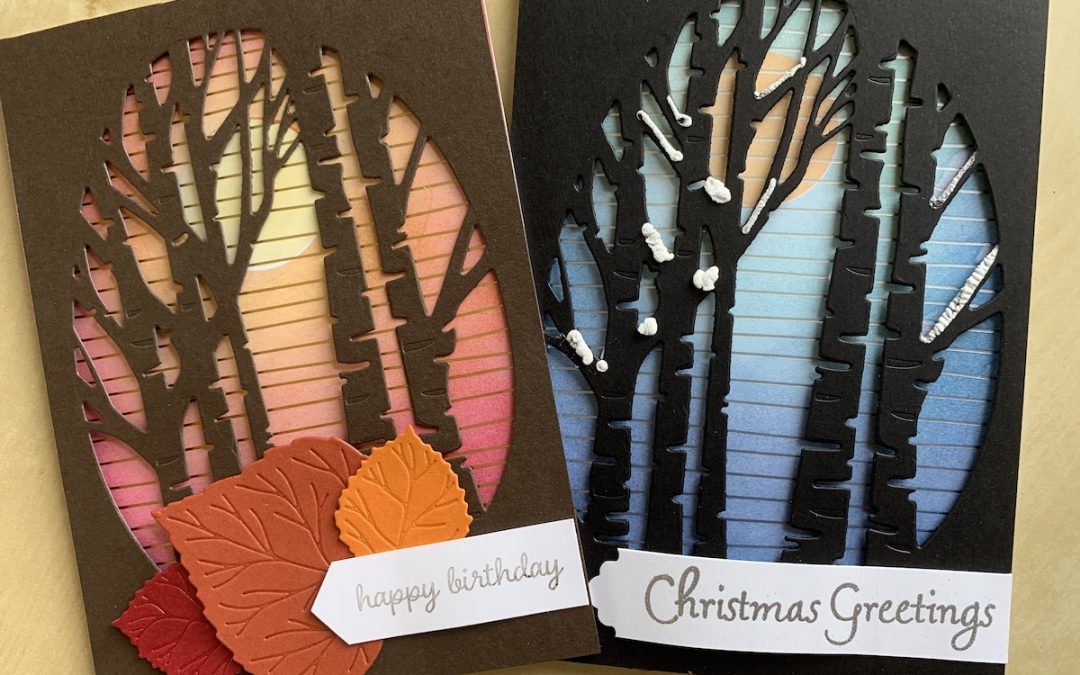
These are truly wow cards but are far easier than they look!
First, a confession: Blending scared me and I resisted doing it initially. But like any skill, with a bit of practice, it becomes easier. Go on, have a go!
The key to using blending brushes is to add colour gradually and always dab off before adding any colour to your card. Don’t press hard, let the brush do the work of adding colour layer after colour layer. Be patient!
What you’ll need:
Basic White base cardstock: 21cm x 14.8cm scored at 10.5cm
Gold / Silver striped DSP (from Saleabration – or use Basic White shimmer cardstock) cut to 14.8cm x 10.5cm
Early Espresso / Basic Black cardstock 14.8cm x 10.5cm
Scraps of Mango Melody, Cajun Craze and Cherry Cobbler cardstock for the leaves
Scrap of Basic White cardstock for the sentiment
Selection of ink pads:
Autumn card: Daffodil Delight, Pumpkin Pie, Cajun Craze, Cherry Cobbler
Christmas card: Pale Papaya, Balmy Blue, Pacific Point, Night of Navy
Blending brushes (come as a set of three)
Small 1 1/4″circular die or punch plus a piece of scrap printer paper or card.
Instructions
The best way to find out what to do is to watch the video below. I’ve also written out brief instructions below – there’ll be a more detailed pdf available from the shop very soon.
INSTRUCTIONS
Die cut the oval Aspen tree in the centre of the coloured cardstock.
Cut a circle in the centre of a piece of scrap paper or card approx 1 1/4″ diameter. (Keep the cut out circle.) Place your circle stencil over your Gold or Silver DSP and use your diecut stencil to decide where you want your sun/moon to be. Tape down with low tack tape.
Rub a blending brush over the Daffodil Delight/Pale Papaya ink pad to pick up colour. Dab off onto scrap paper then rub over your cutout circle, using a circular motion.
Remove your circle stencil. Add some removable adhesive to the cut out circle and stick over your inked sun/moon to protect it while you add the other colours.
Using the lightest colour first, use the blending brush as before to add colour in an oval shape around your circle. Repeat with the middle colour, blending as you go. Finally, add your darkest colour around the outside of your card.
Remove your circle protector! Make up your card as shown in the video and the picture. I used the new Snowfall puff paint to make the snow on the branches of the Christmas card.
Full instructions can be found in the pdf available from my shop.
Please let me know in the comments if you enjoyed this video and do get in touch if there is a card or technique you’d like me to cover in a future video. Finally, please join me at my live online Craftalongs or at my in-person Craft ‘n’ Chat classes if you live locally – details on the blog homepage.
Product List
|
|
|
|
|
|
|
|
|
|||
|
|
|
|
|


Fabulous Craft & Chat class last Thursday making these cards. Wasn’t sure about this Aspen Tree Die but quickly learned how versatile it actually is. Brilliant.
So glad you all enjoyed it – great to see such smiling faces!