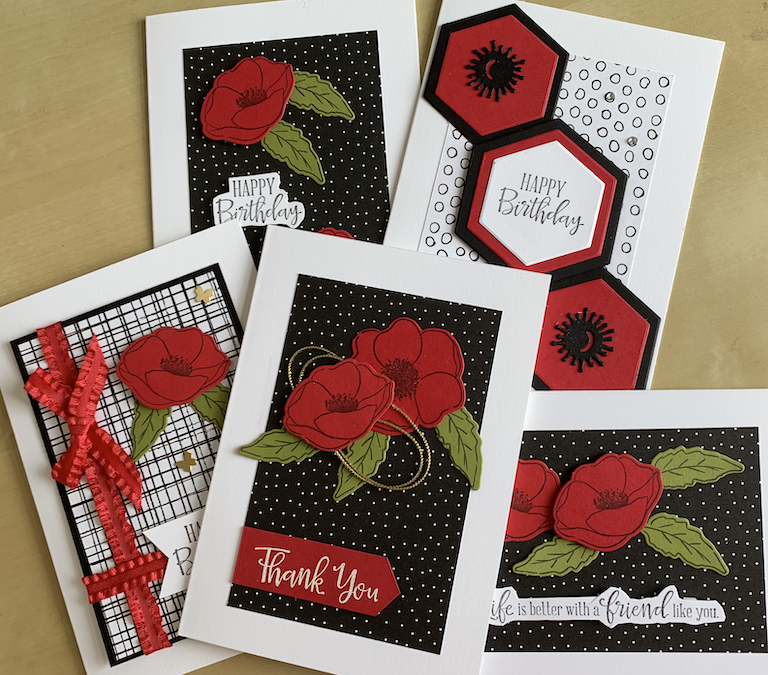
Here are the instructions for seven simple suggestions to sex up your sentiments. I find I can get into a rut and do the same thing with my sentiments most times. So I thought it would be useful to show you these seven simple suggestions for sexing up your sentiments.
There are two videos available elsewhere in this Craftalong blog and on my YouTube channel to show you these seven suggestions if you prefer to learn visually. But for those who prefer to read things, here are the written instructions.
None of these ideas are difficult or complicated but I hope you find they provide some simple and quick ideas for making your sentiments sing.
For these cards I used the same basic design – black and white DSP on a Basic White card base decorated with poppies from the Painted Poppies stamp set and Painted Label dies. All the sentiments are from the Peaceful Moments stamp set which has a brilliant range of useful everyday sentients. I’ve done this to show how simply changing the sentiment produces very different effects, All the products used can be found at the bottom of this post.
Don’t forget to decorate the insides of the cards and decorate your envelopes!,
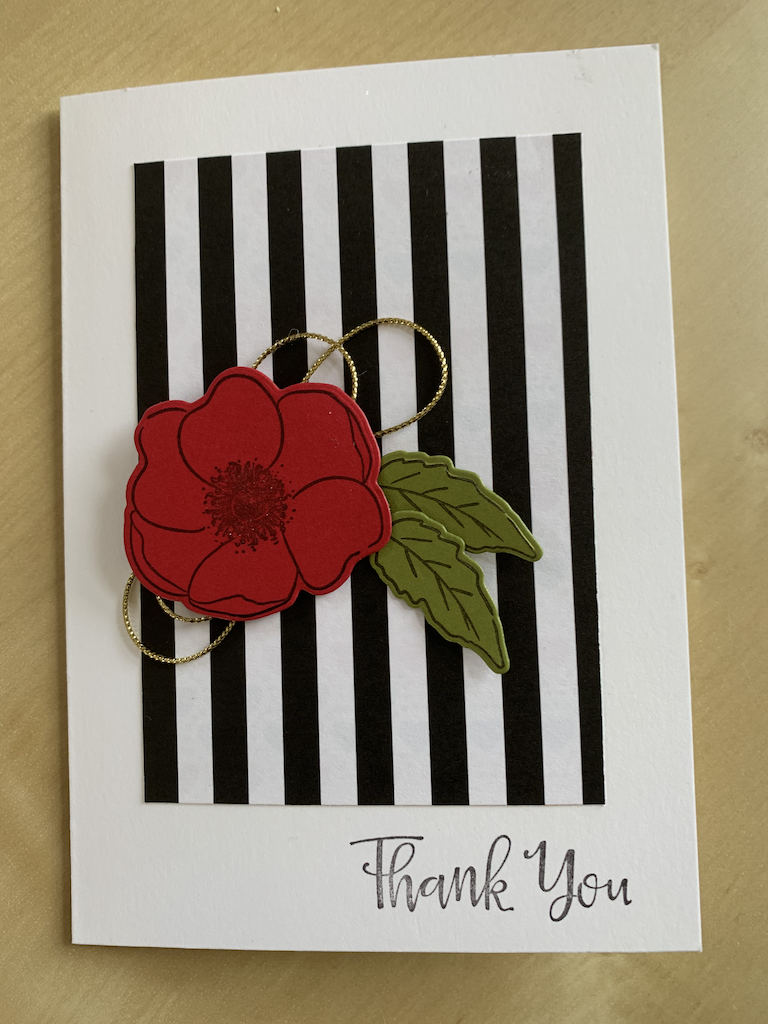
Base card:
The most basic type of sentiment is when it is stamped directly onto the base card.
On this card I’ve used a rectangle of DSP which is 7.5cm wide by 11cm tall. This allowed room underneath for the sentiment. (For all the other cards, the DSP measures 7.5cm wide by 11.8cm tall.)
I stamped and die cut loads of poppies and loads of leaves and used the gold cord from the Simply Elegant trim to add some bling.
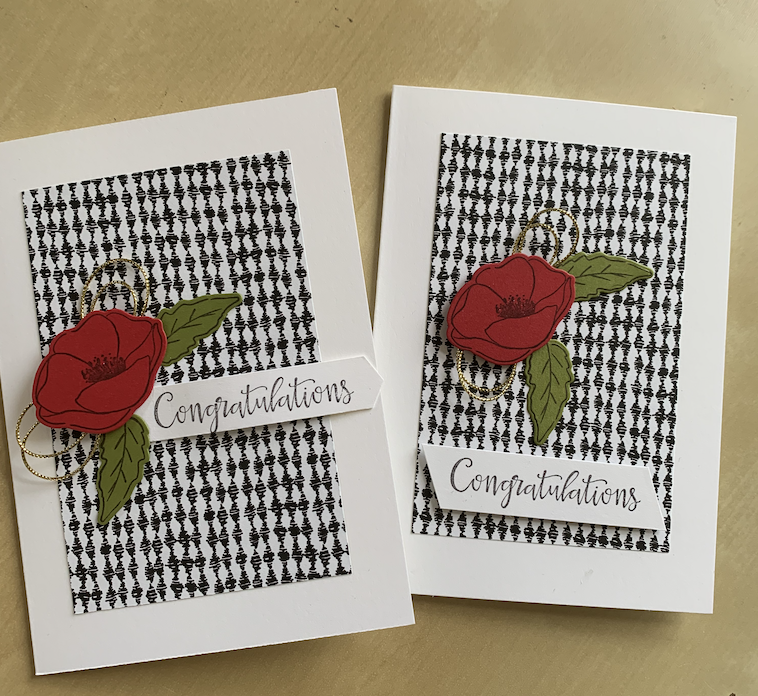
Simple Sentiment 1:
I probably use this type of sentiment more than any other.
Stamp your chosen sentiment onto Basic White card. Then either add a chevron end or cut slanted ends using the lines on your trimmer to make sure they are parallel – see video 1 for how to do this.
Raising the sentiment on dimensionals adds a little more to your card.
Simple Sentiment 2:
I use this type of sentiment second most often.
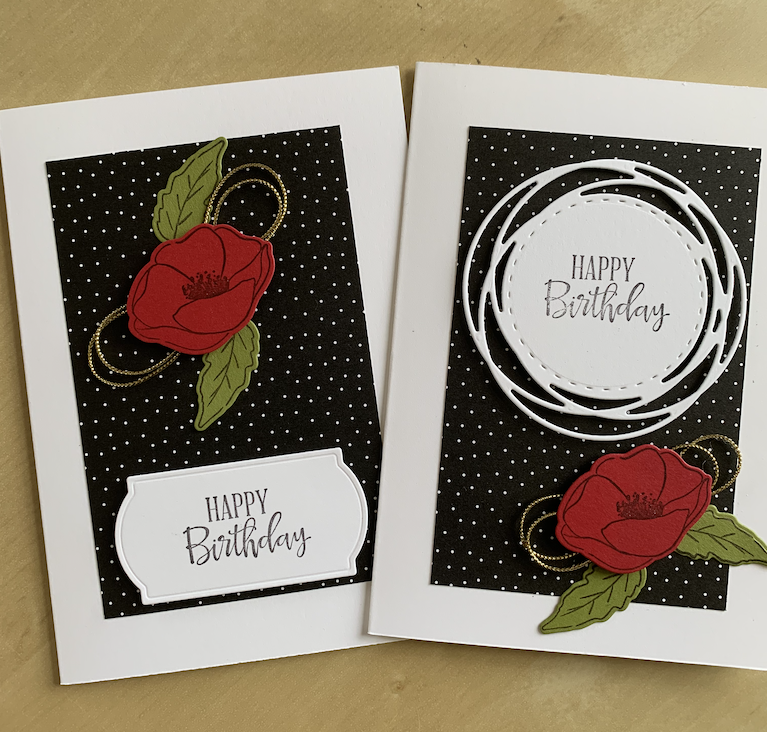
Stamp your chosen sentiment onto Basic White card. Then die cut using a frame die – Stampin’ Up! have many to choose from! These are from the Painted Label die set. Quick tip: when using quite large frames like this, you are best to use a plainish background then they stand out more.
Raising the sentiment on dimensionals again adds a little more to your card.
Simple Sentiment 3:
Another quick and simple way to make your sentiment stand out is to add layers.
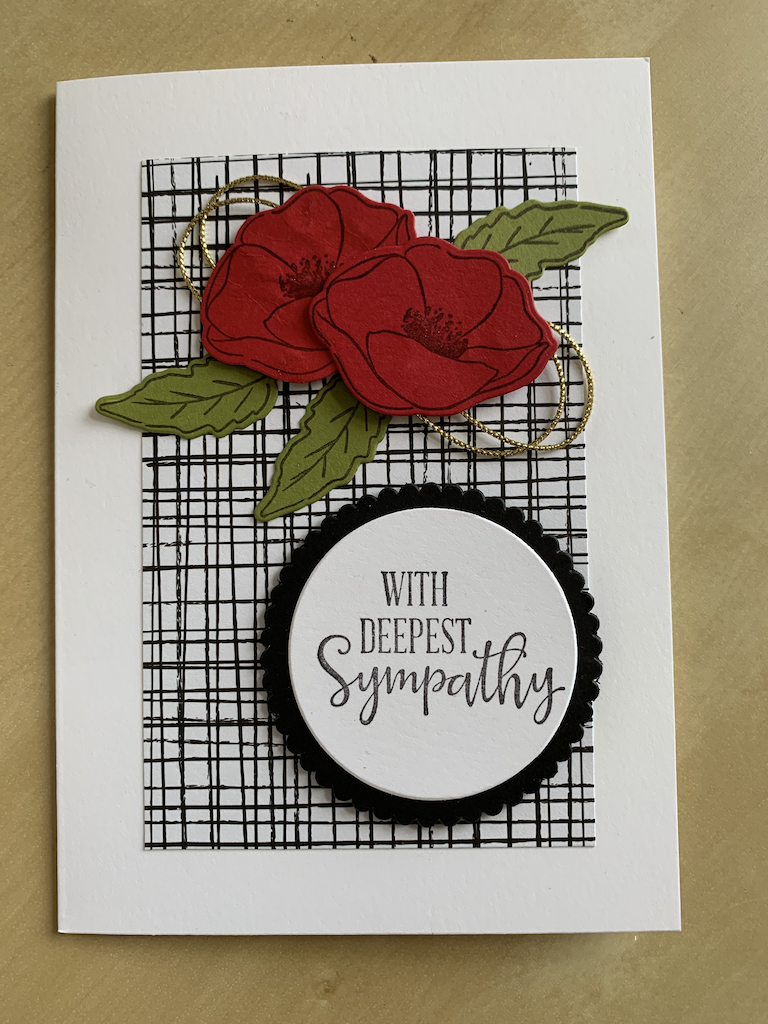
Here I’ve used an outer scalloped circle cut from Basic Black and a Basic White inner circle on which I stamped the sentiment. Both these dies are from the Layering Circles die set.
You can use any shape you like for this – circles, squares, rectangles, hexagons – whatever fits your sentiment best. Stam,pin Up! has a wide range of nesting and layered dies to choose from.
Raising this layered sentiment on dimensionals again adds a little more to your card.
Simple Sentiment 4:
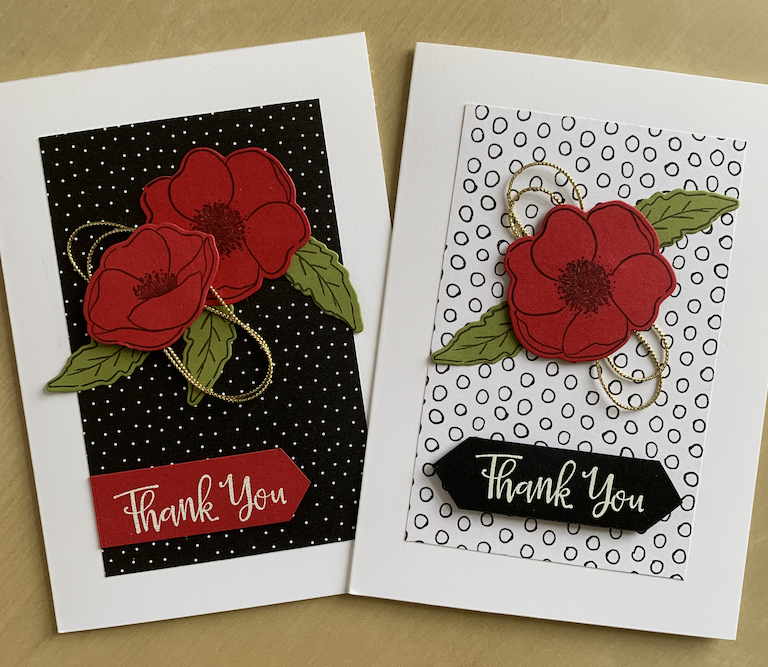
A WOW way to make your sentiment stand out is to use embossing on a coloured card strip.
Here I’ve embossed my sentiment in white embossing powder on red card and on black card, then shaped the ends. Stampin’ Up! have a wonderful range of embossing powders. But please remember to use your embossing buddy on your card before stamping your sentiments in Versamark, otherwise you’ll get splotches of embossing powder where you don’t want them…ask me how I know!!
Raise this sentiment on dimensionals to add a little more to your card.
Simple Sentiment 5:
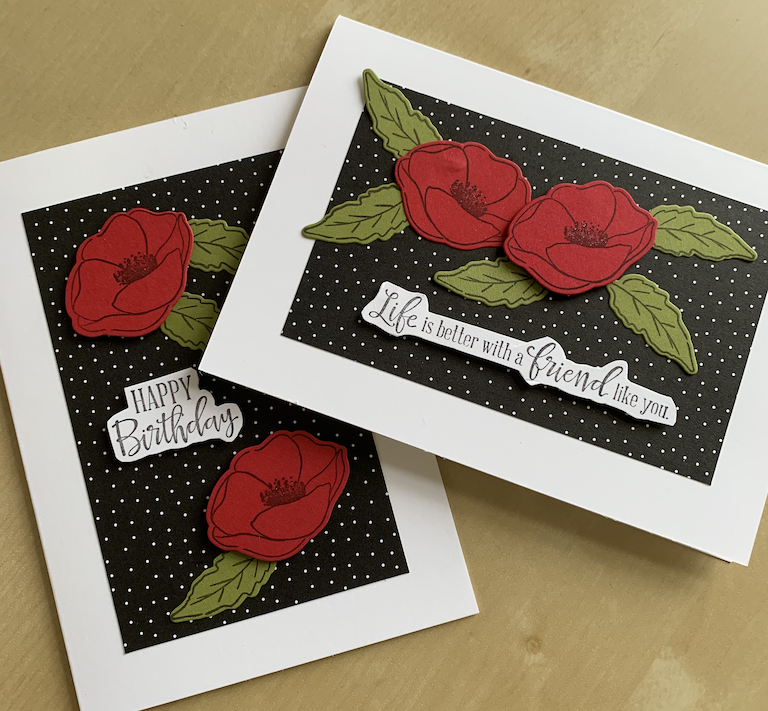
A different way to make your sentiment stand out (and to use up bits of scrap card!) is to carefully cut around your sentiment.
This works best on sentiments that have varying fonts used together like these from the Peaceful Moments stamp set. This method will not work well with sentiments that are all the same font and same size.
Again, raise the sentiment on dimensionals to add a little more to your card.
Simple Sentiment 6:
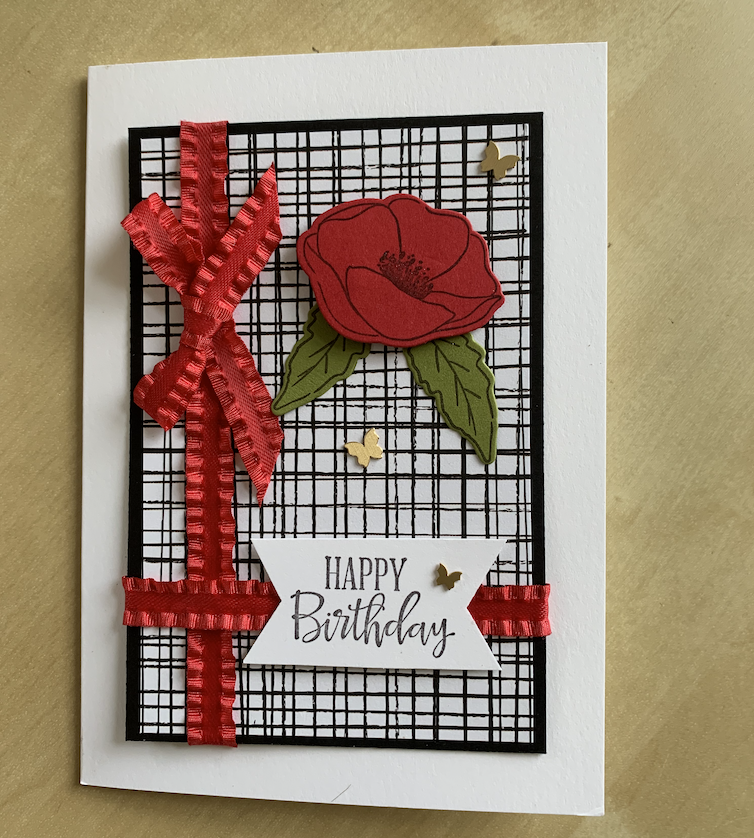
Adding embellishments such as ribbon behind your sentiment can really help it to stand out.
On this card I’ve used Real Red mini rucked ribbon behind the sentiment and made a feature of it by adding an upright length and adding the bow too.
I’ve also added some brushed brass butterflies. Stampin Up! have a wonderful range of embellishments, ribbons and trims.
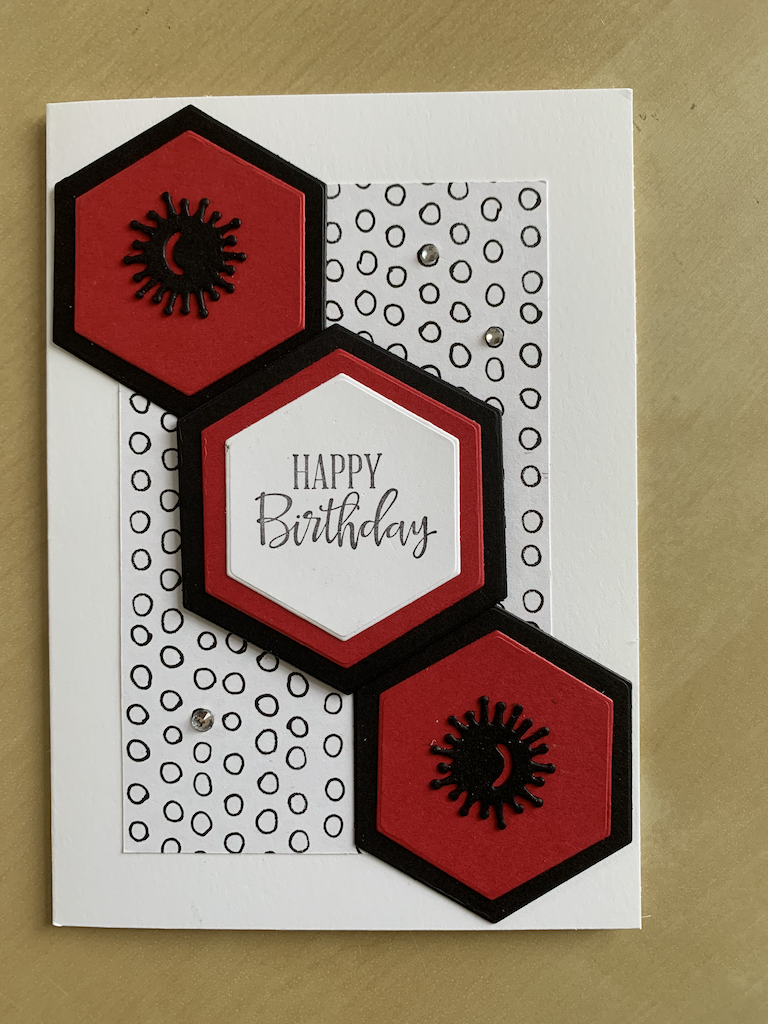
Simple Sentiment 7:
My final suggestion is to make the sentiment the focal point of your card.
I’ve used the Real Red and Basic Black colour scheme again but this time I’ve cut hexagons from the Beautiful Shapes die set and formed them into the pattern as shown.
For the centre hexagon layers I used the bigger size as the outer one and added an extra layer. The black centres are from the Poppy Moments die set to continue my poppy theme.
I hope you find some inspiration from my ideas. You probably have some ideas of your own too. Please do share your makes with me – I’d love to see them.
Product List
|
|
|
|
|
|
|
|
|
|
|
|
|
|
|
|
|
|
|
|
|
|
||
|
|

